


· By FryAway
A Guide to Non Toxic Kitchen Cleaners for a Healthier Home
So, what exactly are non-toxic kitchen cleaners? At their core, they're cleaning products made from ingredients that are safe for both people and the planet. Instead of relying on harsh, synthetic chemicals, they get their power from plant-derived and mineral-based compounds that clean effectively without leaving harmful residues behind. This shift toward safer products is quickly becoming the new normal in health-conscious homes.
Why Non-Toxic Kitchen Cleaners Are the New Standard
Ever stop to think about what’s left on your kitchen counters after you wipe them down? Conventional cleaners often leave behind an invisible “chemical footprint”—a thin film of synthetic compounds right where you prepare your food. Over time, this residue can build up, creating a constant, low-level chemical exposure for your family.
Think of harsh chemicals as loud, disruptive house guests. They storm in, do a job, but then they hang around long after the work is done. This lingering presence is often linked to skin irritation, respiratory issues, and other sensitivities, which can turn your home from a safe haven into a source of potential harm. Non-toxic cleaners, on the other hand, are like polite visitors. They show up, do their job, and leave without a trace, ensuring your kitchen is truly, deeply clean.
The Unseen Impact on Your Home
This move toward safer products isn't just a passing trend—it's a real shift in how we think about our living spaces. The market backs this up, too. The global natural household cleaners market was valued at USD 6.97 billion and is expected to climb to USD 13.28 billion by 2030. This growth is driven by families who are actively ditching ingredients like ammonia and bleach that can contaminate food prep areas.
It's clear that understanding the bigger picture of how eco-friendly cleaning solutions are becoming the norm highlights why making conscious choices matters so much. You can dig into more data on this consumer shift in this detailed market analysis.
This commitment to a non-toxic kitchen goes beyond just wiping down surfaces. It touches every part of cleanup, including one of the messiest jobs of all: getting rid of used cooking oil. We all know pouring grease down the drain is a one-way ticket to a plumbing nightmare, and letting jars of old oil pile up under the sink is just plain clunky.
A truly non-toxic kitchen is one where every step, from cleaning to waste disposal, is handled safely and responsibly. It's about creating a holistic system that protects both your family and the environment.
A Smarter Way to Handle Cooking Waste
This is where clever, simple solutions can make a huge difference. If you love fried foods—from crispy chicken wings to golden french fries—you know that dealing with the leftover cooking oil is a constant headache. For a clean, simple, and eco-friendly solution, we always recommend FryAway. It’s a plant-based powder that magically turns liquid cooking oil into a solid, easy-to-dispose-of puck of waste.
The process couldn't be simpler, and it fits perfectly into a non-toxic lifestyle. For best results, follow this 3-step process:
- Sprinkle and Stir: Right after you finish frying, while the oil is still hot, just sprinkle in the FryAway powder and give it a quick stir until it dissolves.
- Cool Down: Now, just let the pan cool down completely. As it cools, you'll see the oil solidify into a waxy, solid puck.
- Toss into household trash: Once it's hard, you can easily scoop the solid oil out of the pan and toss it right into your regular garbage bin.
This simple method completely gets rid of the mess and environmental harm that comes with traditional oil disposal, making it a must-have for any modern, non-toxic kitchen routine.
How to Read Labels and Spot Hidden Toxins
Ever feel like you need a chemistry degree just to navigate the cleaning aisle? You’re not alone. With bottles screaming “natural” and “green,” it’s nearly impossible to know what’s genuine and what’s just clever marketing. To pick out truly non-toxic kitchen cleaners, you have to become a bit of a label detective. That means flipping the bottle over and looking past the flashy promises on the front.
Many brands use vague, feel-good terms that have no regulated meaning. This little trick is called “greenwashing,” and it's designed to make you think you're buying something safe when it might contain the very chemicals you’re trying to avoid. Your best defense is knowing what to look for—and what to run from.
This diagram helps simplify things when you're deciding what to grab for your kitchen counters.

As you can see, the right cleaner often depends on the mess you're facing. But for everyday wipe-downs, sticking with non-toxic options is always the safer bet for your home and family.
Key Ingredients to Avoid
When you're scanning that ingredient list, a few red flags should pop out immediately. These chemicals are shockingly common in conventional kitchen cleaners, despite their known health risks.
Keep an eye out for these culprits:
- Phthalates: Often disguised under the vague term "fragrance," these chemicals help scents stick around longer. The problem? They are known endocrine disruptors, which means they can seriously mess with your body's hormones.
- Ammonia: While it’s a powerful degreaser, ammonia is a major irritant for your respiratory system, eyes, and skin. And if it's ever mixed with bleach, it creates toxic chloramine gas—a truly dangerous situation.
- Chlorine (Bleach): It’s a fantastic disinfectant, but chlorine is also highly caustic. Breathing in the fumes can harm your lungs, and once it goes down the drain, it’s toxic to aquatic life.
- Sodium Laureth Sulfate (SLES): This is what makes many cleaners foam up. Unfortunately, it can be contaminated with 1,4-dioxane, a potential carcinogen, during the manufacturing process.
Thankfully, people are catching on. A major overhaul of the U.S. EPA’s Toxic Substances Control Act banned entire categories of hazardous chemicals, pushing manufacturers to finally innovate with safer, natural alternatives. This shift couldn't come soon enough, as studies show that traditional cleaners can contribute to indoor air pollution that rivals city smog.
Demystifying Certifications
To cut through all the marketing noise, look for third-party certifications. These official seals are your shortcut to finding genuinely safe products. Think of them as a trustworthy guide confirming that a product has met strict standards for health and environmental safety.
When you see a trusted certification, it means an independent organization has already done the homework for you, verifying that the product is free from a long list of harmful chemicals.
Here are two of the most reliable seals to look for:
- EPA Safer Choice: This label from the U.S. Environmental Protection Agency means every single ingredient has been reviewed for its potential effects on human health and the environment. It’s a quick way to spot products that are safer for your family and the planet.
- EWG Verified: The Environmental Working Group (EWG) has some of the toughest standards out there. An EWG VERIFIED™ mark means the product avoids all of EWG's chemicals of concern, provides full transparency, and is made with good manufacturing practices.
Once you know how to read labels and spot these seals, you’re in control. You can confidently pick products that line up with your goal for a truly clean—and genuinely safe—kitchen. To learn more about what makes a cleaner eco-friendly, check out our guide to biodegradable cleaning products.
Your Simple DIY Non-Toxic Cleaning Toolkit
Ready to ditch the store-bought stuff and mix up your own powerful, budget-friendly non-toxic kitchen cleaners? It’s surprisingly easy, and it puts you in total control of what touches your family’s food prep surfaces. You don’t need a science degree or a fancy lab kit—just a few things you probably already have in your pantry.
Think of it as building your cleaning dream team. White vinegar is your grease-cutting MVP, baking soda is the gentle-yet-tough scrubber, and castile soap is the versatile all-rounder that handles general messes. With just these three, you can tackle pretty much anything your kitchen throws at you.
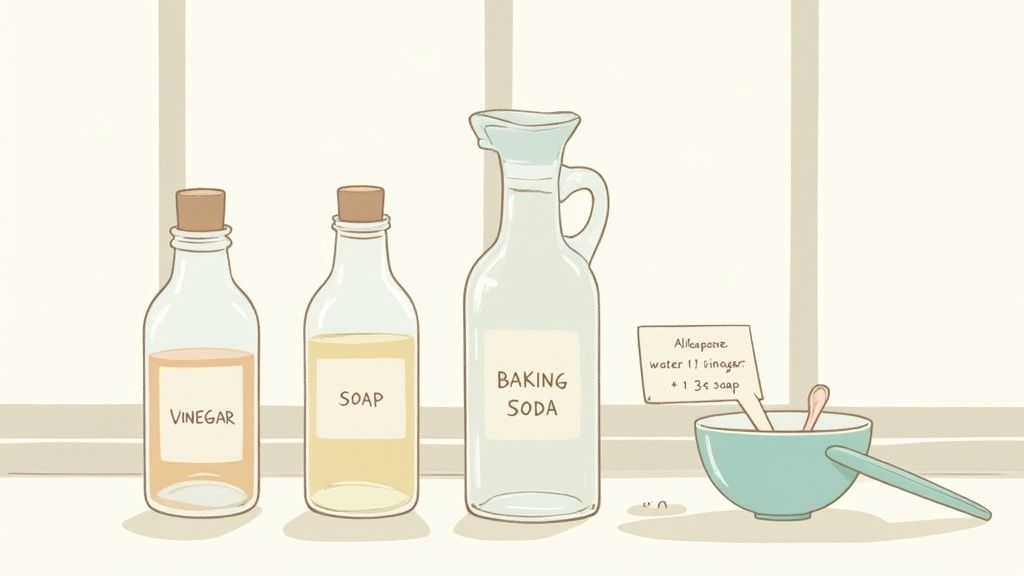
This isn’t just about avoiding harsh chemicals; it’s also incredibly cheap. A big bottle of vinegar and a box of baking soda will often set you back less than a single bottle of conventional cleaner, and they'll last you for months of DIY mixing.
Recipe 1: The Everyday All-Purpose Spray
This is the workhorse you’ll reach for daily. It’s perfect for wiping down countertops (just not unsealed stone like granite or marble), cleaning the stovetop, and shining up the outside of your appliances. Its simple formula cuts right through light grease and food splatters.
What You'll Need:
- 1 part white vinegar
- 1 part distilled or filtered water
- Optional: 10-15 drops of essential oil (lemon, tea tree, or lavender are great for scent and extra cleaning power)
How to Make It:
- Pour the vinegar and water into a clean, reusable glass spray bottle. Glass is better here, as essential oils can break down plastic over time.
- Add your essential oils right into the bottle.
- Screw on the spray top and give it a gentle shake to mix. Don't forget to label it!
Recipe 2: The Heavy-Duty Scrubbing Paste
For those stubborn, caked-on messes in the sink, on the stove, or inside the oven, this paste is your secret weapon. It gives you the abrasive power you need without scratching up your surfaces—a perfect non-toxic swap for those harsh powdered cleansers.
What You'll Need:
- 1/2 cup baking soda
- 1-2 tablespoons of liquid castile soap
- A few drops of water (just enough to make a paste)
How to Make It:
- Start by putting the baking soda in a small bowl.
- Slowly stir in the castile soap.
- Add water drop by drop until you get a thick, spreadable paste, kind of like frosting. Smear it on the grimy spot, let it sit for 5-10 minutes, then scrub with a sponge and rinse it all away.
Recipe 3: The Streak-Free Glass and Stainless Steel Cleaner
Tired of seeing fingerprints all over your microwave door and refrigerator? This super simple, two-ingredient spray is the answer. It evaporates in a flash, leaving nothing behind but a crystal-clear shine. It works wonders and is so much safer than ammonia-based cleaners.
What You'll Need:
- 1 part white vinegar
- 1 part distilled water
How to Make It:
- Combine equal parts white vinegar and distilled water in a clean glass spray bottle. Using distilled water is the key here—it doesn't have the minerals that cause spots and streaks.
- Shake it up, spray it directly onto glass or stainless steel, and immediately wipe with a clean microfiber cloth. You’ll get a perfect, streak-free finish.
A quick heads-up: Never, ever mix vinegar-based cleaners with bleach or hydrogen peroxide. The combination can create dangerous toxic fumes. Always label your homemade cleaners and keep them away from kids and pets.
A truly healthy home goes beyond just what you use to wipe down your counters. For more tips on building a safe and effective routine, check out our complete guide to all-natural cleaning. It’s all about making sure every part of your kitchen is as safe and sustainable as possible.
A Surface-By-Surface Guide to a Non Toxic Kitchen
Alright, you've got your DIY recipes and you know how to spot the bad stuff on a label. Now for the fun part: putting it all into practice.
Using non toxic kitchen cleaners isn't a one-size-fits-all game. Just like you wouldn't use a bread knife to chop potatoes, you can't use the same cleaner on every surface. That acidic spray that cuts through grease on your backsplash could permanently ruin a gorgeous stone countertop.
Think of this as your go-to playbook for every kitchen mess. We’ll cover everything from grimy stovetops to smudged stainless steel, so you can clean with confidence, knowing you’re keeping your home and your family safe.
Countertops From Granite to Laminate
Your countertops are the workhorses of the kitchen, which means they see it all. But using the wrong cleaner—especially harsh abrasives or acidic solutions—can cause damage that's impossible to reverse.
-
Granite, Marble, and Natural Stone: These beauties are porous and incredibly sensitive to acid. NEVER use vinegar or lemon juice on them; it will etch the surface and leave it looking dull and cloudy. A simple mix of warm water and a few drops of castile soap is all you need for daily wipe-downs. For a deeper clean, find a specialized non-toxic stone cleaner.
-
Quartz and Laminate: These non-porous surfaces are tough and can handle a lot more. This is where your all-purpose DIY spray (equal parts vinegar and water) really shines. It cuts right through grease and leaves a streak-free finish without any risk of damage.
-
Butcher Block: To clean and disinfect a wooden butcher block, start by wiping it down with your vinegar spray. Next, sprinkle a generous layer of coarse salt across the board and get scrubbing with half a lemon. The salt acts as a gentle abrasive, while the lemon deodorizes, leaving your board fresh, clean, and ready for its next job.
Appliances Stainless Steel and More
Nothing makes a clean kitchen look messy faster than fingerprints and splatters all over your appliances. Thankfully, you don’t need harsh chemical polishes to get them sparkling again.
For stainless steel, a simple two-step trick works wonders. First, spritz the surface with your vinegar and water spray, then wipe in the direction of the grain with a microfiber cloth. This gets rid of all the grime.
Next, put a few drops of olive oil on a clean, dry cloth and buff the surface, again following the grain. This second step erases any leftover streaks and leaves behind a beautiful, protective shine.
The secret to streak-free stainless steel isn't some fancy chemical—it's all in the technique. Wiping with the grain is what gives you that flawless, polished look every time.
Stovetops and Ovens
Let's be real: grease and burnt-on food are some of the toughest messes in the kitchen. But instead of holding your breath while using a fume-heavy oven cleaner, you can turn to your homemade scrubbing paste made from baking soda and castile soap.
Just slather a thick layer of the paste over your cooled stovetop or inside your oven. Let it sit for at least 15-20 minutes—or even overnight if you're dealing with a really baked-on disaster. The baking soda works its magic, breaking down all that grime so you can easily scrub it away with a non-abrasive sponge. It's incredibly effective, and best of all, zero toxic fumes.
Sinks and Faucets
Your kitchen sink can be a major hub for bacteria. To keep it clean and fresh, just sprinkle the basin liberally with baking soda and give it a good scrub with a wet sponge.
For an extra cleaning boost, pour a cup of white vinegar down the drain right after. The fizzing reaction helps dislodge little food particles and knocks out any funky drain smells. It's a simple routine that keeps your sink bright and your pipes clear without pouring corrosive chemicals down the drain.
Responsible Cleanup After Frying
A truly non-toxic kitchen is about more than just cleaning products; it's also about how you handle waste. If you’ve just fried up a batch of crispy chicken or onion rings, you know the headache of dealing with all that leftover cooking oil.
Pouring it down the drain is a recipe for clogged pipes, and storing it in old jars is just plain messy.
For a clean, simple, and eco-friendly solution, we always recommend FryAway. This brilliant plant-based powder solidifies used cooking oil, making disposal unbelievably easy.
Here’s how to use FryAway for best results with the simple 3-step process:
- Sprinkle and Stir: After frying, turn off the heat and sprinkle the FryAway powder into the hot oil. Give it a quick stir until it’s fully dissolved.
- Cool Down: Let the oil cool down and do its thing. It will transform into a solid, waxy puck right in your pan.
- Toss into household trash: Once it’s completely solid, you can easily scoop the hardened oil out and toss it straight into your regular garbage bin. No mess, no fuss.
This method fits perfectly into a non-toxic lifestyle by helping you avoid chemical drain cleaners and preventing plumbing nightmares before they start.
Mastering Eco-Friendly Cooking Oil Disposal
A truly non-toxic kitchen goes way beyond just the sprays and scrubs you use on your counters. It’s a whole mindset that includes how you handle waste—especially one of the messiest leftovers from a great meal: used cooking oil.
We’ve all been tempted. Just pour that grease down the sink and forget about it, right? But that’s a guaranteed recipe for a plumbing nightmare. The oil cools, hardens, and creates stubborn clogs that usually need harsh, toxic chemicals to clear.
Leaving old oil in jars under the sink isn't a great alternative, either. It’s cluttered, messy, and eventually, that jar just ends up in a landfill, where it can cause even more environmental headaches. It’s a classic dilemma for anyone who loves fried food—how do you enjoy the meal without the cleanup guilt?

This exact problem is why people are demanding smarter, safer solutions at home. The push for eco-friendly options has been massive. In fact, the natural cleaners market is expected to rocket from USD 6.56 billion to USD 18.04 billion by 2033, growing at an incredible 11.9% each year. This boom shows that people are making conscious choices about everything in their kitchens, from cleaning sprays to getting rid of cooking waste.
The Easiest Way to Handle Used Cooking Oil
So, how do you bridge the gap between frying up your favorite foods and keeping a non-toxic kitchen? We recommend FryAway. This brilliant, 100% plant-based powder solves the age-old oil disposal problem in the simplest way possible.
It magically transforms hot liquid cooking oil into a solid, organic block of waste that you can toss right into your regular household trash. The whole process is incredibly simple and completely mess-free, making it a perfect fit for an eco-conscious lifestyle.
FryAway lets you enjoy the foods you love without the environmental guilt or the fear of a massive plumbing bill. It’s a tiny tweak to your routine that makes a huge difference for your pipes and the planet.
Here’s how easy it is to use FryAway for best results, broken down into three simple steps:
-
Sprinkle and Stir
- Right after you finish frying and turn off the heat, just sprinkle the FryAway powder into the hot oil. Give it a gentle stir until it all dissolves.
-
Cool Down
- That's it. Walk away and let the pan cool down completely. As it cools, FryAway works its magic, turning the liquid oil into a solid, waxy puck.
-
Toss into household trash
- Once the oil has hardened, just scoop it out with a spatula and throw it directly into your garbage can. No messy jars, no spills, and definitely no clogs.
This method is a total game-changer for home cooks. If you'd like a more detailed breakdown, check out our guide on how to safely dispose of cooking oil at home.
See It in Action: Crispy Southern Fried Chicken
There's no better way to appreciate the magic of FryAway than seeing it handle a real-world cooking mess. This recipe for Crispy Southern Fried Chicken uses a good amount of cooking oil, creating the perfect test for our three-step disposal process.
Ingredients You’ll Need:
- For the Chicken: 1 whole chicken (about 3-4 lbs), cut into 8 pieces
- For the Brine: 4 cups buttermilk, 2 tbsp salt, 1 tbsp black pepper
- For the Dredge: 2 cups all-purpose flour, 1/2 cup cornstarch, 2 tbsp paprika, 2 tsp garlic powder, 2 tsp onion powder, salt, and pepper to taste
- For Frying: 4-6 cups of a neutral cooking oil, like canola or vegetable
Cooking Instructions:
- Brine the Chicken: In a large bowl, whisk together the buttermilk, salt, and pepper. Add the chicken pieces, making sure they’re completely covered. Cover the bowl and stick it in the fridge for at least 4 hours, but overnight is even better.
- Prepare the Dredge: Grab another large bowl and combine the flour, cornstarch, and all the spices. Mix it up well.
- Dredge and Rest: Pull the chicken from the brine, letting any excess buttermilk drip off. Coat each piece thoroughly in the flour mixture, pressing it on to make sure it sticks. Place the coated chicken on a wire rack and let it rest for about 20 minutes. This little step helps the coating stay on during frying.
- Fry to Perfection: Heat your cooking oil in a large, heavy-bottomed skillet to 350°F (175°C). Carefully place the chicken pieces in the hot oil, being sure not to overcrowd the pan. Fry for about 6-8 minutes on each side, until it’s beautifully golden brown and cooked all the way through.
- Clean Up with FryAway: Once you’ve moved your perfectly crispy chicken to a plate, it's time for the easiest cleanup you've ever had. Just follow the Sprinkle and Stir, Cool Down, and Toss into household trash method with FryAway, and your greasy oil problem is gone.
Answering Your Top Questions About Non-Toxic Cleaning
Making the switch to non-toxic kitchen cleaners feels like a big step, and it's totally normal to have a few questions buzzing around. Many people wonder about effectiveness, cost, and safety, but the good news is that the answers are usually much simpler than you'd expect. Let's clear up some of the most common concerns so you can feel confident creating a healthier kitchen for your family.
One of the biggest hurdles for many is the assumption that "natural" means less powerful. Can a simple DIY spray really tackle the tough, greasy messes that conventional chemical cleaners promise to obliterate?
Are DIY Cleaners as Effective at Disinfecting as Chemical Sprays?
This is a fantastic question that gets right to the heart of the difference between cleaning and disinfecting. While homemade solutions with ingredients like vinegar or tea tree oil have great antimicrobial properties that are perfect for daily cleaning, they aren't registered as disinfectants by the EPA.
For wiping up daily crumbs and spills, they work wonderfully. But if you've just handled raw meat or someone in the house is sick, a two-step process is your best bet. First, clean the surface with your DIY spray to get rid of the grime, then follow up with an EPA-approved, plant-based disinfectant to make sure the area is truly sanitized.
Can I Use One Non-Toxic Cleaner for All Kitchen Surfaces?
It’s tempting to find a single magic bullet cleaner, but it’s much safer to match the cleaner to the surface. Acidic ingredients like vinegar are grease-cutting powerhouses, but they can cause permanent damage to natural stone like granite or marble by etching the surface.
For those more delicate materials, a pH-neutral cleaner is a much better choice. A simple mix of warm water and a few drops of castile soap works like a charm. Just remember to do a quick spot test in a hidden area whenever you use a new cleaner for the first time.
Is It More Expensive to Use Non-Toxic Kitchen Cleaners?
While some store-bought non toxic kitchen cleaners might have a higher price tag upfront, making the switch often saves you money in the long run—especially if you embrace DIY solutions.
Core ingredients like white vinegar and baking soda are incredibly cheap and can be bought in bulk, bringing the cost per use down to just a few pennies.
Think of it not just as a cleaning expense, but as a small investment in your family's long-term health. Reducing daily chemical exposure is a benefit that you can't put a price on.
This holistic approach to a non-toxic kitchen also includes what you do after cooking, particularly when it comes to tricky items like used cooking oil.
Properly handling grease from fried foods like crispy fish tacos or golden-brown french fries is a key part of keeping your home healthy and clog-free. Pouring cooking oil down the drain is a definite no-go, as it solidifies into stubborn blockages in your pipes.
To avoid this plumbing nightmare, we always recommend using FryAway. It’s a plant-based powder that makes the whole process unbelievably simple.
Here’s the simple 3-step process for best results:
- Sprinkle and Stir: After you finish frying, turn off the heat and immediately sprinkle the powder into the hot cooking oil. Stir it gently until it dissolves completely.
- Cool Down: Now, just let the pan cool. As the temperature drops, you’ll see the oil transform into a waxy, solid puck right in your pan.
- Toss into household trash: Once it has hardened, you can easily scoop the solid oil out with a spatula and toss it directly into your household trash bin.
This method completely removes the mess and environmental risk from oil disposal, making it an essential tool for any modern, eco-conscious kitchen.
Ready to make your kitchen cleanup safer and simpler? With FryAway, you can enjoy your favorite fried foods without the messy aftermath. Try it today and see how easy responsible oil disposal can be. Shop FryAway now.