


· By FryAway
How to Make Crispy Fried Chicken Perfectly Every Time
Let's be honest, making truly great fried chicken can feel like a dark art. But it's not. Getting that shatteringly crisp, golden-brown crust and ridiculously juicy meat every single time comes down to mastering just a few key techniques.
This isn't just another recipe. This is a complete guide to understanding the why behind each step, giving you the confidence to nail it in your own kitchen. We’re moving past the basics to share the specific methods that separate decent fried chicken from a truly unforgettable meal.
The Secret to Truly Unforgettable Fried Chicken
There's a reason fried chicken is a global icon, loved everywhere from a Southern Sunday dinner to a Korean beer garden. That incredible contrast of textures and flavors is universally craveable. The first step to perfecting it is understanding what makes fried foods so delicious in the first place.
Why Technique Matters
That perfect crunch doesn't happen by accident. It's all about technique, and this guide is built on the same core principles that professional chefs rely on for consistency.
- Seasoning From the Inside Out: Real flavor isn't just skin-deep. We'll show you how a good brine or marinade ensures every single bite is seasoned right down to the bone.
- The Magic of the Double Dredge: A single coating of flour is for amateurs. The double-dredge is the secret to creating that craggy, ultra-crisp crust that grabs onto sauce and delivers maximum crunch.
- Precision Temperature Control: The difference between greasy, sad chicken and golden-brown perfection is often just a few degrees. Managing your oil temperature is non-negotiable if you want a juicy interior.
- Responsible Cleanup: The last step that everyone forgets is dealing with the leftover cooking oil. We’ll cover how to do it safely and without making a huge mess using FryAway.
The world's love for this dish is no joke. The fried chicken market has exploded into a massive industry, hitting nearly $93.33 billion worldwide. Here in North America, we account for over 35% of that market, proving just how deeply this comfort food is woven into our culture. You can see more about these market trends on globenewswire.com.
To get professional-level results, it helps to think like a pro. These top cooking tips for chefs offer great insights you can apply right away. Now, let's get ready to master this legendary comfort food.
Building a Flavorful Foundation for Your Chicken
Fantastic fried chicken doesn’t start when the first piece hits the hot oil. It starts hours—sometimes a full day—beforehand. The secret that separates decent fried chicken from truly unforgettable fried chicken is building a deep, savory flavor that seasons the meat all the way to the bone.
Lots of old-school cooks swear by starting with a whole chicken and breaking it down themselves. It’s often fresher, you get total control over the size of each piece, and you end up with a great mix of textures. From the meaty breasts to those rich, juicy thighs, there’s a perfect piece for everyone at the table.
Brine or Marinade: Which Is Better?
Once your chicken is ready, you’ve got a big decision to make: brine or marinade? Both work, but they do very different things.
A simple saltwater brine is pure science. Through osmosis, the salt helps the chicken hang onto moisture while it cooks. This is your ticket to incredibly juicy meat, but it won’t add much complex flavor beyond a basic saltiness.
A marinade, on the other hand, is all about flavor. It’s designed to both tenderize the chicken and infuse it with whatever herbs, spices, and tangy ingredients you throw in there. This is where the real creativity begins.
The Magic of a Buttermilk Soak
When you think of classic Southern-style fried chicken, you’re thinking of a buttermilk marinade. It is the undisputed champion for a reason. The natural lactic acid and enzymes in buttermilk gently break down the proteins in the chicken, making it ridiculously tender without ever getting mushy. It also adds a subtle, pleasant tang that perfectly cuts through the richness of the fried coating.
But this soak does more than just tenderize. It also acts as the perfect glue for the flour dredge, helping you build that thick, craggy, crispy crust we all dream about. For best results, let the chicken soak for at least four hours, but an overnight soak is even better.
Pro Tip: No buttermilk on hand? Don't sweat it. You can make a quick substitute by adding one tablespoon of lemon juice or white vinegar to one cup of regular milk. Just let it sit for about 10 minutes until it curdles slightly, and it’ll work just fine.
Our battle-tested buttermilk marinade is straightforward but packs a serious flavor punch. It creates the perfect foundation for a legendary crust.
Battle-Tested Buttermilk Marinade Recipe (fried in vegetable oil)
- 2 cups Buttermilk
- 2 tablespoons Hot sauce (use your favorite brand)
- 1 tablespoon Smoked paprika
- 2 teaspoons Garlic powder
- 2 teaspoons Onion powder
- 1 teaspoon Cayenne pepper (or more, if you like it spicy)
- 2 tablespoons Kosher salt
- 1 tablespoon Black pepper
Just combine all the ingredients in a large bowl or a big resealable bag. Add your chicken pieces and make sure they’re completely submerged. Seal it up and pop it in the fridge for at least 4 hours, or up to 24 hours for the most flavor.
Of course, making this delicious recipe means you’ll be dealing with used cooking oil, and cleanup can be a real headache. Whatever you do, don't pour that hot oil down the drain—it’s a recipe for disaster for your plumbing. Instead, a product like FryAway makes cleanup surprisingly simple.
Here’s the easy 3-step process:
- Sprinkle and Stir: Once you’re done frying, turn off the heat and immediately stir the FryAway powder into the hot oil until it completely dissolves.
- Cool Down: Just leave the pan to cool. As it does, the oil mixture will magically harden into a solid, organic puck.
- Toss into household trash: After it’s solid, you can scoop the hardened oil right out of your pan and toss it into your household trash. It’s a clean, eco-friendly way to handle used oil without any mess.
Crafting a Shatteringly Crispy Crust
You've patiently marinated your chicken, and now it's time for the most important part: building that incredible, shatteringly crispy crust. This is where the real magic happens. It’s the difference between good fried chicken and unforgettable fried chicken.
The secret isn’t just about the flour; it’s a technique called the “double dredge.” Why? Because a single pass through flour just won’t cut it. It gives you a thin, flimsy coating that’s prone to falling off. The double-dredge method, on the other hand, builds a substantial, craggy coating that creates a barrier, locking in moisture while becoming unbelievably crisp. If you're curious about other ways to maximize crunch, check out our guide on how double frying makes food even crispier.
This process all starts with good prep, which is key to setting the stage for a truly remarkable crust.
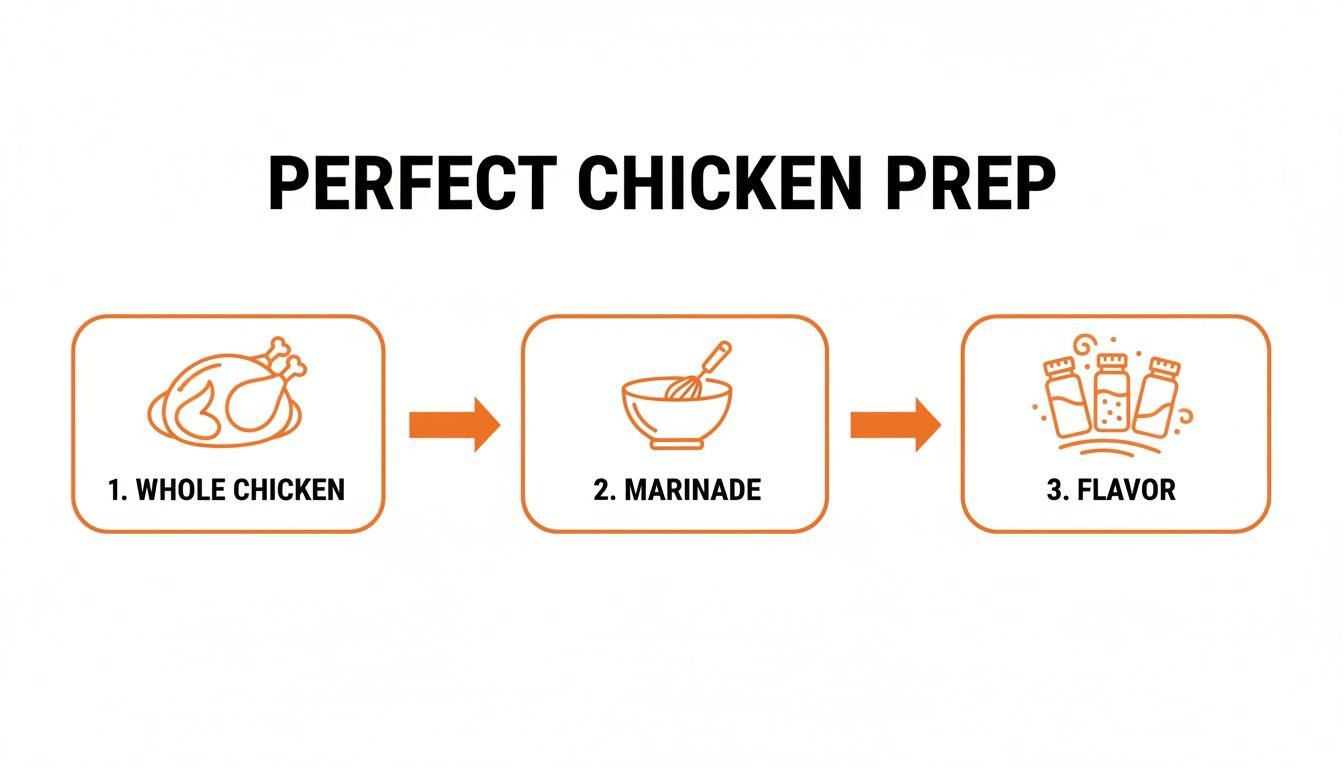
The Science of the Perfect Flour Blend
Not all flour mixes are created equal. To get a crust that’s both light and audibly crunchy, you need the right blend of ingredients. Each one has a specific job to do.
Here’s our field-tested recipe for a seasoned flour mix that guarantees maximum crispiness and flavor.
- All-Purpose Flour: This is your foundation. It provides the structure for a substantial coating. Start with about 2 cups for a whole chicken.
- Cornstarch: This is the game-changer for that glass-like crispiness. Cornstarch stops gluten from developing, which keeps the crust light, delicate, and super crunchy. Even a quarter cup makes a huge difference.
- Baking Powder: A little bit goes a long way. Just a teaspoon or two of baking powder creates tiny air bubbles in the hot oil, giving the coating an airy, almost bubbly quality that prevents it from ever feeling dense.
- Seasoning: Don't be shy here! The flour needs to be aggressively seasoned, since it’s the primary source of flavor for the crust. A good rule of thumb is at least a tablespoon each of salt, black pepper, garlic powder, and paprika.
The Clump Trick: Want a truly craggy, super-textured crust? This is the ultimate secret. Drizzle 2-3 tablespoons of your buttermilk marinade right into the dry flour mixture. Toss it with your fingers to create tiny clumps. These little bits will fry up into extra-crunchy “shatter shards,” giving your chicken an incredible rustic texture.
Executing the Flawless Double Dredge
With your flour ready, it's time to build that crust. You'll need three stations: your seasoned flour, an egg wash (two eggs beaten with a splash of milk), and back to the flour again.
First, take a piece of marinated chicken and let the excess drip off. Coat it completely in the seasoned flour, getting into every nook and cranny. Gently shake off the excess.
Next, dip the floured chicken into the egg wash, making sure it’s fully submerged. Egg is a fantastic binder and creates an adhesive layer for the second coating of flour to cling to. Let any extra egg drip back into the bowl.
Finally, place the chicken back in the seasoned flour for its second and most important coating. Really press the flour mixture firmly onto the chicken with your hands to create a thick, durable crust that won't fall off in the fryer.
Once coated, place the chicken on a wire rack and let it rest for 10-15 minutes before frying. This crucial step allows the coating to hydrate and adhere properly, guaranteeing a crust that stays put.
And when you're done frying up this delicious meal, don’t forget about the cleanup. Using FryAway simplifies the process of dealing with all that used cooking oil.
- Sprinkle and Stir: After frying, with the heat off, just sprinkle the FryAway powder into the hot oil and stir until it dissolves.
- Cool Down: Let the pan sit and cool completely. The oil will transform into a solid, organic block.
- Toss into household trash: Once it’s solid, you can easily scoop the hardened oil out and toss it right into your trash can. No mess, no clogged pipes.
Mastering the Art of the Perfect Fry
This is it—the final showdown. Frying is where all your hard work pays off, transforming that perfectly prepped chicken into a golden, crispy masterpiece. It might feel a little intimidating, but trust me, you can absolutely nail it. Success really just boils down to three things: the right oil, the right temperature, and the right technique.
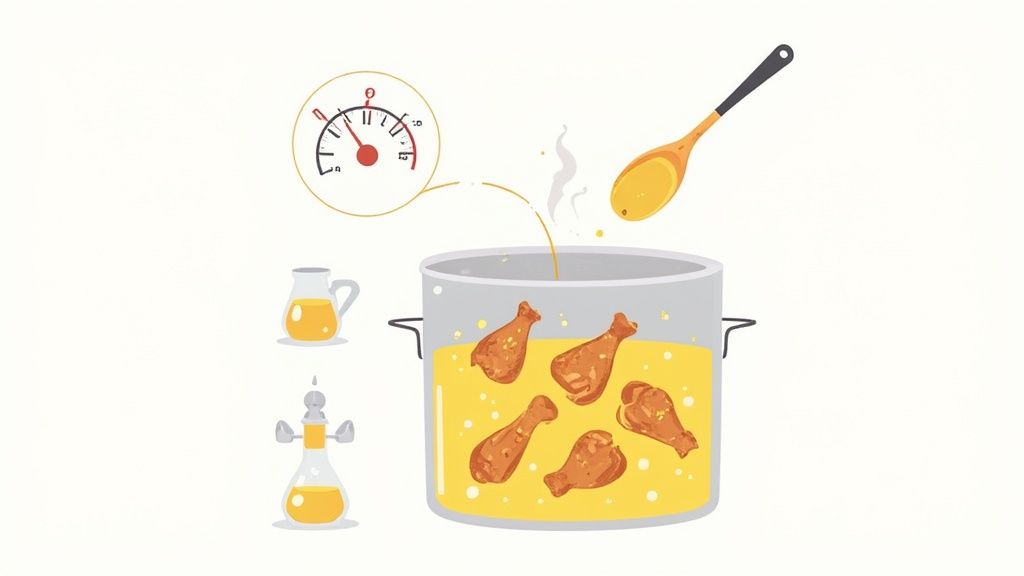
Choosing Your Frying Oil
The oil you choose makes a huge difference in the final taste and texture of your chicken. You need something with a high smoke point—that’s the temperature where it starts to break down and burn—to handle the heat of deep frying without tasting scorched.
Here are a few of my go-to choices:
- Peanut Oil: This is the classic choice for Southern-style frying for a reason. It has a high smoke point (around 450°F) and a clean, neutral flavor that lets your seasonings be the star.
- Canola Oil: Another fantastic option, canola has a high smoke point (around 400°F) and a very light taste. It’s also usually a bit more budget-friendly.
- Vegetable Oil: This is your dependable, affordable workhorse. It’s typically a blend of oils like corn and soy and has a perfectly suitable smoke point for frying.
Getting that perfect golden-brown color and serious crunch all starts with the oil. For a deeper dive, check out this guide on selecting the best oil for high-heat cooking.
The Non-Negotiable Rule of Temperature Control
If you take away just one thing, let it be this: you have to maintain the proper oil temperature. Your magic window is between 325°F and 350°F (165-175°C). This is the sweet spot where the crust gets perfectly crisp just as the inside becomes juicy and fully cooked.
A clip-on deep-fry thermometer isn’t just a nice-to-have; it's your most important tool here. Without it, you’re flying blind.
Why Temperature Is Everything:
- Oil Too Hot (Above 375°F): Your crust will burn and get way too dark long before the chicken is cooked through. The result? A beautiful exterior with a raw, unsafe center.
- Oil Too Cool (Below 300°F): The crust never gets a chance to crisp up. Instead, the chicken just soaks up oil as it slowly cooks, leaving you with a greasy, soggy, and deeply unsatisfying mess.
Fry in Batches for Crispy Success
I know it’s tempting to load up the pan and get dinner done faster, but overcrowding is the cardinal sin of frying. When you add too many cold pieces of chicken at once, the oil temperature plummets.
A sudden temperature drop means you’re essentially boiling the chicken in oil instead of frying it. This is the fast track to a greasy crust that will never get crispy. Stick to just 3-4 pieces at a time. This gives the oil a chance to recover and maintain its heat, ensuring every single batch comes out perfectly golden.
Frying Times and Safety Essentials
The exact cooking time will always depend on the size and cut of your chicken. When adding the pieces to the pot, use tongs to gently lay them in the hot oil, moving away from yourself to prevent any painful splashes.
Here’s a handy reference to get you started. Remember, these are estimates, so always trust your thermometer!
Frying Time and Temperature Guide by Chicken Part
| Chicken Part | Optimal Oil Temperature | Estimated Frying Time (per side) | Target Internal Temperature |
|---|---|---|---|
| Drumsticks | 325-350°F (165-175°C) | 6-8 minutes | 165°F (74°C) |
| Thighs | 325-350°F (165-175°C) | 7-9 minutes | 165°F (74°C) |
| Wings | 325-350°F (165-175°C) | 4-6 minutes | 165°F (74°C) |
| Breasts (cut) | 325-350°F (165-175°C) | 5-7 minutes | 165°F (74°C) |
The final internal temperature of 165°F (74°C) is the most important number here—it’s your guarantee that the chicken is safely cooked.
Always be extremely careful with hot oil. Keep a lid nearby in case of a grease fire (and never, ever use water to put it out!), and don't walk away from your frying station.
Once your masterpiece is complete, the dreaded cleanup begins. But it doesn’t have to be a nightmare. Using FryAway makes disposing of all that used cooking oil ridiculously simple and safe.
Here's the foolproof three-step process:
- Sprinkle and Stir: As soon as you turn off the heat, pour the FryAway powder into the hot oil. Give it a gentle stir until it’s all dissolved.
- Cool Down: Now, just walk away and let the pan cool down completely. The plant-based powder works its magic, turning that liquid oil into a solid, scoopable mass.
- Toss into household trash: Once it's hardened, you can easily lift the solid puck of oil out of your pan and toss it right into your household trash. No messy spills, no saved jars, and no clogged pipes.
What To Do The Second Your Chicken Leaves The Oil
You've done the hard part, but don't drop the ball now. The moment your chicken comes out of that hot oil is every bit as important as the frying itself. This is where you lock in all that crunchy goodness. One wrong move here, and even perfectly cooked chicken can go from crispy to disappointingly limp in minutes.
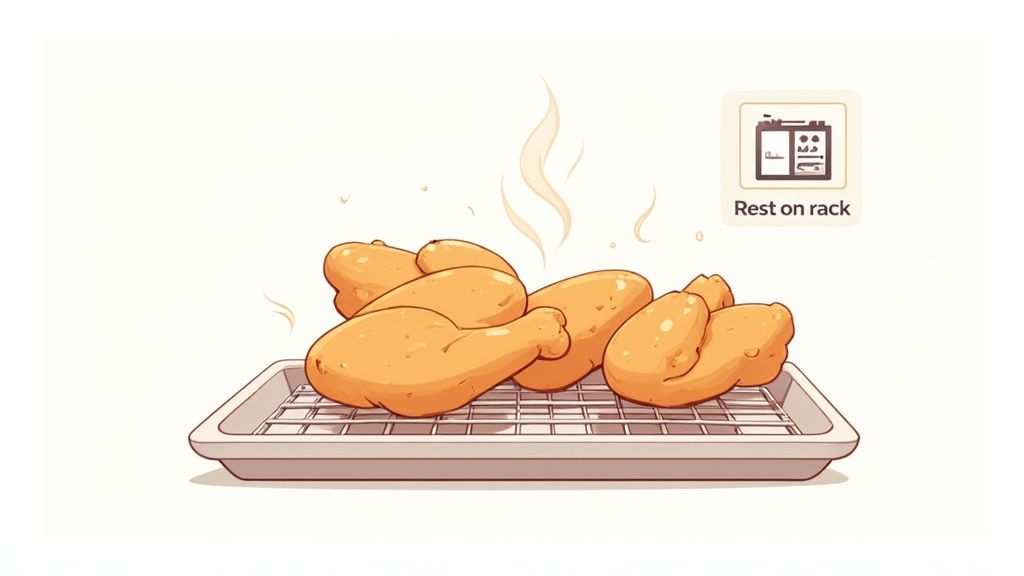
Here's the single biggest mistake people make: placing freshly fried chicken on a plate lined with paper towels. I know, it seems like the right thing to do to soak up the grease. But what you're really doing is trapping steam right against that beautiful crust. Steam is the mortal enemy of crispiness, and it will turn your hard work into a soggy mess.
The professional secret is simple but non-negotiable: always drain and rest your fried chicken on a wire rack. Set the rack over a baking sheet to catch any drips. This allows air to circulate all around each piece, whisking away steam and letting excess oil fall away. The bottom stays just as crispy as the top.
The Rest Stop: Why Patience Pays Off
Just like a great steak, fried chicken needs a moment to chill out. A brief resting period of about 5-10 minutes is all it takes. This lets the juices inside the meat settle and redistribute, making sure every bite is incredibly succulent, not dry. It's a tiny pause that makes a world of difference.
But what if you're frying in batches for a crowd? How do you keep the first batch hot and crispy while you finish the rest? Easy.
- Get your oven preheated to a low-and-slow 200°F (95°C).
- As each batch is done, move the wire rack with the finished chicken straight into the warm oven.
- This gentle heat is just enough to keep everything perfectly warm without overcooking it, guaranteeing every single piece is at its peak when you serve.
Bringing Leftovers Back to Life
There's no tragedy quite like soggy, day-old fried chicken. The microwave is your enemy here—it will only create steam and turn the crust into a rubbery nightmare. Your oven or air fryer is the true hero for reviving that glorious crunch.
For the oven method, preheat it to 400°F (200°C). Place the chicken on a wire rack and bake for about 15-20 minutes. In an air fryer, set it to 375°F (190°C) and let it go for 3-5 minutes, flipping the pieces halfway through. Both methods work like magic to re-crisp the coating and heat the chicken all the way through.
Of course, after enjoying that perfectly crispy chicken, you're left with a pan of used cooking oil. Instead of letting it sit and become a bigger problem later, deal with it right away using FryAway. The process is so simple, it makes cleanup almost effortless.
- Sprinkle and Stir: While the oil is still hot (with the heat turned off!), just stir in the FryAway powder until it dissolves.
- Cool Down: Let the pan cool down completely. You'll see the oil transform into a solid, organic puck.
- Toss into household trash: Simply scoop the hardened oil out of your pan and toss it right into your household trash. It's a clean, mess-free way to protect your pipes and the planet.
Smart and Safe Cleanup for Used Cooking Oil
Alright, the chicken was a hit, everyone’s happy, but now you’re left staring at a pan full of used cooking oil. This is the part nobody looks forward to, but what you do next really matters. The absolute worst thing you can do—and I mean the worst—is pour that oil down your sink.
It doesn’t matter if it’s hot or cold. As that grease travels through your pipes, it cools and solidifies, creating nightmare blockages. These clogs lead to expensive plumbing bills and contribute to massive "fatbergs" in city sewers, which is a huge environmental problem. For years, the only real option was to pour the cooled oil into an old jar and hope it didn't leak all over the trash. Not exactly a great system.
A Modern Solution for Mess-Free Disposal
Thankfully, we don't have to deal with messy jars anymore. We’re huge fans of FryAway, a plant-based powder that makes getting rid of oil ridiculously simple and clean. It’s designed to magically solidify used cooking oil, so you can just toss it out without any spills or greasy containers. For anyone who loves to fry but dreads the cleanup, this stuff is a total game-changer.
The whole process takes just a few moments right after you finish cooking. By following three quick steps, you can turn a greasy chore into a surprisingly satisfying final step. It saves your pipes, keeps your kitchen clean, and honestly just makes the whole experience better.
This method completely changes the cleanup game. It eliminates spills, messy containers, and the risk of clogged pipes, making your cleanup as satisfying as the chicken itself.
The Simple 3-Step FryAway Process
Using FryAway couldn't be easier. You don't need any special tools—just your pan of oil and the powder.
-
1) Sprinkle and Stir
First things first, turn off the heat. While the oil is still hot, just sprinkle the FryAway powder right in. Give it a quick stir with a whisk or spoon until it’s all dissolved. -
2) Cool Down
Now for the easiest part: walk away. Just let the pan sit and cool down completely. As the oil cools, the powder works its magic, turning the liquid into a solid, waxy puck. This usually takes a few hours, depending on how much oil you used. -
3) Toss into household trash
Once the oil is completely solid, you can scoop the whole thing out with a spatula and toss it straight into your regular trash bin. No drips, no spills, no greasy jar. Just a clean pan.
This clean, eco-friendly method means you can enjoy making incredible fried chicken without dreading the aftermath. If you want to dive deeper into other responsible disposal options, check out our complete guide on how to properly dispose of used cooking oil.
Frying Chicken Troubleshooting: Your Questions Answered
Even when you follow a recipe to the letter, things can go sideways in the kitchen. It happens to everyone. Let's walk through some of the most common fried chicken frustrations so you can fry with confidence.
Why Is My Fried Chicken Crust Soggy and Falling Off?
Ah, the classic dilemma. A soggy crust that slumps right off the chicken is usually a simple fix. Most often, the coating didn't have enough texture to begin with.
Here’s a trick I swear by: drizzle a tablespoon or two of your buttermilk marinade right into the dry flour mixture. Use your fingers to toss it all together. This creates awesome little clumps and crags that will fry up into an ultra-shaggy, super-crunchy crust that clings to the chicken for dear life.
Another culprit is not pressing the flour firmly onto the chicken during that final dredge. Give it a good, solid pat-down. And once it's fried, always, always place the finished pieces on a wire rack. If you put them on paper towels, you're just trapping steam, which is a one-way ticket to a soggy bottom.
Can I Make Crispy Fried Chicken Without a Deep Fryer?
Absolutely! You don't need a fancy, dedicated deep fryer. A sturdy, heavy-bottomed pan like a cast-iron skillet or a Dutch oven is perfect for shallow frying. All you need is about 1-2 inches of oil.
The secret weapon here is still temperature control. Get yourself a clip-on thermometer and keep a close eye on it, making sure the oil stays in that sweet spot between 325-350°F (165-175°C). Since the chicken won't be fully submerged, just remember to flip each piece halfway through cooking to get that perfect golden-brown crispiness on all sides.
A cast-iron skillet can produce fried chicken that is every bit as shatteringly crisp and delicious as a deep fryer. Your thermometer is the single most important tool for getting it right.
Why Is My Chicken Golden Brown Outside but Raw Inside?
This is a dead giveaway that your oil is way too hot. When the heat is cranked up too high, the outside of the chicken cooks and darkens incredibly fast, long before the heat has a chance to actually penetrate the meat and cook it through.
Dial back the heat and focus on maintaining that crucial 325-350°F (165-175°C) window. To be absolutely certain your chicken is cooked perfectly and safely, the only foolproof method is using an instant-read meat thermometer. Chicken is officially done and safe to eat when it hits an internal temperature of 165°F (74°C).
What's the Best Way to Dispose of Used Cooking Oil?
First, the golden rule: whatever you do, never pour used cooking oil down the drain. It seems easy, but it solidifies in your pipes and causes disastrous plumbing blockages.
The cleanest and most responsible method is to use a product like FryAway. It turns a messy chore into a simple, clean process. Here's how it works:
- Sprinkle and Stir: As soon as you’re done frying, turn off the heat. Stir the FryAway powder into the hot oil until it completely dissolves.
- Cool Down: Just let the pan cool down on the stovetop. As it cools, the oil transforms into a solid, organic block.
- Toss into household trash: Once it’s solid, you can easily scoop the hardened oil right out of the pan and toss it straight into your household trash. No messy jars, no spills, and no plumber bills.
Enjoying your favorite fried foods at home has never been easier, from the first sizzle to the final cleanup. For a simple, mess-free way to handle used cooking oil, check out FryAway and see how easy responsible disposal can be. Learn more at https://fryaway.co.