


· By FryAway
How to Dispose of Vegetable Oil After Frying The Right Way
You've just cooked up a fantastic meal, but now you're left staring at a pan full of used cooking oil. What do you do with it? The most important rule is to never, ever pour it down the drain. The best and safest approach is to solidify the oil first before tossing it in your regular household trash. This simple step can save you from a world of plumbing headaches and environmental harm.
Why Pouring Oil Down the Drain Is a Terrible Idea
After enjoying a plate of crispy fried chicken, the temptation to just wash that leftover oil down the sink is real. We get it. But this seemingly harmless act is a recipe for disaster.
When hot, liquid oil travels down your pipes, it cools and hardens, clinging to the inside of the plumbing. This sticky gunk acts like a magnet, grabbing onto food scraps, coffee grounds, and whatever else finds its way down there. Before you know it, you've got a stubborn blockage and a hefty bill from the plumber.
But the problem doesn't stop at your property line. It gets much, much bigger.
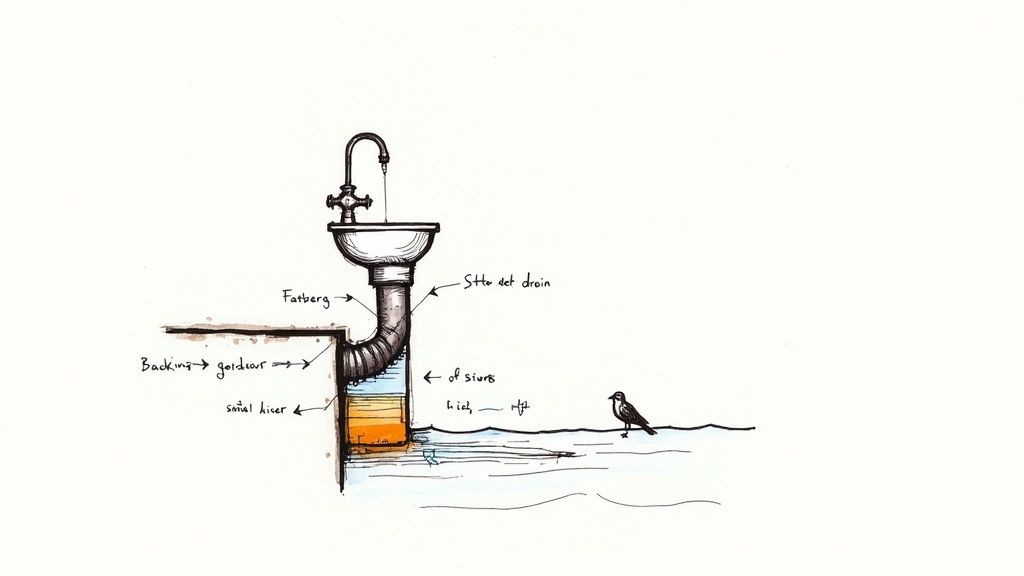
The Rise of the Giant "Fatbergs"
When thousands of households pour grease down their drains, it all meets up in the city's sewer system. There, it mixes with "non-flushable" items (like wipes) and congeals into enormous, concrete-like masses called fatbergs.
These things are monstrous. Fatbergs can grow to be hundreds of feet long and weigh several tons, completely choking off major sewer lines.
Removing them is a disgusting, difficult, and expensive job for municipalities. Worse, they often lead to raw sewage backing up into streets and even homes. By handling your kitchen grease the right way, you're doing your part to prevent these urban menaces. If you want to dive deeper into these underground giants, you can learn more about what fatbergs are and why they matter in our detailed guide.
This isn't just a small-scale issue. The amount of used cooking oil (UCO) we generate is staggering. Globally, an estimated 3.7 billion gallons of UCO were available in 2022, with the U.S. alone collecting around 0.85 billion gallons.
The Environmental Toll of Improper Disposal
It’s not just our pipes that are at risk. Tossing liquid oil straight into the trash isn't a great solution either. It can easily leak from garbage bags at the landfill, seeping into the ground and contaminating soil and groundwater.
If that oil eventually makes its way into rivers or lakes, it creates a suffocating film on the water's surface. This film blocks oxygen from reaching aquatic life, harming fish, plants, and other wildlife.
That’s why solidifying the oil is the only truly safe way to ensure it stays contained and is disposed of without causing harm.
To make it easier to choose the right method, let's compare the common ways people get rid of cooking oil.
Cooking Oil Disposal Methods at a Glance
This table breaks down the good, the bad, and the ugly of oil disposal, helping you see why some methods are far better than others.
| Disposal Method | Environmental Impact | Plumbing Risk | Recommendation |
|---|---|---|---|
| Pouring Down the Drain | High | Extreme | Never do this. |
| Tossing Liquid Oil in Trash | High | Low | Not recommended. |
| Composting | Medium | None | Avoid. |
| Recycling (Local Facility) | Low | None | Good, if available. |
| Solidifying Before Trash | Low | None | Best for home use. |
As you can see, solidifying your used cooking oil before throwing it away is by far the safest and most environmentally responsible choice for home cooks.
The Easiest Way to Solidify and Toss Used Oil
Let's be honest, cleanup after a delicious fried meal can be a real drag. Who wants to deal with greasy jars or worry about spilling used oil everywhere? But what if you could make it completely mess-free?
There’s a way to solidify your used cooking oil in just minutes using a simple plant-based powder. This little trick transforms hot, liquid oil into a solid, organic puck you can just scoop out and toss straight into your household trash. It's a total game-changer.
We always recommend FryAway, a product designed to do exactly this. It’s perfect for anyone who loves whipping up fried chicken or crispy fries but absolutely dreads the cleanup. The magic is in its simplicity—it turns a messy liquid into a solid, manageable puck, completely taking plumbing disasters off the table.
The official FryAway site shows just how simple their three-step approach is.
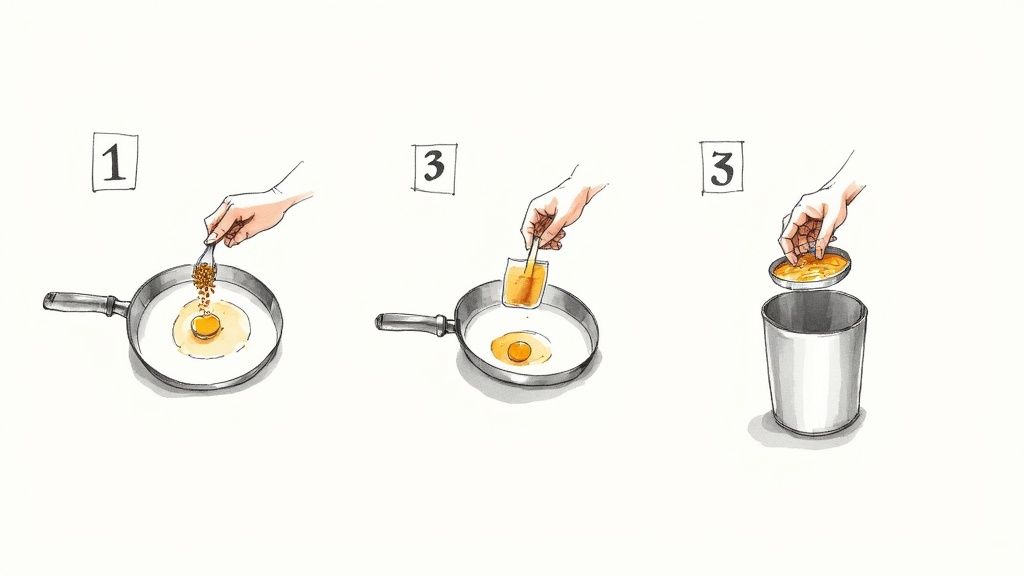
As you can see, the process is incredibly straightforward. It’s designed for any home cook to use safely and without any fuss.
Your Three-Step Guide to Perfect Cleanup
Using FryAway couldn't be simpler. It's a foolproof, three-step process that works like a charm every time, whether you've just pan-fried some fish or deep-fried a whole batch of doughnuts.
Here’s how you get that perfect, hassle-free cleanup:
-
Sprinkle and Stir: Right after you finish cooking, turn off the heat. While the oil is still hot, sprinkle the FryAway powder directly into the pan. Give it a gentle stir until the powder completely dissolves.
-
Cool Down: Now for the easy part—just walk away. Let the pan cool down completely. As the oil loses heat, the mixture will start to thicken and eventually harden into a solid, waxy disc. This usually takes a few hours, depending on how much oil you used.
-
Toss into household trash: Once it's completely solid, you can easily scoop the entire puck out with a spatula and toss it right into your garbage bin. No greasy residue, no messy containers, and zero risk of spills.
By solidifying the oil, you're not just making your life easier. You're actively preventing the clogs and fatbergs that plague our sewer systems. It's a small step in the kitchen that makes a surprisingly big difference.
Why This Method Is Our Top Choice
Solidifying used cooking oil is, hands down, the best method for home kitchens. It's cleaner, safer, and way more convenient than the old-school ways of dealing with grease. For home cooks who regularly fry up goodies like beer-battered fish tacos or homemade doughnuts, this completely removes the biggest headache.
- No Messy Containers: You can finally say goodbye to saving old jars or milk cartons to store used oil.
- Protects Your Plumbing: It guarantees oil never goes down your drain, saving you from the nightmare of expensive plumbing bills.
- Environmentally Friendly: Since FryAway is plant-based, the solidified oil is just organic waste.
Once the oil is solid, you can safely toss it in your regular trash. If you want to take the eco-friendly approach a step further, consider using biodegradable bin liners.
Curious about the science behind this cleanup hack? We've got a detailed guide on how to solidify cooking oil that breaks it all down.
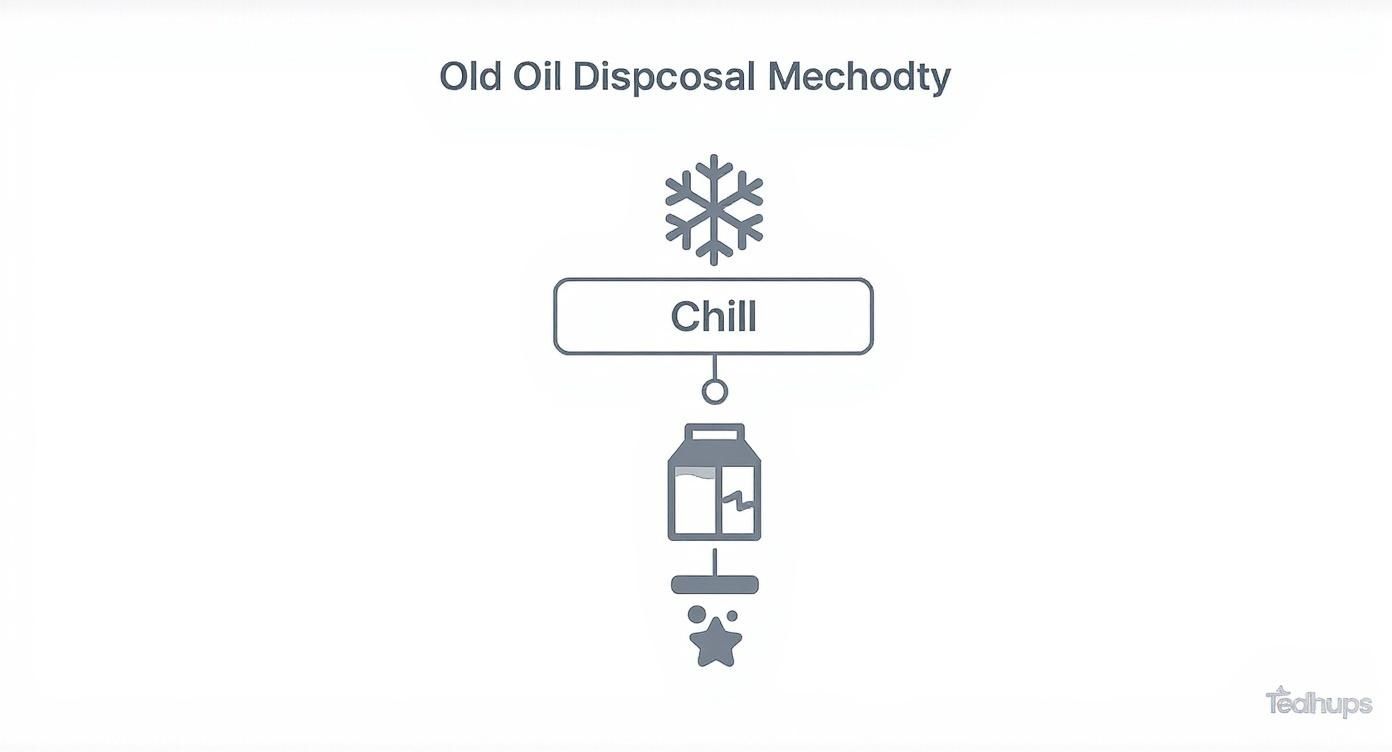
Old-School Ways to Handle Leftover Oil
So, you've just finished frying up a storm, but you don't have an oil solidifier like FryAway on hand. What do you do? While there are much cleaner and more convenient ways to handle used oil these days, the classic methods can still get the job done if you’re careful.
These old-school techniques definitely require a bit more effort and can get messy, but they’re a far better choice than pouring that grease down your sink. Let's break down the two most common approaches: chilling it solid or sealing it in a container. The golden rule for both? The oil must be completely cool before it goes anywhere near your trash bin. This is non-negotiable if you want to avoid a greasy, dangerous mess.
The Chill and Scrape Method
This trick works best for fats that get solid when they're cold, like bacon grease, lard, or coconut oil.
After you're done cooking, let the pan cool way down on the stovetop. Once it’s cool enough to touch, pop it in the fridge. In a few hours, the oil will harden into a solid disk. From there, you just grab a spatula and scrape the whole thing right into the trash.
- The good: It's simple and doesn't require any extra jars or bottles.
- The bad: It can be a real mess, leaving a greasy film in your pan. Plus, it takes one of your pans out of commission while it chills in the fridge.
The Sealed Container Method
For liquid oils that won't solidify in the cold—like canola, vegetable, or peanut oil—you need a different game plan. The name of the game here is finding a sturdy, non-recyclable container with a lid that seals up tight. An old milk carton, a plastic takeout container, or a bottle with a screw-on cap are all good candidates.
Again, let the oil cool down completely. This is so important. Pouring even slightly warm oil into a plastic container can warp or melt it, and you'll have an epic disaster on your hands. Once it's cool, carefully pour the oil into your container, seal it up tight, and toss the whole thing in the garbage.
A word of caution: If that container isn't sealed perfectly, it can leak all over your trash can. That attracts pests and creates a nasty goo that can seep out of landfills and into the soil.
These traditional disposal methods really shine a light on a bigger problem. In Europe, the demand for used cooking oil to make biofuels is massive—around 130,000 barrels per day, which is eight times more than what's actually collected. While a country like Spain recycles 72% of its commercial cooking oil, only a tiny 5% from households gets captured. That’s a huge gap. You can read more about these unsustainable oil demand trends on transportenvironment.org.
While these old-fashioned methods work, they often mean more cleanup and a higher chance of making a mess. It's a good reminder of why products like FryAway, designed specifically for oil disposal, are often the smarter, cleaner choice for a hassle-free kitchen.
When to Reuse or Recycle Your Cooking Oil
Before you jump straight to getting rid of your cooking oil, it's worth asking a simple question: can I use it again? Tossing oil after just one fry isn't always necessary. With a bit of care, you can often get a second or even a third use out of it, which is great for your wallet and even better for reducing waste.
The secret is all in the prep. Once you're done frying, let the oil cool down completely. Then, strain it through a fine-mesh sieve or a couple of layers of cheesecloth to get rid of all those leftover food particles. It's those little bits and pieces that tend to burn and make your oil turn rancid faster than it should.
Signs Your Oil Is Ready to Go
So, how do you know when your oil has officially reached the end of the road? Your own senses are actually the best tools for the job. After you’ve strained the cooled oil, give it a quick once-over before you put it away.
It's time to dispose of it if you notice any of these tell-tale signs:
- It looks dark or cloudy. Fresh oil usually has that nice clear, golden look. It naturally darkens with each use, but once it gets murky, it's done.
- It smells rancid or just "off." If the oil has lost its neutral smell, that off-putting flavor is going to transfer right into your next meal.
- It foams up a lot when you heat it. A little bubbling is normal, but if you see a thick layer of foam on the surface, that's a clear sign the oil's structure has broken down.
If you spot any of these, don't risk it—it's time to toss that oil using a solidifier like FryAway for the safest disposal. You can learn more about the most eco-friendly cooking oil disposal technique to make sure you're handling it responsibly.
Giving Your Oil a Second Life Through Recycling
What if your oil is past its prime for cooking, but you want a greener option than just throwing it in the trash? Recycling is a fantastic choice. Used cooking oil is actually a pretty valuable resource; it can be converted into biodiesel, which is a renewable fuel that helps cut down on greenhouse gas emissions.
To find a collection center near you, a good first stop is your city or county's waste management department website. Many of them have dedicated drop-off points specifically for used cooking oil.
This decision tree gives a great visual of the simple choices you have when dealing with used oil.
As the infographic makes clear, whether you're chilling it to scrape later or pouring it into a container, the first step is always to let that oil cool down completely.
This isn't just a local thing; it's a growing global movement. In Asia, for example, collecting used cooking oil is becoming more common thanks to government programs and public awareness. China's market for recycled cooking oil is expected to hit $1.03 billion by 2025, with the entire Asia Pacific region seeing major growth.
Pro Tip: When you're saving up oil for recycling, pour the completely cooled liquid into a sturdy container with a screw-on lid, like an old plastic jug or bottle. Label it clearly so no one mistakes it for something else, and keep it in a cool, dark spot until you're ready to make a trip to the drop-off center.
Fried Recipes That Make Cleanup Worthwhile
Once you realize how simple disposing of used vegetable oil can be with a product like FryAway, a whole world of incredible food opens up. Frying doesn't have to be a chore you dread. When you have a plan for the aftermath, that crispy, golden-brown perfection is something you can easily whip up at home.
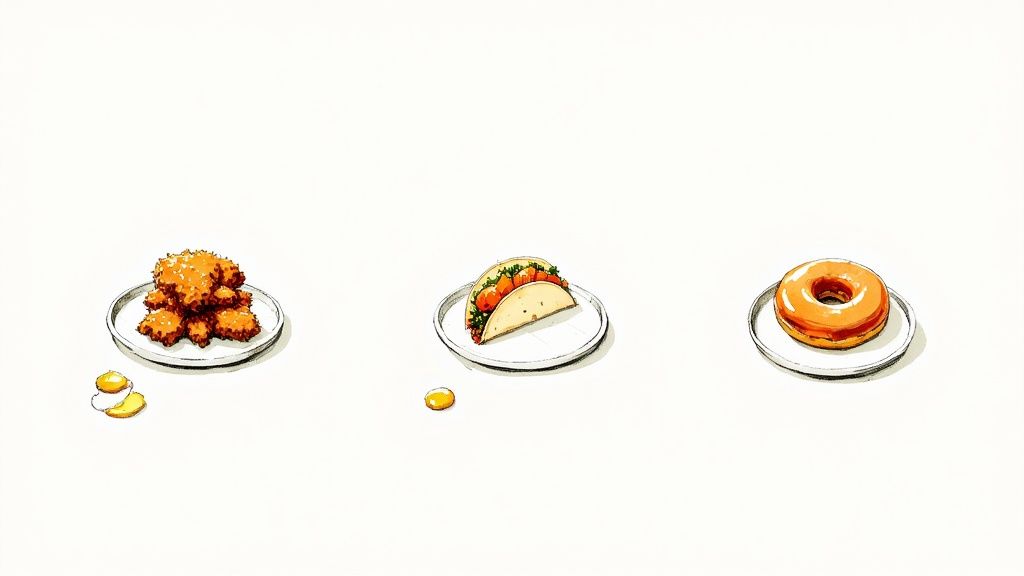
Here are three classic fried recipes that are absolutely worth making, especially when you know the greasy cleanup will be a non-issue.
Crispy Southern Fried Chicken
You just can't beat this comfort food icon. We're talking unbelievably juicy chicken on the inside with that perfectly seasoned, crunchy crust you crave.
What You'll Need:
- Chicken: 1 whole chicken (about 3-4 lbs), cut into 8 pieces
- Buttermilk Brine: 2 cups buttermilk, 1 tbsp salt, 1 tsp black pepper, 1 tsp paprika
- Flour Dredge: 2 cups all-purpose flour, 2 tbsp cornstarch, 2 tsp salt, 1 tsp black pepper, 1 tsp garlic powder, 1 tsp onion powder
- Cooking Oil: 4-6 cups of peanut or canola oil
How to Make It:
First, get your brine ready. Mix the chicken pieces and all the buttermilk brine ingredients together in a large bowl. Cover it up and pop it in the fridge for at least 4 hours—but overnight is even better.
When you're ready to cook, whisk together the flour, cornstarch, and all the seasonings for the dredge in a separate bowl.
Heat your oil in a heavy-bottomed pot or Dutch oven until it reaches 350°F (175°C). Take the chicken out of the brine, let the extra liquid drip off, and then dredge each piece thoroughly in the flour mix. Make sure every nook and cranny is coated.
Carefully place the chicken in the hot oil, working in batches so you don't overcrowd the pot. Let it fry for 6-8 minutes per side until it's a beautiful golden brown and cooked all the way through. All that's left is to drain it on a wire rack.
Beer-Battered Fish Tacos
These tacos are light, crispy, and bring that seaside-shack flavor right into your kitchen. The secret is the beer batter, which creates an impossibly airy crust that’s the perfect match for flaky white fish.
What You'll Need:
- Fish: 1 lb of firm white fish fillets (cod or tilapia work great), cut into strips
- Batter: 1 cup all-purpose flour, 1 tsp baking powder, 1/2 tsp salt, 1 cup of cold beer (a light lager is perfect)
- For Serving: Corn tortillas, shredded cabbage, pico de gallo, and a good cilantro-lime crema
- Cooking Oil: 4 cups of vegetable or canola oil
How to Make It:
Start by heating your oil in a pot to 375°F (190°C).
In a bowl, whisk the flour, baking powder, and salt. Slowly pour in that cold beer, mixing just until it comes together. Don't worry about a few lumps; that's actually a good thing.
Pat your fish strips dry with a paper towel, dip each piece into the batter, and let the excess drip off.
Fry the fish in batches for about 2-3 minutes per side, or until the batter is a deep, satisfying golden brown. Drain them on a plate lined with paper towels, assemble your tacos, and serve immediately.
Classic Homemade Glazed Doughnuts
Is there anything better than a warm, freshly made doughnut? This recipe makes a soft, pillowy treat that practically melts in your mouth, all finished with a simple, sweet glaze.
What You'll Need:
- Doughnuts: 2 ¼ tsp active dry yeast, ½ cup warm milk, ¼ cup sugar, 2 large eggs, ⅓ cup melted butter, 2 ½ cups all-purpose flour, ½ tsp salt
- Glaze: 2 cups powdered sugar, ¼ cup milk, 1 tsp vanilla extract
- Cooking Oil: 6-8 cups of vegetable oil
How to Make It:
First, wake up the yeast in the warm milk. Then, mix in the sugar, eggs, and butter. Slowly add the flour and salt until you have a soft dough. Knead it for 5 minutes, then let it rise in a warm spot for 1-2 hours until it's doubled in size.
Roll out the dough, cut out your doughnut shapes, and let them rest for another 30 minutes.
Get your oil heated to 365°F (185°C) in a large pot. Fry the doughnuts for just 1-2 minutes per side until they're golden. Pull them out and let them cool just a bit.
While they're cooling, whisk the glaze ingredients together. Dip each warm doughnut into the glaze and set them on a wire rack to let the magic happen.
After you've cooked up any of these amazing dishes, the cleanup is the same easy routine. Turn off the heat and let FryAway do the heavy lifting. 1) Sprinkle and Stir the powder into the hot oil. 2) Cool Down and watch it solidify. 3) Toss the hardened puck right into your household trash. Seriously, it's that simple.
Common Questions About Frying Oil Disposal
Even when you know the best ways to get rid of used cooking oil, a few questions always seem to pop up. Let's walk through some of the most common ones I hear, so your kitchen cleanup can be safe, simple, and totally mess-free.
How Many Times Can I Reuse Frying Oil?
Before you even think about tossing it, it’s worth asking if your cooking oil has another round left in it. Reusing oil is a great way to save a little money and cut down on waste.
As a general rule of thumb, you can safely reuse vegetable oil two to three times, but that really depends on what you cooked and how you stored it.
The key is to let the oil cool down completely, then strain it through a fine-mesh sieve or a few layers of cheesecloth. This gets rid of all the little food particles that make oil go bad fast.
Once it's strained, take a good look and a quick sniff. It’s time to get rid of the oil if you notice:
- A dark, cloudy appearance: Fresh, usable oil should be clear and golden.
- A rancid or "off" smell: If it smells funky, it’s going to make your food taste funky.
- Excessive foaming when heated: A bunch of foam bubbling on the surface is a sure sign the oil's structure has broken down.
Should I Put Used Vegetable Oil in My Compost?
This is a big one, and the answer is a hard no. I know it seems like a natural, eco-friendly move, but adding used cooking oil to a compost pile is one of the worst things you can do for it.
Oil is hydrophobic—it repels water. Pouring it on your compost creates a greasy, waterproof barrier that chokes out the air and moisture your compost pile needs to break down organic matter. It's also a magnet for pests like rodents and insects, and trust me, it will start to smell absolutely awful as it goes rancid.
Just stick to tossing it in the trash. Using FryAway to solidify it first is the cleanest and safest way to do this.
How Can I Cool Down Hot Oil Faster?
Waiting for a big pot of hot oil to cool feels like it takes an eternity, right? Patience is always the safest bet, but there are a few things you can do to nudge the process along.
First, whatever you do, never add water or ice to hot oil. This will cause a violent, dangerous eruption of scalding liquid. Don't do it.
Instead, once the burner is off, you can carefully move the pot to a cool burner or place it on a heat-resistant surface like a metal trivet. This helps the heat dissipate a bit faster. If you're really in a pinch, you can even point a small fan at the surface of the oil to increase airflow and speed up cooling.
The fastest and most efficient step after frying is also the simplest. Once the heat is off, just add FryAway directly to the hot oil. It works as the oil cools, so by the time it’s safe to handle, it's already solidified and ready to be tossed.
And hey, accidents happen. If you do end up with a splash on your clothes while handling the oil, it helps to know how to remove oil stains from clothing so your favorite shirt isn't ruined.
Ready to make your post-frying cleanup completely mess-free? With FryAway, you can say goodbye to greasy jars and clogged pipes forever. Just sprinkle it into hot oil, let it cool, and toss the solid puck in the trash. Discover the easiest way to handle used cooking oil at https://fryaway.co.