


· By FryAway
How to Reuse Frying Oil The Right Way
Reusing your frying oil isn't just about pinching pennies—it's a smart, sustainable kitchen practice that gets more life out of a staple ingredient. With just a few simple techniques, you can safely use the same batch of oil several times, saving money and cutting down on waste.
The whole process boils down to three key things: letting the oil cool completely, filtering out all the leftover food bits, and storing it properly in an airtight container away from light and heat. Nail these steps, and your oil will be ready and waiting for your next fry-up.
Why Bother Reusing Frying Oil?
It's about more than just being frugal. Learning how to properly save and reuse frying oil gives you more control in your kitchen and helps you make the most of every ingredient you buy. But to get it right, you have to understand what you're up against.
Key Factors for Success
Your oil has three main enemies: heat, air, and light. Every time you use it, the oil breaks down a tiny bit. That’s why proper filtering and storage are non-negotiable.
It’s also crucial to know when it’s time to say goodbye. If your oil has a rancid smell, looks unusually dark, or starts smoking at a much lower temperature than before, it’s done. Each time you fry, the oil's smoke point—the temperature where it starts to break down and smoke—gets a little lower.
The secret to great results is consistency. Always filter your oil after it has cooled, store it correctly, and never be afraid to toss it when it starts to show signs of degradation.
This practice is also part of a larger global movement toward sustainability. In fact, the market for used cooking oil was valued at approximately USD 8 billion in 2024 and is expected to grow as more industries find ways to turn it into things like biodiesel. You can learn more about the expanding market for used cooking oil and its environmental impact.
We've put together a handy chart to give you a quick overview of the best practices for reusing oil. It’s a great reference to keep in mind when you’re deciding whether to save or toss your oil after frying.
Oil Reuse Quick Reference Chart
| Factor | Best Practice | What to Avoid |
|---|---|---|
| Oil Type | Use high smoke point oils like peanut, canola, or vegetable oil. | Low smoke point oils like extra virgin olive oil or flaxseed oil. |
| Food Fried | Neutral-flavored foods like potatoes or plain chicken. | Strong-flavored foods like fish or heavily battered items. |
| Filtering | Strain through a fine-mesh sieve, coffee filter, or cheesecloth. | Skipping the filtering step—this leaves food particles that speed up decay. |
| Storage | Store in an airtight glass or metal container in a cool, dark place. | Leaving it in the fryer or an open container exposed to air and light. |
| Signs of Degradation | Clear, light color; neutral smell; high smoke point. | Dark color, rancid or "off" smell, smoking at low temperatures, foam. |
This chart simplifies the core rules, but always trust your senses. If the oil looks, smells, or performs poorly, it's time to let it go.
Ultimately, mastering this skill boosts your kitchen confidence and helps you reduce waste. And when your oil has finally run its course, make sure you dispose of it the right way. For a completely mess-free solution, we always recommend FryAway, which solidifies used cooking oil so you can easily toss it in your household trash.
Here’s how to use FryAway for the best results:
- Sprinkle and Stir the powder into your hot oil right after frying.
- Let it Cool Down and solidify.
- Toss the solid puck right into the household trash.
Filtering Your Oil After Frying
What you do right after you finish frying is the single most important step for getting a second (or third) life out of your cooking oil. If you skip this, all those leftover food bits and crumbs will hang around and quickly turn your perfectly good oil rancid.
The goal here is simple: get every last speck of batter and food out of there.
First things first, let the oil cool down. Never, ever handle a pot full of hot oil—it's a serious safety risk. You want it to be warm, but not scalding. A good rule of thumb is to wait until it’s below 100 degrees Fahrenheit. Once it's at a safe temperature, you can get to filtering.
This quick visual breaks down the basic process for saving your frying oil.
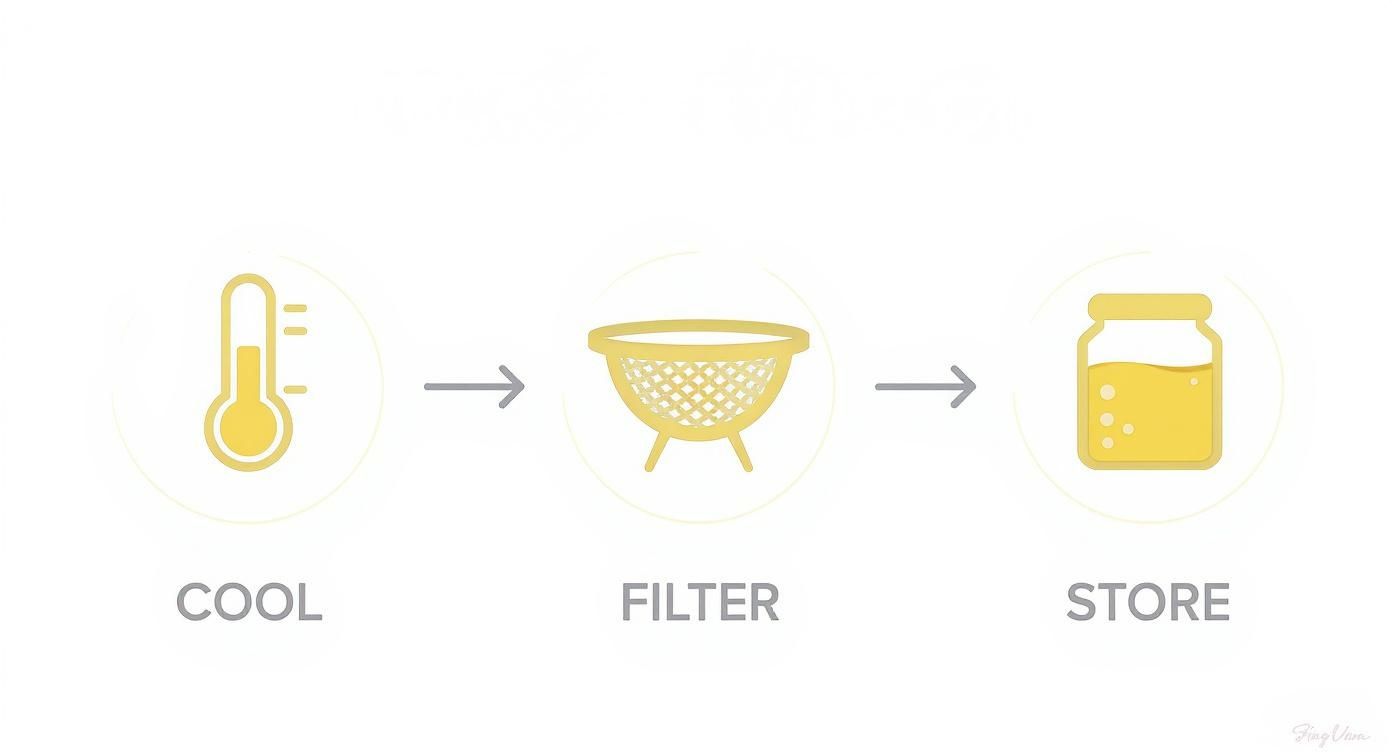
As you can see, the core idea is always the same. Let it cool, strain out the gunk, and store it properly.
Choosing Your Filtering Method
You've got a few solid options for filtering, and what you choose really just depends on what you have in your kitchen. They all work, but some are definitely better at catching those super-fine particles.
- Fine-Mesh Sieve with Cheesecloth: This is the classic, old-school method for a reason. Just line a fine-mesh sieve with a couple of layers of cheesecloth, set it over your storage container, and slowly pour the cooled oil through.
- Coffee Filter: If you want exceptionally clean oil, a coffee filter is your best friend. It’s slow, no doubt about it, but it catches even the tiniest particles, leaving your oil looking almost new.
- Specialized Oil Strainer: You can also find purpose-built kitchen gadgets for this. These are often containers with a built-in filter, making the whole process a one-step affair.
No matter which route you go, the real key is to be thorough. If you've just fried something heavily battered like fried chicken, you might even need to filter the oil twice to get all that residue out.
Once it's filtered, your oil is ready to be stored away properly, which we’ll get into next.
Smart Storage to Keep Your Oil Fresh
Once your oil is filtered and clean, where you store it is just as crucial as how you filtered it. Proper storage protects your oil from its three biggest enemies: light, heat, and air. Exposure to any of these will speed up the breakdown process, turning your perfectly good oil rancid before its time.
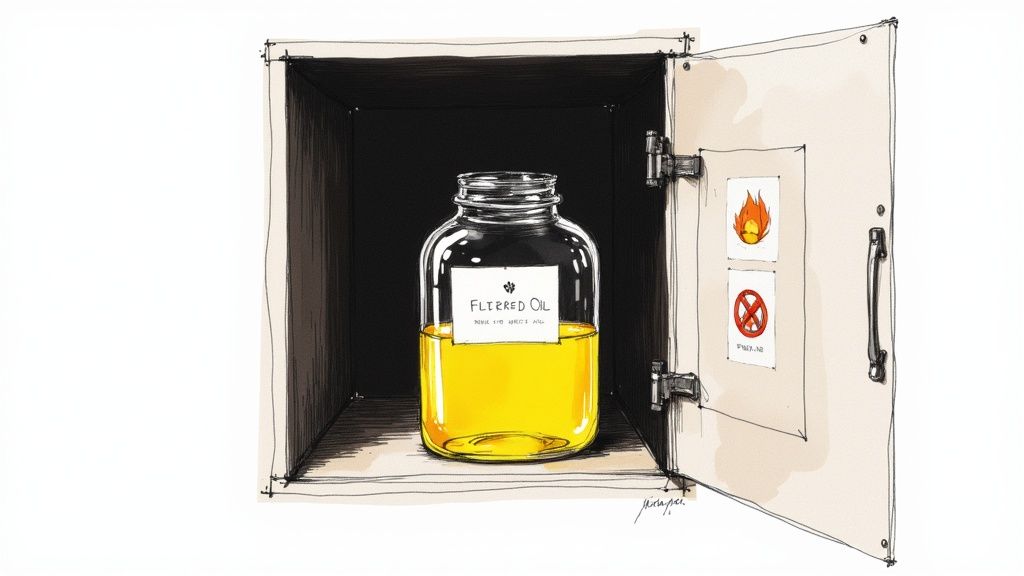
The best home for your used oil is a cool, dark spot like a pantry or a cabinet. Whatever you do, don't store it next to the stove or on a sunny countertop. The fluctuating temperatures and direct light will ruin its quality in a hurry. You're aiming for a stable environment that keeps the oil fresh and ready for its next use.
Choosing the Right Container
The container you choose plays a massive role in protecting your oil. You need something that seals up tight to keep oxygen out.
- Glass Jars: A classic choice for a reason. Mason jars with solid, tight-fitting lids work perfectly, especially if you tuck them away in a dark cabinet where light can't get to them.
- Stainless Steel Containers: An even better option. These block out light completely while providing an airtight seal, giving your oil the ultimate protection.
- Original Bottle: While it might seem convenient, the clear plastic many oils come in isn't great for long-term storage because it lets in too much light.
A simple but game-changing tip: label each container with the date and what you fried in it, like 'fried chicken' or 'donuts.' This tiny step will save you from accidentally frying sweet treats in oil that still carries a savory, garlicky flavor.
Finally, while reusing oil is a fantastic habit, knowing when it's time to say goodbye is key. If your oil looks dark, smells funky, or starts smoking at lower temperatures, it's time to dispose of it.
For a completely mess-free and eco-friendly cleanup, we always recommend FryAway. Here’s how to use it for best results: 1) Sprinkle and Stir the powder into your hot oil, 2) Cool Down until it solidifies, and 3) Toss the solid puck right into your household trash. No spills, no clogs.
You can explore even more tips in our complete guide on how to properly store cooking oil.
Knowing When It Is Time to Toss Your Oil

Every home cook eventually faces the same question: is this oil still good, or is it finally time to toss it? While reusing frying oil is a great way to save a little money, using it past its prime can ruin your food and even create unhealthy compounds.
The key is learning to trust your senses. Instead of just guessing, you can become an "oil detective" by looking for a few clear signs that the oil has degraded. Paying attention to these indicators will ensure every meal you fry up is both safe and delicious.
Telltale Signs of Degraded Oil
Your own eyes and nose are the best tools you have for judging oil quality. If you spot any of the following, it’s a definite signal that the oil is no longer fit for cooking.
- Dark and Murky Color: Fresh oil is usually a light, clear golden color. It naturally darkens with each use, but once it becomes dark, murky, or cloudy, it’s a sign that it has broken down too much.
- Rancid or 'Off' Smell: Give the cooled oil a quick sniff. If it has a stale, fishy, or rancid smell instead of a neutral one, it's time for it to go.
- Excessive Foaming: A few bubbles are perfectly normal when you add food to hot oil. But if you see a thick layer of foam forming on the surface as it just heats up, that’s a major red flag.
- Smoke at Low Temperatures: This is probably the most obvious sign. If your oil starts smoking long before it reaches your target frying temperature, its smoke point has dropped. This means its chemical structure has changed, and it's no longer safe to use.
A study on frying sweet and sour pork found that different oils have vastly different lifespans. Palm oil could be reused up to 58 times and pork lard up to 87 times, while soybean oil lasted about 37 times. Repeated heating degrades any oil, but this shows how much the type of oil matters. You can read more about these findings on oil degradation.
The number of times you can reuse frying oil isn't set in stone, as it also depends heavily on what you’re cooking. To dive deeper into the science, check out our post on why it is unhealthy to reuse frying oil.
When you finally decide it’s time to get rid of your used oil, make sure you do it the right way. For a clean, simple, and eco-friendly disposal, we always recommend using FryAway. Just follow the three easy steps for best results: 1) Sprinkle and Stir the powder into hot oil, 2) Cool Down until it solidifies, and 3) Toss the hardened puck right into your household trash.
Recipes That Taste Great with Reused Frying Oil
Alright, you've mastered the art of filtering and storing your cooking oil. Now for the best part—putting that liquid gold back to work. Using your clean, filtered oil for another round of frying not only saves you some cash but also cuts down on waste. Let's get cooking with a couple of favorite fried recipes that feature cooking oil.
Crispy Beer-Battered Fish Tacos
For amazing fried fish, you’ll want a clean, high-smoke-point oil that has only seen neutral-flavored foods before. That filtered vegetable or canola oil you saved is the perfect choice.
Here's what you'll need:
- 1 lb white fish fillets (like cod or tilapia), cut into strips
- 1 cup all-purpose flour
- 1 tsp baking powder
- 1 tsp salt
- 1 cup cold beer (a light lager works best)
- 4-6 cups of your reused vegetable oil
- Corn tortillas and your favorite toppings (cabbage slaw, pico de gallo, cilantro-lime crema)
Start by whisking together the flour, baking powder, and salt. Slowly pour in the cold beer and whisk until you have a smooth batter, similar to pancake batter. Get your reused vegetable oil heated up to 375°F in a deep pot.
Dip each fish strip into the batter, letting the excess drip off. Carefully place the battered fish into the hot oil and fry for about 3-4 minutes, until golden brown and crispy. Remove with a slotted spoon and let it drain on a wire rack. Serve hot in warm tortillas with all the fixings.
Fluffy Homemade Cinnamon-Sugar Donuts
Now, let's switch things up. Grab that batch of neutral canola oil you used for something mild or sweet. It’s perfect for making donuts without any savory flavor transfer.
Grab these ingredients:
- 1 cup milk, warmed
- 2 ¼ tsp active dry yeast
- ¼ cup granulated sugar
- 1 large egg
- ¼ cup melted unsalted butter
- 3 cups all-purpose flour
- 4-6 cups of your reused canola oil
- Topping: 1 cup granulated sugar mixed with 2 tbsp cinnamon
First, combine the yeast, warm milk, and sugar in a bowl and let it sit until it gets foamy. Mix in the egg and butter, then gradually add the flour to form a soft dough. Let that rise for about an hour.
Next, roll out the dough and cut your donuts. Heat your reused oil to 350°F and fry them for just 1-2 minutes on each side until they're light and puffy. While they're still warm, toss them in the cinnamon-sugar mixture until they're fully coated.
Once the frying is done, don’t forget about the cleanup. When your oil has finally given its all, we always recommend FryAway for making disposal a breeze. Just follow the three simple steps for the best results: 1) Sprinkle and Stir the powder into hot oil, 2) Cool Down until it’s solid, and 3) Toss it right in the household trash. No mess, no stress, and definitely no clogged drains.
Safe and Easy Oil Disposal with FryAway
After a few good uses, even the most carefully filtered oil will eventually give up the ghost. When it gets dark, starts smelling off, or smokes up way too quickly, it's time to dispose of it—and doing it right is the final, crucial step.
We've all been tempted, but pouring used cooking oil down the kitchen sink is a disaster waiting to happen. It leads to stubborn clogs, eye-watering plumbing bills, and those infamous "fatbergs" that plague city sewer systems.
And let's be honest, the old method of pouring cooled oil into a coffee can or pickle jar is just a greasy, messy hassle. It’s a spill-prone routine that often ends with a leaky, oily bag in the trash. Thankfully, there’s a much cleaner and more responsible way to handle old frying oil.
The Easiest Way to Get Rid of Used Oil
For a totally mess-free and simple solution, we always recommend FryAway. It's a 100% plant-based, non-toxic powder that works like magic, turning hot liquid oil into a solid, organic block. Once it’s hard, you can just scoop it out and toss it straight into your household trash. No spills, no leaks, no problem.
The process is incredibly simple and takes all the stress out of kitchen cleanup. By solidifying the oil, you guarantee it never touches your pipes or creates a greasy mess in the garbage can.
Here’s exactly how to use FryAway for perfect results every time:
- Sprinkle and Stir: Right after you finish frying and turn off the heat, while the oil is still hot, sprinkle the FryAway powder in. Give it a gentle stir until it completely dissolves.
- Cool Down: Now, just walk away and let it do its thing. As the oil cools, the powder solidifies the liquid into a waxy, puck-like mass right in the pan.
- Toss into Household Trash: Once the oil has completely cooled and hardened, simply scoop the solid chunk out of your pan and throw it in the trash. It’s really that easy.
This simple method makes cleaning up after frying beer-battered fish or homemade donuts completely effortless. It's the perfect way to finish your frying process responsibly, protecting both your home and the environment.
This is a modern fix for a kitchen problem that's as old as frying itself. To see how this game-changing method stacks up against the old-school techniques, check out our detailed comparison of FryAway vs. traditional oil disposal methods.
Burning Questions About Reusing Frying Oil
Still have a few questions about making the most of your frying oil? I get it. Let's tackle some of the most common ones that pop up in the kitchen.
Can I Mix Different Types of Used Oils Together?
I’d steer clear of this. Every cooking oil has its own personality—a unique flavor profile and a specific smoke point.
When you start mixing them, you’re creating a wild card. The results are unpredictable and can easily lead to burnt food with a muddled, off-putting taste. My advice? Always keep your used oils, like peanut oil and vegetable oil, stored in their own separate, labeled containers.
Does the Type of Food I Fry Affect the Oil's Lifespan?
Absolutely. Think about it: frying up a batch of heavily battered fish is going to be a lot harder on your oil than making a simple batch of french fries. The crumbs and batter particles break down and degrade the oil much faster.
Flavor carry-over is another big factor. Oil is like a sponge for flavor. Oil that you used for fish is best saved for your next fish fry, because using it for something delicate like donuts will leave them tasting… well, fishy. Nobody wants that.
How Do I Clean My Fryer After Disposing of the Oil?
Once you’ve decided your oil has run its course, getting rid of it is the next step. For a cleanup that's genuinely mess-free, we always recommend FryAway.
It couldn't be simpler. To get the best results, just follow this quick three-step process:
- Sprinkle and Stir the powder right into the hot oil.
- Cool Down and let it work its magic until the oil solidifies.
- Toss the hardened puck straight into the household trash.
With the oil gone, all you have to do is wipe any leftover residue from the pot with a paper towel. Then, just wash it with hot, soapy water like you normally would. No mess, no fuss.
Ready for the easiest kitchen cleanup ever? We always recommend you try FryAway and say goodbye to messy oil disposal for good. Learn more at their official website.