


· By FryAway
How to Avoid Oil Spills A Proactive Kitchen Guide
Learning how to avoid oil spills is about more than just dodging a cleanup chore. A slick floor isn't a minor inconvenience—it's a genuine safety hazard. And when that oil is near a heat source, things can get dangerous fast. Let's be honest, preventing spills in the first place is one of the most important parts of cooking safely at home.
The Real Risks of Kitchen Oil Spills
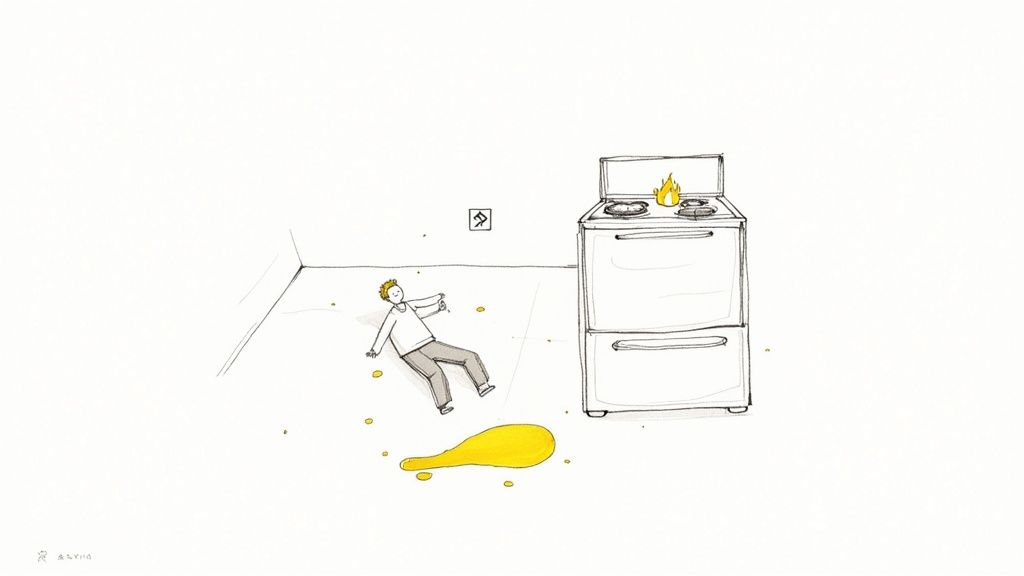
What looks like a small cooking oil spill can spiral into a big problem for any household. The most immediate threat is a nasty slip-and-fall. A thin, almost invisible film of oil on a tile or linoleum floor essentially turns it into an ice rink.
Beyond the risk of injury, there's the very real danger of fire. If spilled oil splatters or spreads near an open flame, a hot burner, or even a pilot light, it can ignite in a heartbeat. Grease fires are incredibly hard to put out and can escalate with terrifying speed, threatening your home and everyone in it.
To put it in perspective, here are the most common dangers you're trying to avoid when handling cooking oil.
Common Oil Spill Risks in the Kitchen
| Hazard Type | Potential Consequence | Prevention Focus |
|---|---|---|
| Physical Safety | Severe slip-and-fall injuries from slick floors. | Maintaining a clean, dry work area and immediate spill cleanup. |
| Fire Hazard | Ignition of spilled oil near burners or heat sources. | Controlling oil splatters and keeping heat sources clear. |
| Plumbing Damage | Clogged pipes and sewage backups from improper disposal. | Never pouring oil down the drain; using solidifiers. |
| Environmental Harm | Formation of "fatbergs" in sewer systems, water pollution. | Adopting eco-friendly disposal methods, like solidification. |
These risks highlight why a proactive approach to handling and disposing of cooking oil is so crucial for a safe and functional kitchen.
Environmental and Plumbing Damage
The danger doesn't stop when the cooking is over. Pouring used cooking oil down the drain might seem like the easy way out, but it's a recipe for disaster. As that hot oil travels down your pipes, it cools, congeals, and clings to the interior walls, trapping food scraps and other gunk.
Before you know it, these buildups can grow into massive clogs known as fatbergs. These monsters can cause raw sewage to back up right into your home and contribute to huge blockages in the city's sewer system, leading to expensive repairs for everyone. You can learn more about how these clogs form and why they're such a big deal in our guide on what fatbergs are.
A proactive approach to spill prevention and disposal isn't just about being neat. It's a fundamental skill for keeping your home safe, protecting your plumbing, and minimizing your impact on the environment.
A Smarter Disposal Solution
Globally, the emergency spill response market is projected to hit USD 33.7 billion by 2025, which just goes to show how seriously spills are taken on a larger scale. This growth is all about finding better, faster ways to contain and clean up messes.
For home cooks, the smartest solution is often the simplest. Using a product like FryAway completely sidesteps the risk of post-cooking spills. It's a plant-based powder that magically solidifies used cooking oil, making cleanup a total breeze.
The whole process is foolproof:
- Sprinkle and Stir: Just sprinkle the FryAway powder into the hot oil and give it a stir until it dissolves completely.
- Cool Down: Let the pan cool down. You'll see the oil transform into a solid, waxy puck right before your eyes.
- Toss into household trash: Once it's hard, you can easily scoop the solid oil out and toss it straight into your household garbage.
This method completely eliminates messy liquid oil, so it never gets a chance to become a hazard in your kitchen.
Setting Up Your Kitchen for Spill-Free Frying
The best way to handle oil spills is to stop them from ever happening. A little prep work before you even think about turning on the heat is your single greatest defense against kitchen messes and dangers. It’s not about following a rigid checklist, but more about creating a calm, efficient workspace where you’re in total control.
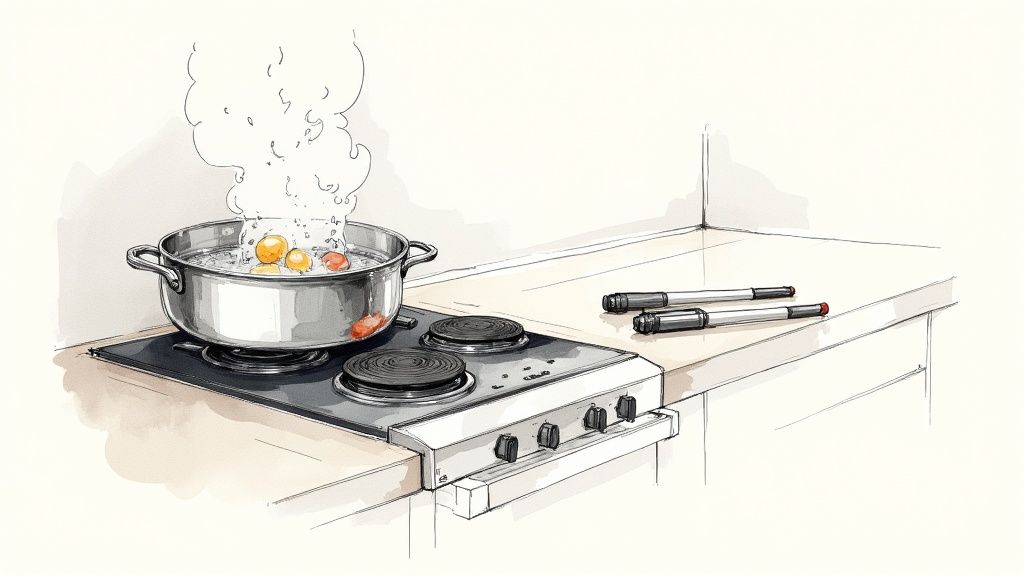
It all starts with picking the right pot for the job. You’ll want something deep and heavy-bottomed, like a good Dutch oven or a sturdy stockpot. These types of pots give you stability on the stovetop and distribute heat far more evenly, which helps prevent the sudden hot spots that cause oil to splatter violently.
But the most critical part? Pay attention to the size of your pot. You should never fill it more than halfway with oil. A good rule of thumb is to leave at least 3-4 inches of space at the top. Think of this as your safety buffer—it's what contains the bubbling and expansion when you add food, stopping a dangerous boil-over in its tracks.
Creating a Safe Frying Zone
Your immediate cooking area should be a dedicated, clutter-free zone. Before you do anything else, clear the counters of anything that isn't essential for frying—stray bowls, utensils, your phone, you name it. This simple habit dramatically cuts down the risk of knocking something into the hot oil.
Always place your pot on a stable, level burner. If you can, use one of the back burners. This small adjustment makes it much harder for you to accidentally bump the handle or for a curious child or pet to reach up and grab it.
This idea of prevention isn’t just for home cooks. On a global scale, the oil spill management market hit a value of about USD 151.6 billion in 2024. A huge chunk of that goes toward technologies designed to stop disasters before they even start. It’s all about being proactive, not reactive.
Gathering Your Essential Tools
Fumbling around for a tool mid-fry is a recipe for disaster. Having all your equipment ready and within arm's reach is non-negotiable for a safe frying session. Lay everything out before you even pour the oil.
Here are the absolute must-haves:
- A spider strainer or a long slotted spoon: These are perfect for gently lowering food into the hot oil and fishing it out without causing a huge splash.
- Long-handled tongs: Your go-to for turning individual pieces of food while keeping your hands at a safe distance.
- A wire rack placed over a baking sheet: This is the ideal landing spot for your freshly fried food. It lets excess oil drip away, keeping everything crisp.
Getting your tools in order is a cornerstone of setting yourself up for success. For a deeper dive, check out our guide on the must-have kitchen essentials every cook needs.
And don’t forget the bigger picture. A clean kitchen is a safe kitchen. This extends to things you might not think about, like grease buildup in your range hood. Regular residential kitchen hood cleaning can prevent fire hazards, adding another layer of safety to your cooking routine. When your space is clean, organized, and properly equipped, frying feels less like a risk and more like the controlled culinary art it should be.
Mastering Your Frying Technique
With a safe frying station set up, it's time to focus on the action—the cooking itself. Your technique is what stands between a perfectly crisp meal and a dangerous, splattery mess. A calm, mindful approach transforms frying from a chaotic risk into a controlled culinary skill.
So, what causes those violent hisses and pops? The answer is simple: moisture. When water hits hot oil, it instantly turns to steam and expands like crazy, forcing oil to jump right out of the pot. This is why properly prepping your ingredients is a non-negotiable step to keeping things safe.
Keep Your Ingredients Dry
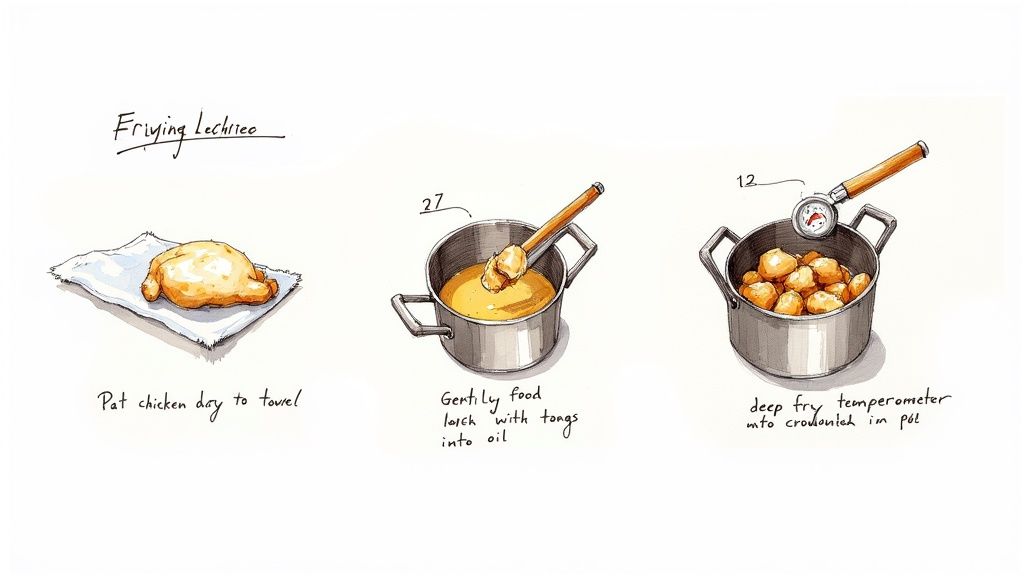
Before a single piece of food touches that hot oil, it needs to be as dry as you can get it. Whether you're making fried chicken, french fries, or battered veggies, take a moment to pat everything down with paper towels. You’d be surprised how much of a difference this tiny step makes.
Be extra careful with frozen foods like onion rings or fries. Those ice crystals are just frozen water waiting to cause a ruckus. Always follow the package directions—tossing them in while still frozen can cause major bubbling and a potential boil-over.
Lower Food Gently and Strategically
How you add food to the pot is just as critical as its moisture content. Never, ever drop or toss food into hot oil. It's a classic rookie mistake that displaces oil way too fast, creating a wave that can easily splash over the side.
Instead, grab a pair of long-handled tongs or a spider strainer and gently lower each piece into the oil. Make it a habit to place the food so it enters the oil away from you. That way, if a small splash does happen, it’s directed away from your body.
The goal is to introduce ingredients with minimal disturbance. A gentle, controlled entry keeps the oil calm and contained within the pot, significantly reducing the risk of a painful burn or a slippery spill on the floor.
Avoid Overcrowding the Pan
It's tempting to get it all done at once, but overcrowding the pan is a recipe for disaster. Shoving too much food in at the same time creates two big problems that dramatically increase the risk of an oil spill.
- Temperature Drop: A crowded pan makes the oil's temperature plummet. Not only does this lead to soggy, greasy food, but it also increases the chance of a boil-over as the oil struggles to get back up to heat.
- Lack of Space: Too much food physically displaces the oil, raising the level in the pot. As the ingredients bubble and release steam, that lack of headspace can quickly lead to an overflow.
Fry in small batches. This gives each piece plenty of space, maintains a stable oil temperature for crispier results, and allows the oil to bubble safely.
For ultimate control, use a deep-fry thermometer. It's what the pros do to maintain that perfect, consistent temperature from start to finish. This level of precision is fundamental to safe, effective frying and one of the best ways to keep spills out of your kitchen.
The Smartest Way to Dispose of Used Cooking Oil
So, you’ve just fried up something amazing. The food is perfect, but you're left staring at a pan full of hot, used cooking oil. This is the moment when things often go wrong. Trying to pour that sloshing, scalding liquid into a jar is a recipe for messy countertops, slick floors, and even nasty burns.
And whatever you do, don't pour it down the drain. That’s a one-way ticket to disastrous plumbing clogs. So, what’s the modern solution for dealing with oil after you’re done cooking? Simple: you turn it from a liquid into a solid.
That's where FryAway changes the game. It’s a 100% plant-based powder that makes solidifying used cooking oil unbelievably easy and safe. No more juggling hot grease—FryAway turns it into a solid puck you can toss right into your household trash.
How FryAway Prevents Disposal Spills
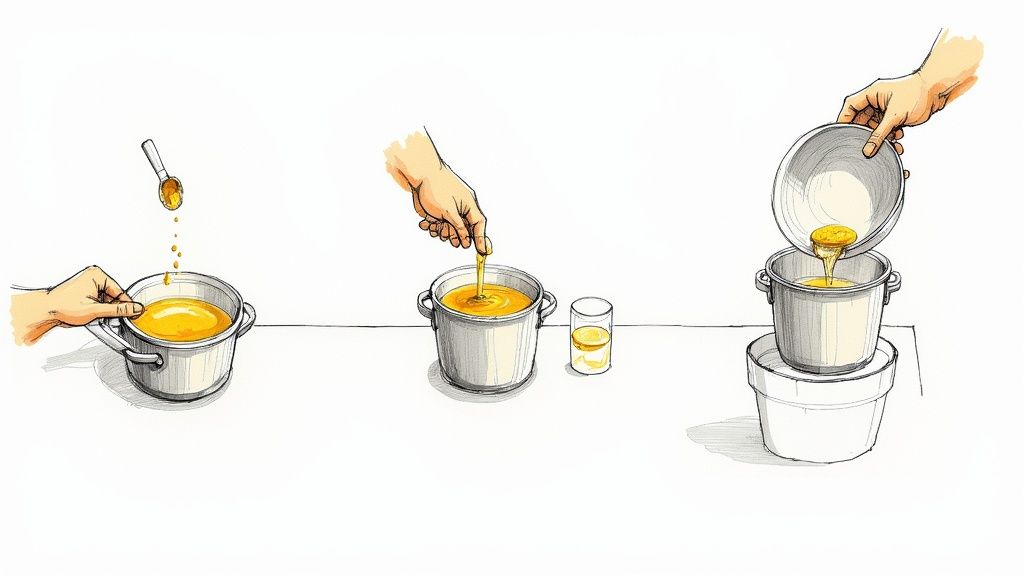
Using FryAway couldn’t be more straightforward, and it completely removes the risk of handling hot liquid oil. It’s all done in a few quick steps, right in the pan.
- Sprinkle and Stir: While the oil is still hot, just sprinkle the FryAway powder in. Give it a quick stir until it’s all dissolved.
- Cool Down: Now for the easiest part: walk away. Let the pan cool down completely. As it does, the oil will transform into a solid, waxy disk.
- Toss into household trash: Once it's hard, the solid puck scoops out cleanly. You can drop it right into your regular garbage bin. No liquid, no mess, no stress.
This simple routine is a cornerstone of smart, responsible kitchen cleanup. For a deeper dive into best practices, check out our complete guide on how to properly dispose of used cooking oil.
By solidifying the oil before it ever leaves the pan, you remove the riskiest step of the entire frying process—transferring hot liquid. This makes your kitchen safer and your cleanup effortless.
A Lesson in Prevention
Thinking ahead to manage oil is a strategy that works on a massive scale, too. Just look at the dramatic drop in oil spills from tankers since the 1970s. These spills have plummeted by over 90% globally, mostly thanks to smarter regulations and safer ship designs like double hulls. You can see the incredible progress for yourself in this data-driven report on Visual Capitalist.
Just as better technology prevents huge environmental disasters, FryAway prevents kitchen disasters. It's a tiny change to your cleanup routine that delivers a major upgrade in safety and convenience.
After you’ve nailed that perfect batch of crispy fried chicken or golden onion rings, the last thing you want is a dangerous mess. With FryAway, you can finally enjoy your favorite fried foods without dreading what comes after.
Fried Recipes to Perfect Your Spill-Free Skills
Alright, theory is one thing, but getting your hands dirty (or in this case, not getting them oily) is how you truly master a skill. The best way to build confidence and muscle memory for spill-free frying is to just get in the kitchen and cook.
These two classic fried dishes are perfect for the job. They're not just delicious; they force you to pay close attention to the very techniques we've been talking about. I’ve woven some safety prompts right into the steps to help reinforce those good habits, making clean, safe frying feel like second nature.
Let's get the oil hot.
Crispy Buttermilk Fried Chicken
This recipe is a masterclass in one of the most important parts of frying: temperature control. Keeping that oil at a steady, consistent heat isn't just the secret to a perfectly golden, crispy crust—it’s also how you prevent the dangerous boil-overs that happen when oil gets way too hot.
What You'll Need:
- 8 pieces of bone-in, skin-on chicken
- 2 cups buttermilk
- 2 cups all-purpose flour
- 2 teaspoons salt, 1 teaspoon black pepper, 1 teaspoon paprika
- 48 ounces (6 cups) of peanut or canola oil
Instructions:
Start by marinating the chicken in buttermilk for at least 4 hours. This is what makes it so tender.
In a shallow dish, mix your flour and seasonings together. Dredge each piece of chicken, making sure it’s completely coated, and then let it rest on a wire rack for about 15 minutes. This helps the coating stick.
Now, pour the oil into a large, heavy-bottomed pot. Remember to leave at least 3-4 inches of empty space at the top. Heat the oil to 350°F (175°C), and please, use a deep-fry thermometer. Guessing is not your friend here.
Safety Check: Time to fry. Gently lower 3-4 pieces of chicken into the hot oil, placing them so they move away from your body. This directs any potential splashes in the other direction.
Fry for 6-8 minutes per side until golden brown and cooked all the way through. Use tongs to remove the chicken and place it on a clean wire rack to drain.
Golden Beer-Battered Onion Rings
With this recipe, the big lesson is learning not to overcrowd the pan. It’s so tempting to throw everything in at once, but giving each onion ring its own space is absolutely essential for getting them crispy and, more importantly, preventing the oil level from rising to a dangerous point.
What You'll Need:
- 2 large sweet onions, cut into ½-inch rings
- 1 cup all-purpose flour
- 1 cup beer (a light lager works great)
- 1 teaspoon salt
- 4 cups of vegetable or canola oil
Instructions:
Get your oil heated to 375°F (190°C) in a deep, heavy pot.
While it's heating, whisk together the flour, salt, and beer in a bowl until you have a nice, smooth batter.
Dip a few onion rings into the batter, letting any excess drip off before they hit the oil.
Safety Check: This is key. Carefully place the battered rings into the oil one by one. Do not just dump them in. Fry in small batches of just 4-5 rings at a time to keep the oil from overflowing and the temperature from dropping.
Fry for about 2-3 minutes, flipping once, until they’re a deep golden brown.
Spill-Free Cleanup Is Key
Once you're done cooking and the oil is still hot, it's time for the final, crucial step. Using FryAway ensures a safe, mess-free finish. Simply Sprinkle and Stir the powder into the hot oil until it dissolves. Let it Cool Down completely, and watch it solidify. Finally, Toss the hardened puck directly into your household trash.
For anyone looking to expand their skills with less oil, exploring air fryer cooking techniques can be a fantastic way to practice crisping things up using a totally different method.
Have a Question? We've Got Answers
Even when you're careful, things can happen in the kitchen. Knowing how to react to a spill or how to use disposal tools correctly is the key to keeping things safe and clean. Here are a few common questions we hear all the time.
What Should I Do If an Oil Spill Happens Anyway?
First things first: turn off the heat immediately. This eliminates the risk of the spill turning into a fire.
Whatever you do, never use water on a grease spill. It’s a classic kitchen mistake that will cause the hot oil to splatter violently, spreading the mess and potentially a fire.
Instead, reach for baking soda, cornstarch, or salt and cover the spill generously. Give it about 15 minutes to soak everything up, then you can just sweep the mixture away. Make sure to follow up with a good degreasing cleaner to get rid of any slick spots left behind.
Can I Reuse Oil After Adding FryAway?
No, FryAway is designed for final disposal only. Once you stir the powder into hot cooking oil, it begins a process that turns the liquid into a solid for easy, mess-free removal. The oil is completely unusable for cooking after that.
The whole point of FryAway is to transform used liquid oil into a solid, scoopable mass. That way, you can toss it straight into your household trash without worrying about messy leaks or clogged pipes.
How Much FryAway Do I Need to Use?
That all depends on how much oil you're getting rid of. FryAway comes in different sizes, so whether you're cleaning up a little bacon grease or emptying a deep fryer, there’s an option for you.
A good rule of thumb is one scoop or packet for every four cups of oil. Always check the instructions on the package to make sure the oil solidifies properly into a hard puck once it cools. This simple three-step routine makes it foolproof every time.
- Sprinkle and Stir the powder into the hot oil.
- Cool Down completely and let it work its magic.
- Toss the hardened puck right into the trash.
It's truly the safest and cleanest way to wrap up a frying session, getting rid of any chance of a spill during cleanup.
Ready to make your kitchen cleanup safer and easier? FryAway offers a planet-friendly, mess-free solution for getting rid of used cooking oil. Check out the full range of products and upgrade your frying routine at https://fryaway.co.