


· By FryAway
How Often to Change Deep Fryer Oil: A Quick Guide
So, you're wondering how often to change deep fryer oil? The quick and easy answer for most home cooks is after about 8 to 10 uses. But let's be honest, that's just a starting point.
The real lifespan of your cooking oil depends heavily on what you’re frying, the kind of oil you’re using, and how well you take care of it.
The Definitive Answer to Changing Your Deep Fryer Oil
![]()
Think of your cooking oil like the oil in your car's engine. Every time you use it, it breaks down a little, picks up tiny particles, and starts to lose its mojo. Just like you wouldn't keep driving on old, dirty engine oil, you don't want to keep frying with degraded cooking oil. The result? Greasy, funky-tasting food and a kitchen full of smoke.
Getting a handle on the variables is the real secret to mastering your deep fryer. It’s what separates the pros from the novices, letting you get the most out of every bottle while turning out perfectly crispy, delicious food every single time.
For example, a big batch of breaded chicken wings is going to wreck your oil way faster than frying up some plain french fries. All those breadcrumbs and bits of seasoning break off and burn, degrading the oil. Likewise, a tough, high-smoke-point oil like peanut oil will naturally outlast a more delicate one.
Quick Guide to Oil Change Frequency
To see how much these factors matter, let's break down the best and worst-case scenarios for your oil's lifespan.
| Factor | Best Case (Longer Oil Life) | Worst Case (Shorter Oil Life) |
|---|---|---|
| Food Type | Lightly battered vegetables or potatoes (e.g., french fries) | Heavily breaded proteins (e.g., fried chicken, fish) |
| Oil Type | High smoke point oils (e.g., peanut, canola, grapeseed) | Low smoke point oils or those that degrade quickly |
| Frying Temp | Maintained at a consistent, appropriate temperature (350-375°F) | Fluctuates often or overheats past its smoke point |
| Filtration | Filtered after every single use to remove food particles | Never or rarely filtered, allowing debris to burn |
By keeping these factors in mind, you can stop guessing and start knowing exactly when it's time for an oil change.
And when that time comes, what you do next is just as important. Pouring old oil down the drain is a recipe for disaster, leading to serious plumbing clogs and harming the environment.
A mess-free solution like FryAway makes the cleanup totally painless and safe. Just follow three simple steps for the best results:
- Sprinkle and Stir: While the oil is still hot, sprinkle in the FryAway powder and give it a stir until everything dissolves.
- Cool Down: Let the fryer cool down completely. As it does, the oil will magically transform into a solid, organic puck.
- Toss into household trash: Once it's solid, you can easily scoop the hardened oil out and toss it right in your garbage can.
This simple process turns a dreaded chore into a breeze, so you can focus on enjoying amazing fried recipes like these Crispy Fried Onion Rings, which are delicious when fried in vegetable oil, without worrying about the cleanup.
Ever bite into a piece of fried food and it just tastes… off? That funky, greasy flavor isn't just your imagination. It’s a sign that your cooking oil has seen better days, breaking down at a molecular level and turning from liquid gold into a kitchen nightmare.
When you use oil for frying, it's constantly battling heat, air, and water. This fight triggers a few chemical reactions that wreck its quality, affecting everything from flavor to food safety.
The Science of Oil Breakdown
The moment you drop food into hot oil, hydrolysis kicks in. Water from your food hits the hot oil, breaking down its molecules. That satisfying sizzle is actually the first step toward your oil's downfall.
Next comes oxidation, which happens when the oil meets the air. Just like a sliced apple turns brown, your oil "rusts" over time, especially when it's hot. This process creates compounds that give old oil that signature rancid, almost crayon-like smell.
Finally, there's polymerization. As oil molecules break down, they start linking together to form bigger, stickier chains. Imagine fresh honey slowly turning into a thick, gummy sludge. This process makes the oil darker, thicker, and terrible at creating a crispy crust. Instead of a light coating, your food soaks up this heavy, greasy mess.
Key Takeaway: Together, hydrolysis, oxidation, and polymerization lower your oil's smoke point. This means your kitchen gets smoky at lower temperatures, and your food ends up greasy with an unpleasant aftertaste.
How Use Impacts Oil Quality
The speed of this breakdown is tied directly to how much you use your fryer. In restaurants, this is measured by oil turnover—how quickly oil is used and replaced. High turnover means the oil is constantly being stressed. For batch fryers, turnover rates are typically between 5 and 12 hours; anything over 20 hours often results in poor quality, even with filtration. You can get more nerdy details on oil turnover from this Oklahoma State University Extension guide.
You might not be running a restaurant, but the principle is the same at home. Every batch of crispy chicken or golden onion rings pushes your oil closer to the edge. Understanding why this happens helps you spot the warning signs and know exactly when it's time for a change.
The Consequences of Using Degraded Oil
Pushing your oil past its prime does more than just ruin the taste and texture of your food. Old, overheated oil can produce harmful compounds and free radicals, which you definitely don't want in your meal. It's a matter of both flavor and safety.
This is why knowing how often to change deep fryer oil is so important. When you understand the science, you can make sure every dish you fry is delicious, crispy, and safe.
And when you've reached that point, remember that proper disposal is just as crucial. A product like FryAway makes cleaning up simple and eco-friendly.
- Sprinkle and Stir: Just add the plant-based powder to your hot used oil and give it a stir.
- Cool Down: As the oil cools, it will harden into a solid mass.
- Toss into household trash: Scoop the solid puck out and throw it away in your regular trash bin.
This effortless process keeps your pipes from clogging and makes frying at home so much more enjoyable. Now you can focus on perfecting recipes like these amazing Crispy Fried Onion Rings without dreading the cleanup.
Key Factors That Affect Your Fryer Oil's Lifespan
Knowing the 8-10 use rule is a great start, but to really master your deep fryer, you need to understand the variables at play. Not all frying sessions are created equal. Four key factors dramatically influence how quickly your oil degrades, turning from a pristine cooking medium into a smoky, greasy mess.
By getting a handle on these elements, you can make smarter choices that save money, reduce waste, and produce consistently delicious food. Think of it as learning the specific dials that control your oil quality, giving you the power to fine-tune your frying process for the best results every time.
The Type of Oil You Use
The foundation of any good fry is the oil itself, and your choice here is critical. Different oils have different chemical makeups that dictate how stable they are under high heat. The single most important trait to look for is a high smoke point—that's the temperature where an oil starts to break down and smoke.
Oils with high smoke points are your best friends for deep frying. Think peanut, canola, and grapeseed oil. They can handle the intense heat (typically 350-375°F) without degrading quickly. On the flip side, oils with low smoke points, like extra virgin olive oil or butter, will burn almost immediately, making them totally unsuitable for a deep fryer.
This infographic breaks down the three main stages of oil degradation, which heat, air, and water all speed up.
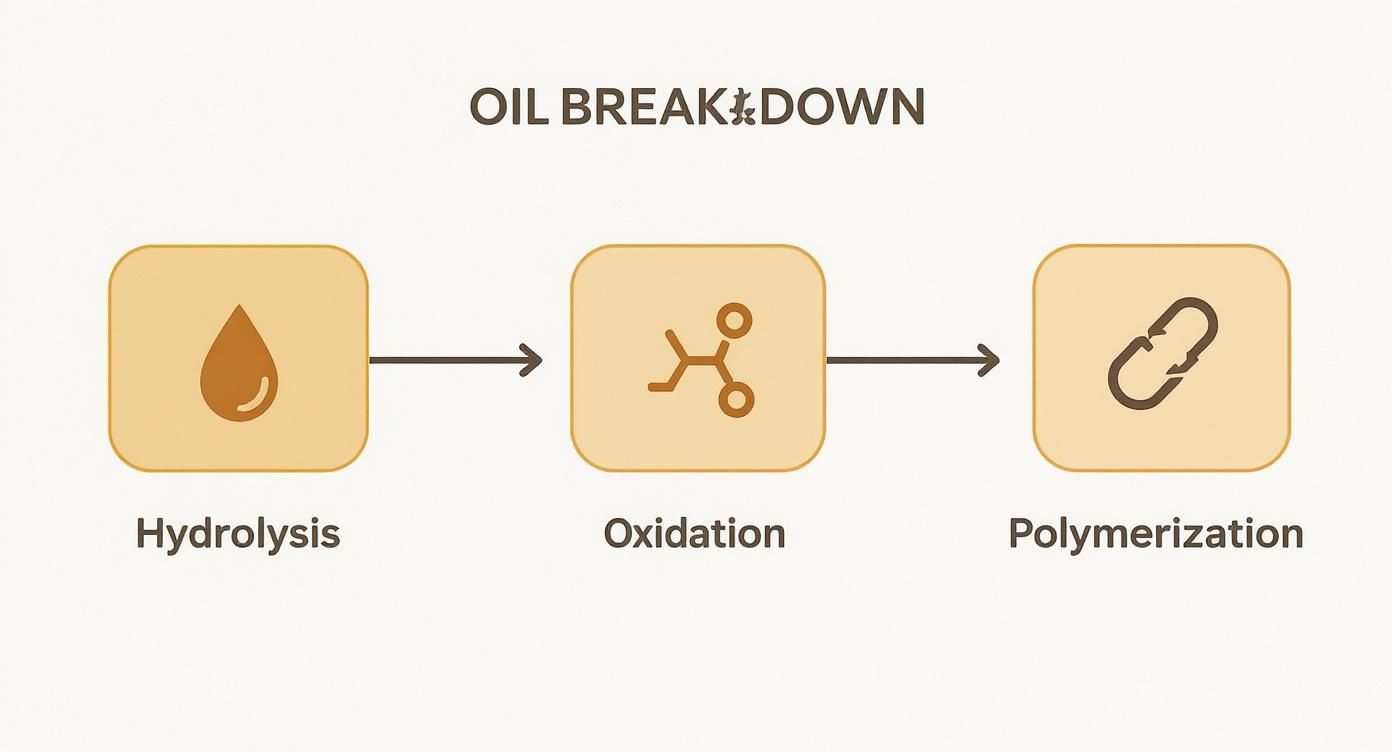
Each of these stages—hydrolysis, oxidation, and polymerization—contributes to the oil's decline, making it darker, thicker, and less effective.
What You Are Frying
What you cook has a massive impact on your oil’s lifespan. Simply put, some foods are just harder on oil than others, leaving behind particles and moisture that accelerate breakdown.
- Clean vs. Dirty Foods: Frying "clean" items like plain potato slices or lightly battered veggies is relatively easy on your oil. They don't shed a lot of debris.
- Heavily Breaded or Battered Items: Foods like fried chicken, fish, and onion rings are the biggest culprits. The breading and batter inevitably flake off, leaving tiny crumbs behind. These particles just keep cooking and burning, rapidly darkening the oil and creating off-flavors.
- High-Moisture Foods: Foods with a lot of water, especially frozen items that haven't been patted dry, introduce moisture into the hot oil. This kicks hydrolysis into overdrive, one of the main chemical reactions that destroys your oil.
Pro Tip: When frying anything breaded, always shake off the excess flour or coating before it hits the fryer. This one simple step can dramatically reduce the amount of debris left behind.
Your Frying Temperature
Heat is both your best friend and worst enemy when frying. You need it to cook, but excessive or fluctuating temperatures will destroy your oil faster than anything. Keeping your oil within that ideal 350-375°F range is crucial.
If the temperature gets too high and blows past the oil's smoke point, it starts breaking down rapidly. This doesn't just create a smoky kitchen; it gives your food a burnt, acrid taste. On the flip side, if the oil isn't hot enough, your food will soak up more of it, leaving you with a greasy, soggy mess. A good thermometer isn't optional—it's essential for extending your oil's life.
Your Filtration Habits
This is arguably the most important factor you can control. Filtering your oil after every single use is the secret weapon of professional kitchens and savvy home cooks. Those little leftover crumbs and specks of batter might seem harmless, but they are oil assassins.
As they sit in the oil during the next frying session, they burn, releasing carbon and speeding up polymerization. This is what makes the oil dark, viscous, and rancid. In commercial kitchens, this is so critical that oil management is a core part of daily operations. For example, high-volume fast-food spots often change their oil every 3-5 days, while smaller restaurants might stretch it to a week, all while filtering constantly. You can learn more about how restaurants manage their frying oil to balance costs and quality.
For home cooks, the process is easy. Once you’re done frying and the oil has cooled a bit (but is still warm), strain it through a fine-mesh sieve, cheesecloth, or even a coffee filter into a clean, airtight container. This small effort pays off big time, easily doubling the number of uses you get from a single batch.
And when it’s finally time to say goodbye, the easiest cleanup is with FryAway. Just Sprinkle and Stir the powder into the hot oil, let it Cool Down to solidify, and then Toss the hardened puck right into your household trash. It’s a clean, simple, and eco-friendly end for your oil.
Simple Ways to Test Your Oil at Home
While the 8-10 use rule is a solid guideline, you don’t need a fancy lab to know when your oil is past its prime. Your own senses are actually the best tools you have.
Learning to spot the tell-tale signs of degraded oil gives you the confidence to know exactly how often to change deep fryer oil based on its real condition, not just an arbitrary number. Think of these simple, no-gadget methods as your first line of defense against greasy food and a smoky kitchen.
Visual Cues to Look For
Your eyes will tell you a lot. Fresh oil is almost always a light, clear, golden color. As it breaks down with each use, it naturally gets darker and murkier.
A big red flag is when the oil becomes so dark and cloudy that you can't easily see through it. Another dead giveaway is its thickness. Old oil gets syrupy and viscous. If it pours slowly like molasses instead of flowing freely, its frying days are over.
The Smell Test
Your nose knows. Fresh, clean oil has a neutral smell—you almost can’t smell it at all. But as oil oxidizes and goes rancid, it develops a sharp, unpleasant odor that’s hard to miss.
People often describe it as smelling soapy, metallic, or even like old crayons. If you get a whiff of anything funky or off-putting when you open your fryer or oil container, trust your nose and toss it. That smell will go straight into whatever you're cooking, and nobody wants that.
Observing Smoke and Foam
Pay attention to how your oil behaves when you heat it up. One of the most critical signs of breakdown is a lowered smoke point. If your oil starts smoking at a much lower temperature than usual—long before it hits your target of 350-375°F—it’s a clear signal it can no longer handle the heat.
Another warning sign is excessive foaming. A little bubbling is totally normal when you add food, but old oil creates a layer of foam on the surface that just won’t go away. These stubborn bubbles mean the oil's structure is compromised, and it won't be able to make your food crispy anymore. You can dive deeper into the science and health risks in our guide on why it is unhealthy to reuse frying oil.
Quick Tip: The Bread Test
For a quick, practical test, drop a one-inch cube of white bread into the hot oil.
- Good Oil: The bread will turn a nice golden brown in about 60 seconds.
- Bad Oil: If it darkens too fast (under 30-40 seconds) or comes out soggy and oil-logged, the oil has lost its mojo and needs to go.
Once you’ve confirmed your oil is spent, the next step is getting rid of it. For a super easy, mess-free, and eco-friendly cleanup, FryAway is the answer.
Just follow these three simple steps for best results:
- Sprinkle and Stir: While the oil is still hot, stir in the FryAway powder until it’s fully dissolved.
- Cool Down: Let the mixture cool down completely. You’ll see it transform into a solid, scoopable block.
- Toss into household trash: Simply scoop the hardened puck of oil out and toss it right into your garbage can. No spills, no clogs, no problem.
How to Make Your Frying Oil Last Longer
Knowing when to change your deep fryer oil is half the battle. Actively extending its life? That’s where you really start saving money and cutting down on waste.
A little proactive maintenance is your secret weapon here. By picking up a few simple habits—before, during, and after you fry—you can get so much more out of a single bottle of oil. Think of it like caring for a car. You wouldn't just change the oil; you'd also make sure you're using clean fuel and keeping the engine tuned. The same logic applies to your fryer.
Start with Smart Habits
Your first line of defense is in place before the oil even hits the pan. Getting these initial steps right sets the stage for success and helps you dodge the common issues that ruin oil way too soon.
- Choose the Right Oil: As we’ve mentioned, picking an oil with a high smoke point is non-negotiable. Sturdy oils like canola, peanut, or grapeseed are built to handle the intense heat of deep frying without breaking down on you.
- Keep It Clean: Always, always start with a completely clean and dry fryer. Any leftover food bits or lingering water droplets will immediately begin contaminating your fresh, clean oil.
- Mind Your Frozen Foods: Frying something straight from the freezer? Take a second to shake off any excess ice crystals. Those little bits of ice are just frozen water, and water is oil’s worst enemy—it speeds up the hydrolysis process that breaks it down.
Best Practices During Frying
The second you start cooking, every move you make directly impacts the oil’s health. Your main goals should be consistency and cleanliness.
Try to maintain a steady temperature, ideally between 350-375°F (175-190°C). A good thermometer is a must-have to prevent overheating, which absolutely torches your oil. Also, resist the temptation to overcrowd the fryer. Dumping too much food in at once causes the temperature to plummet, leading to greasy food and putting a ton of stress on the oil.
One of the simplest yet most effective things you can do is skim the oil between batches. Just use a fine-mesh skimmer to scoop out any floating bits of batter or food. This stops those particles from burning and tainting the rest of the oil.
The Power of Filtration
Filtering your oil after every single use is the single most important maintenance step you can take. In busy professional kitchens, filtering is a non-negotiable daily chore. In fact, industry guidelines from sources like RTI-inc.com often suggest that high-volume restaurants should filter at least twice a day to remove the food debris that accelerates breakdown.
For home cooks, the process is way simpler and doesn't require fancy equipment.
- Let It Cool: Wait until the oil is cool enough to handle safely but still warm enough to be liquid.
- Strain It: Pour the oil through a fine-mesh sieve lined with cheesecloth or a couple of coffee filters. This will catch even the tiniest crumbs.
- Store It Properly: Keep the filtered oil in a sealed, airtight container in a cool, dark place like a pantry. This protects it from its three biggest enemies: light, heat, and air.
Making filtration a habit will dramatically extend the life of your oil. Just remember not to top off heavily used oil with fresh oil—that only contaminates the new batch. You can get the full rundown in our article on whether to mix old and fresh cooking oil.
Once your oil has finally run its course, responsible disposal is the last step. For a clean, simple, and planet-friendly solution, FryAway is the way to go.
- Sprinkle and Stir: Just add the plant-based powder to your hot used oil.
- Cool Down: Let it cool and watch the liquid transform into a solid puck.
- Toss into household trash: Scoop the hardened oil right into your garbage can.
This easy process means no clogged pipes and no messy spills, making fried food cleanup completely painless. Now you can tackle fried recipes like these Crispy Fried Onion Rings, made with canola oil, with total confidence.
The Easiest (and Cleanest) Way to Get Rid of Old Oil
Okay, you've decided your oil has had its last fry. Now what? The final step is getting rid of it the right way, and trust me, pouring it down the kitchen sink is the absolute worst thing you can do.
It might feel like a quick solution, but that hot grease cools down fast and solidifies inside your pipes. This creates gnarly, expensive clogs that can back up your entire home's plumbing. It also contributes to those infamous "fatbergs" in city sewers, causing massive blockages and environmental headaches. Honestly, knowing how to discard your oil is just as crucial as knowing how often to change deep fryer oil.
The Modern Fix for Mess-Free Disposal
Forget about pouring old oil into leaky plastic bags or saving it in greasy jars under the sink. There's a much cleaner, simpler, and more responsible way to handle it. FryAway is a 100% plant-based powder that works like magic, turning liquid cooking oil into solid, organic waste.
This stuff completely changes the cleanup game. Instead of wrestling with a sloshing, messy container of used oil, you're left with a hardened block that you can literally lift out of the fryer and toss straight into the trash. It's clean, simple, and way better for the environment.
With a solution like FryAway, the dreaded cleanup becomes the easiest part of frying. That means you can enjoy all your favorite fried foods without stressing about the messy aftermath or wrecking your plumbing.
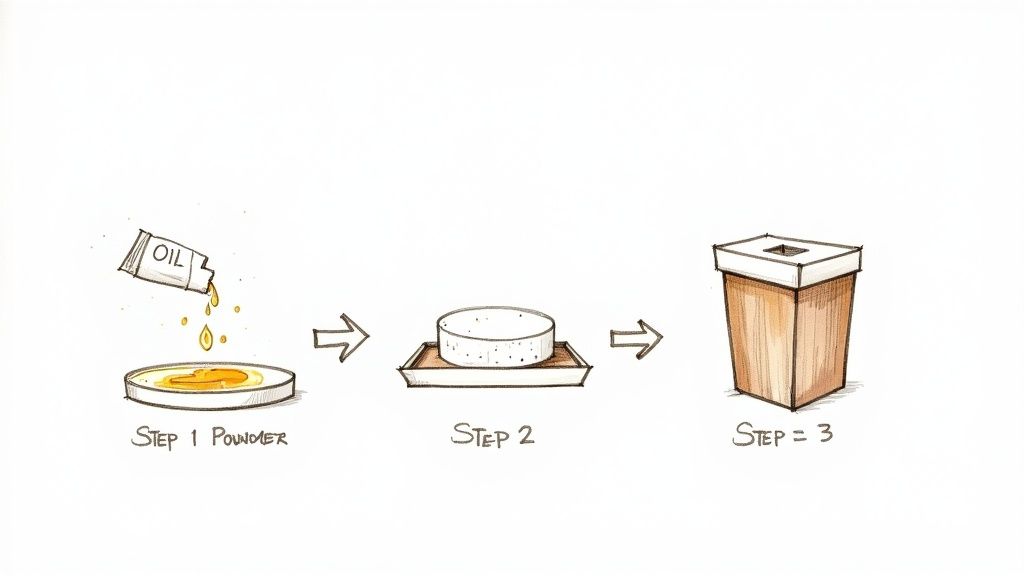
How to Use FryAway in 3 Simple Steps
Using FryAway is ridiculously easy. Just follow this quick three-step process for the best results and a perfect, mess-free cleanup every single time.
-
Sprinkle and Stir
While your used cooking oil is still hot, just sprinkle the FryAway powder into the fryer. Give it a gentle stir until the powder dissolves completely. -
Cool Down
Turn off the heat and just let the fryer cool down. As the oil's temperature drops, you’ll see it start to solidify, transforming from a liquid into a solid, easy-to-handle block. -
Toss into household trash
Once the oil is completely solid, you can scoop it out with a spatula and toss it right into your household trash can. No spills, no mess, and zero risk of clogging your pipes. For an even more detailed guide, you can learn more about how to properly dispose of used cooking oil.
Now you’re ready to put your new skills to the test with our fried recipe for Crispy Fried Onion Rings. It’s the perfect excuse to practice your frying technique using peanut oil and see for yourself how simple cleanup can be.
Frequently Asked Questions About Deep Fryer Oil
Now that you've got the basics down, let's dig into some of the questions that always come up. Getting these final details right will help you fry smarter, store your oil correctly, and keep turning out those perfectly crispy foods you love.
Can You Mix Old and New Deep Fryer Oil?
It’s tempting, I get it. You have a little oil left and just want to top it off. But you should absolutely never mix old and new deep fryer oil.
Think of it like adding a splash of sour milk to a fresh carton—the bad stuff contaminates the good stuff instantly. The broken-down particles and free fatty acids in your used oil immediately start to degrade the fresh oil. This dramatically shortens the life of the entire batch, meaning your food quality and flavor will suffer right from the start.
How Should I Store Used Fryer Oil?
Proper storage is the secret to getting a few more uses out of your filtered oil. The goal is simple: protect it from its three biggest enemies: oxygen, light, and heat.
The best way to do this is to pour your cooled, filtered oil into a sealed, airtight container. Then, tuck it away in a cool, dark place like a pantry or a cabinet that’s not right next to the stove. This one little step makes a huge difference in preventing oxidation and keeping the oil fresh for your next fry day.
Safety First: When it's time to handle and dispose of old oil, ensure your hands are protected with reliable gear such as durable nitrile gloves to keep the process clean and safe.
What Is the Best Oil for a Home Deep Fryer?
When it comes to home deep frying, the best oil will always have two things in common: a high smoke point and a neutral flavor. Oils with these traits can take the heat without burning and won’t steal the spotlight from your food’s natural taste.
Here are the top choices that consistently deliver fantastic results:
- Canola Oil: It's affordable, easy to find, and incredibly versatile.
- Peanut Oil: This is the classic choice for a reason. It has a super high smoke point and is known for its stability.
- Grapeseed Oil: Another winner with a clean taste and great heat tolerance.
Stick with one of these, and you’ll get that beautiful golden-brown crisp on everything from chicken wings to french fries.
When your oil has finally seen its last fry, FryAway makes cleanup completely painless. Just follow the simple three-step process—Sprinkle and Stir, Cool Down, and Toss into household trash—to solidify your used oil, making it easy to scoop and toss. Learn more and make your frying routine easier at FryAway.co.