


· By FryAway
how to clean greasy kitchen: a quick, easy guide
That sticky film of grease can make even the cleanest kitchen feel grimy. If you've ever wiped down a cabinet door only to have it feel tacky minutes later, you know the struggle. The fastest way to deal with that built-up grease is to arm yourself with a good degreasing agent, a bit of patience, and a plan to tackle the toughest spots first.
Your Action Plan for a Grease-Free Kitchen
A greasy kitchen isn't just an eyesore; it can also attract pests and even pose a fire hazard. Those tiny airborne grease particles from cooking love to settle everywhere, creating a stubborn layer on your cabinets, backsplash, and even the floor. The only way to win this battle is with a smart, zone-by-zone approach.
This guide gives you a straightforward strategy, starting right at ground zero—the stovetop and vent hood—before we move on to the surrounding surfaces. We'll cover everything from powerful commercial cleaners to simple, effective homemade solutions you can whip up in minutes.
And it's a common problem. The kitchen degreaser market was valued at USD 1.7 billion in 2024 and is projected to hit nearly USD 3 billion by 2032, all thanks to a growing focus on home hygiene. You can read the full research about kitchen degreaser market trends to see just how big the demand is. It's clear that households everywhere are looking for better ways to cut through the grime.
Choosing the Right Cleaning Agent
Before you start scrubbing, picking the right tool for the job is half the battle. Different surfaces need different types of degreasers to avoid causing damage. For example, a heavy-duty cleaner that works wonders on a stainless steel stovetop could easily strip the finish off your wooden cabinets or etch a natural stone countertop.
To make it simple, here’s a quick way to choose the right type of cleaner based on what you're trying to clean.

The main takeaway? Heavy-duty areas like your stovetop can handle stronger, more alkaline solutions, while delicate surfaces like sealed wood cabinets need a much gentler touch.
A huge part of any successful cleaning strategy is prevention. One of the single most effective things you can do is properly dispose of used cooking oil, stopping grease at the source.
This is where a product like FryAway comes in handy. It’s a plant-based powder that magically solidifies used cooking oil, making disposal clean, simple, and mess-free.
Here’s how it works:
- Sprinkle and Stir: Just add the powder to your hot cooking oil right after you’re done frying.
- Cool Down: Let the oil cool down completely until it turns into a solid.
- Toss: Scoop the hardened oil right into your regular household trash bin.
This simple step keeps oil out of your pipes (a major source of kitchen grime) and prevents greasy spills before they happen.
Kitchen Degreasing Agents at a Glance
Navigating the cleaning aisle—or your pantry—can be overwhelming. To help you choose the right degreaser, here’s a quick comparison of some of the most common options available, from store-bought sprays to DIY solutions.
| Cleaning Agent | Best For Surfaces | Pros | Cons |
|---|---|---|---|
| Commercial Degreaser | Stovetops, range hoods, stainless steel, tile backsplashes | Powerful and fast-acting on tough, baked-on grease. | Can contain harsh chemicals; may damage delicate surfaces like wood or natural stone. |
| Dish Soap (e.g., Dawn) | Cabinets, countertops, floors, most non-porous surfaces | Mild, safe for most surfaces, and excellent at cutting fresh grease. | May require more scrubbing for old, hardened grease. |
| White Vinegar & Water | Glass, stainless steel, ceramic cooktops | Natural, inexpensive, and effective at cutting through moderate grease and leaving a shine. | Acidic nature can damage natural stone (marble, granite) and unsealed wood. |
| Baking Soda Paste | Ovens, stovetops, sinks, stained countertops | Abrasive enough to scrub away tough grime without scratching most surfaces. | Can leave a chalky residue if not rinsed thoroughly. |
| Rubbing Alcohol | Laminate countertops, stainless steel appliances | Evaporates quickly, leaving a streak-free finish; good for sanitizing. | Flammable; strong odor; not suitable for painted or finished wood surfaces. |
Ultimately, the best choice depends on the severity of the grease and the sensitivity of the surface you're cleaning. It's often a good idea to have a couple of these options on hand—a heavy-hitter for the tough jobs and a gentler solution for daily upkeep.
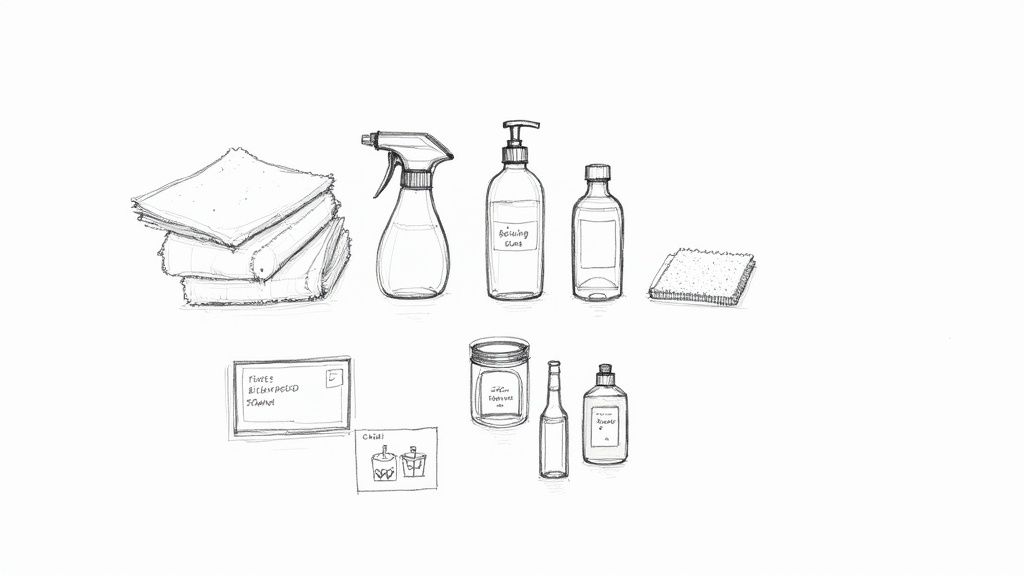
Assembling Your Degreasing Toolkit
Before you can tackle a greasy kitchen, you have to get your gear in order. Having the right supplies on hand from the start means no frustrating mid-scrub trips to the store. Think of this as your pre-game prep for a seriously satisfying deep clean.
The foundation of any good kit starts with the basics. Microfiber cloths are non-negotiable; their unique weave actually traps and lifts grease particles instead of just smearing them around. You’ll also want some non-abrasive scrub pads or sponges. These give you just enough grit to handle tough spots without scratching up delicate surfaces like stainless steel or that glass cooktop.
Choosing Your Cleaning Agents
Next up: your degreasing solutions. It’s smart to have a few different options ready, because what works on a greasy backsplash won't be what you need for a baked-on oven disaster.
- Commercial Degreasers: These are your heavy hitters, formulated to cut right through thick, stubborn grease. They're perfect for things like grimy range hood filters and the stovetop itself.
- Gentle Dish Soap: A good quality dish soap (like Dawn) is a fantastic, mild degreaser. It's my go-to for everyday surfaces like cabinets, countertops, and most backsplashes.
- DIY Solutions: Don't underestimate the power of simple homemade cleaners. I keep a spray bottle with a 50/50 mix of white vinegar and water for quick daily wipe-downs. For caked-on messes, a paste made from baking soda and a few drops of dish soap can work wonders.
This image shows the chemical structure of a common soap molecule, which is key to how degreasers work to lift oily residues from surfaces.
The science is pretty cool: the "hydrophobic" tail latches onto the grease, while the "hydrophilic" head grabs onto the water, letting you wash the grime right away.
And don't forget your floors! They catch more grease splatters than you think. Exploring some effective natural floor cleaning solutions can round out your toolkit for a truly top-to-bottom clean.
A critical—and often forgotten—part of your toolkit is something for grease prevention. The single best way to stop grease from becoming a problem is to manage your used cooking oil from the get-go.
This is where a product like FryAway becomes an absolute game-changer. You shouldn't have to risk clogged pipes just to enjoy some crispy fried chicken or fries at home. After you're done cooking, it's just three easy steps:
- Sprinkle and Stir the FryAway powder into the hot cooking oil.
- Cool Down and just let the oil do its thing and solidify completely.
- Toss the hardened puck of oil right into your household trash can.
By adding a smart disposal product like the FryAway Super Fry to your cleaning arsenal, you’re not just cleaning up grease—you’re stopping it at the source.
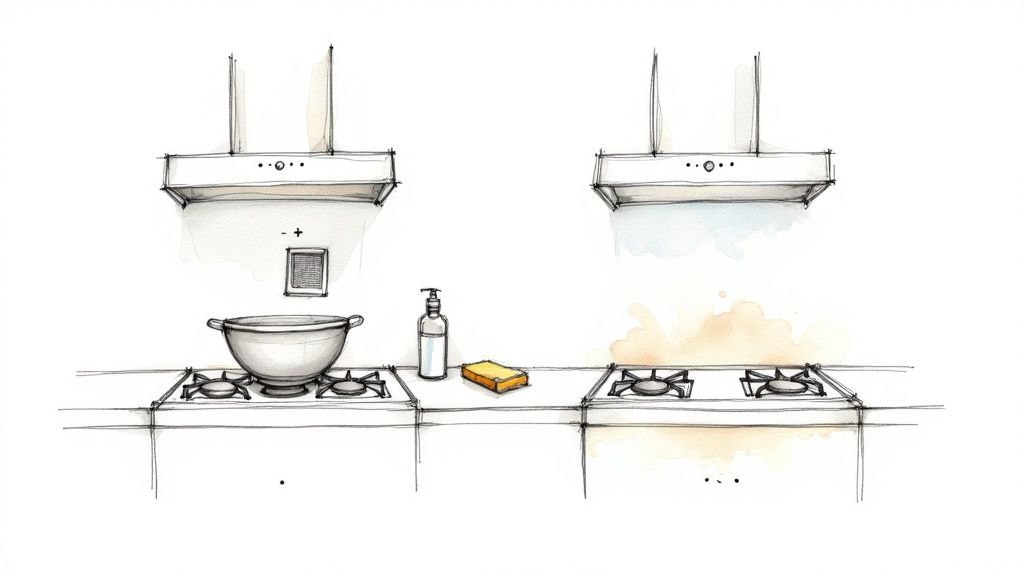
Tackling the Stovetop and Vent Hood
Let's be real—the stovetop is ground zero for grease. It's where all the action happens, so it’s no surprise that this is where grease and grime build up the fastest. The vent hood right above it is just as guilty, catching all that splatter and steam. To get this area truly clean, you need a plan that cuts through those layers of cooked-on gunk. Getting this high-traffic zone sparkling again doesn't just look good; it actually helps improve your kitchen's air quality.
First things first, let's break it down. Gently lift off the burner grates and pull out the vent hood filters. These are the pieces that usually hold the thickest, stickiest grime. Fill your sink or a large basin with the hottest tap water you can get and add a generous squeeze of a strong degreasing dish soap. Let those parts soak for at least 30 minutes to an hour. This downtime does most of the heavy lifting, breaking down all that baked-on residue without you having to scrub endlessly.
Cleaning Cooktops and Hood Surfaces
While the grates and filters are enjoying their bath, you can turn your attention to the cooktop surface and the hood itself. The best way to clean these depends entirely on what they're made of.
- Glass or Ceramic Cooktops: Stay away from anything abrasive. A simple paste made from baking soda and a bit of water is your best friend here. It gently lifts burnt-on food without leaving a single scratch on that delicate surface.
- Stainless Steel Surfaces: Grab a dedicated stainless steel cleaner or just a soft cloth with warm, soapy water. The key is to always wipe in the direction of the grain. This little trick is the secret to avoiding those frustrating streaks and smudges.
- Enameled Metal: A simple mix of warm water and dish soap is usually all you need. For any stubborn spots, a non-abrasive sponge will give you that extra scrubbing power without causing damage.
And don't forget the details! The control knobs and the little crevices around the burners are magnets for grease. An old toothbrush dipped in your cleaning solution is the perfect tool for getting into those hard-to-reach spots.
A key part of knowing how to clean a greasy kitchen is understanding that prevention is easier than remediation. The grease on your stovetop often comes from frying, and managing the leftover oil is the first step in stopping the mess before it starts.
This is where a product like FryAway completely changes the game. Imagine making perfectly crispy fried chicken or golden french fries and having zero liquid oil to deal with afterward. FryAway solidifies used cooking oil, making disposal clean and incredibly easy. You can learn more about creating a cleaner frying routine by checking out our guide to effortless post-frying cleanup.
The whole process couldn't be simpler:
- Sprinkle and Stir FryAway powder into the hot oil right after you finish cooking.
- Cool Down and let the oil mixture solidify completely, right there in the pan.
- Toss the hardened puck of oil straight into your household trash.
By making this a regular habit, you can say goodbye to messy oil spills and stop greasy residue from ever coating your stovetop, hood, or pipes in the first place.
Tackling Greasy Cabinets, Backsplashes, and Walls
Grease doesn't just hang around the stovetop. As you cook, microscopic oil particles float through the air and land on just about every surface in your kitchen. Over time, this creates a sticky, grime-attracting film on your cabinets, walls, and backsplash. Getting these vertical surfaces clean requires a gentle but firm approach to cut through the gunk without damaging any finishes.
The smartest way to tackle this is to work from the top down. Seriously, start with the tops of your upper cabinets. It's an area most people forget, and it's where grease and dust love to team up into a thick, tacky mess. Most of the time, a simple mix of warm water and a good degreasing dish soap, applied with a microfiber cloth, is all you need to slice through that buildup without hurting the cabinet finish.
Cleaning Based on Your Cabinet and Wall Surfaces
Not all surfaces can be treated the same, and grabbing the wrong cleaner can be a recipe for disaster. It’s absolutely crucial to match your cleaning method to the material you’re working with.
- Finished Wood: Stick with a mild soap and water solution. For really stubborn spots, a cleaner made specifically for wood is your safest bet. Stay away from acidic cleaners like vinegar, which can dull the beautiful finish over time.
- Painted or Laminate Cabinets: These guys are generally pretty tough and can handle something a bit stronger. A spray bottle filled with warm water, a few drops of dish soap, and a splash of white vinegar usually works wonders.
- Backsplashes (Tile, Glass, Stone): For tile and glass, that same vinegar solution is perfect. But if you have natural stone like granite or marble, you must use a pH-neutral cleaner to avoid etching and ruining the surface.
A huge portion of the grease coating these surfaces comes from frying. The single most effective way to prevent this buildup is to manage your cooking oil the moment you're done with it.
This is where a product like FryAway completely changes the game and makes your cleaning routine so much easier. Instead of letting used oil sit around or risking a messy trip to the trash can, you can just solidify it for easy, clean disposal.
- Sprinkle and Stir FryAway powder into your cooking oil while it's still hot.
- Cool Down and let the mixture harden into a solid, waxy puck.
- Toss the solid oil straight into your regular household trash bin.
Making this a habit stops grease in its tracks, long before it ever has a chance to coat your cabinets and walls.
Why Effective Degreasers Matter
The demand for powerful and effective cleaning solutions is only getting bigger as more of us realize just how important good kitchen hygiene is. In fact, the global kitchen grease cleaner market was valued at around USD 2.1 billion in 2023 and is projected to nearly double by 2032.
Once you've given your kitchen cabinets a thorough degreasing, you might find yourself wanting a fresh look. If you're searching for an affordable upgrade, look into the best vinyl wrap for kitchen cabinets. It's a fantastic DIY project and an easy way to give your entire kitchen a clean, updated appearance.
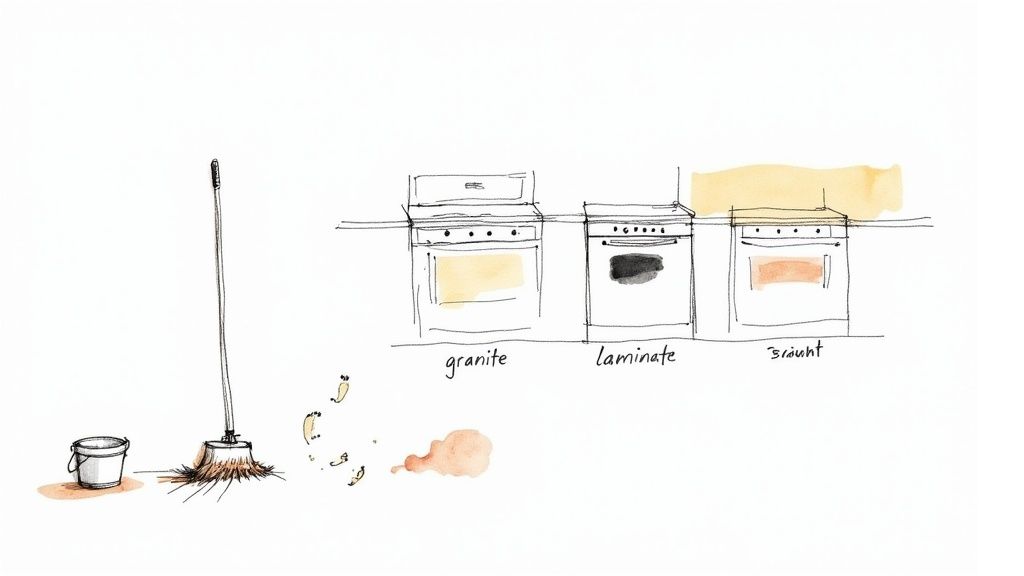
Finishing Touches: Floors, Appliances, and Countertops
With the stovetop and cabinets gleaming, it's time for the final pass. This last push is what takes your kitchen from "clean-ish" to genuinely spotless, tackling the floors, appliances, and countertops that catch all the lingering grime.
Let's start from the ground up. Kitchen floors see it all, from splatters to greasy footprints. For tile or vinyl, a simple mix of hot water, a splash of white vinegar, and a few drops of dish soap will cut through the gunk without leaving a slippery film. If you're working with sealed wood floors, stick to a pH-neutral cleaner made for wood to protect the finish.
A Deep Clean for Appliances and Countertops
Next up, the appliances. The exteriors of your fridge, dishwasher, and microwave are magnets for greasy fingerprints, especially on handles and buttons. For stainless steel, a spritz of equal parts water and rubbing alcohol on a microfiber cloth will dissolve smudges and leave a beautiful, streak-free shine. On other finishes, a cloth dampened with warm, soapy water is all you need.
Countertops need a more tailored approach, since the wrong cleaner can do real damage.
- Granite and Marble: Stick with a pH-neutral stone cleaner. Anything acidic, like vinegar, will etch the surface over time and leave it looking dull.
- Laminate and Quartz: These are workhorses. They can handle a general all-purpose cleaner or a simple vinegar-and-water spray without any trouble.
- Butcher Block: To lift grease and stains naturally, scrub it with salt and half a lemon. Just be sure to rinse it well and reapply a coat of mineral oil to keep the wood protected.
A truly clean kitchen is about more than just looks—it's about creating a hygienic space. This is a big reason the professional kitchen cleaning industry is seeing such growth, with the market valued at USD 385.7 million in 2024. Homeowners are adopting a more professional approach to hygiene, and for good reason.
Of course, the best way to keep things clean is to stop the grease before it builds up. When you make FryAway part of your cooking process, you're trapping grease at the source.
- Sprinkle and Stir: After you've finished frying something delicious, like crispy buttermilk fried chicken, just add the powder to the hot oil and give it a quick stir.
- Cool Down: Let the pan sit until the oil cools and turns into a solid, waxy disc.
- Toss: From there, you can just scoop the hardened oil right into the trash.
It's a small habit that makes a huge difference, keeping grease off your surfaces and, most importantly, out of your pipes. Every future cleaning session just got a whole lot easier.
Keeping Your Kitchen Grease-Free for Good
So, you’ve put in the work and your kitchen is finally sparkling. The real trick is keeping it that way. A huge part of that comes down to one simple thing: what you do with your used cooking oil. Pouring it down the drain is a guaranteed recipe for disaster, leading to stubborn clogs and greasy gunk backing up into your sink.
Honestly, the best way to deal with grease is to stop it before it even has a chance to build up. Instead of juggling messy jars or making that risky trip to the trash with a hot pan, there's a much cleaner way to handle things.
Smart Oil Disposal with FryAway
If you love fried food but can't stand the cleanup, a product like FryAway is a game-changer. It's a 100% plant-based powder that turns hot, liquid cooking oil into a solid puck of organic waste. You can just toss it straight into your household trash. No mess, no fuss.
This single habit prevents grease from ever getting into your pipes or splattering onto your clean surfaces.
Using it is incredibly simple. Right after you're done cooking, just follow these steps:
- Sprinkle and Stir the FryAway powder into the hot cooking oil.
- Let it Cool until the oil mixture has completely solidified in the pan.
- Toss it Out by scooping the hardened puck of oil cleanly into the trash.
It completely takes the messiest part of frying out of the equation, so you can enjoy your favorite recipes without dreading what comes after.
Enjoy Fried Foods Without the Mess
Think about making a batch of Classic Fried Chicken. After you've cooked it to a perfect golden-brown, instead of figuring out what to do with all that leftover hot oil, you just solidify it with FryAway. Cleanup's a breeze.
Or maybe you're whipping up some Crispy Onion Rings. Once they're done, the oil is dealt with in minutes. All you're left with is a delicious snack and a clean pan.
By making this small change to your cooking routine, you’re not just cleaning up after one meal—you're preventing the grease buildup that makes a deep clean such a chore in the first place.
A Simple Weekly Wipe-Down Routine
Beyond handling oil, a quick weekly maintenance routine will keep grease from getting a foothold. Just take five minutes once a week to wipe down the hotspots with warm water and a few drops of dish soap.
- Stovetop Surface: Catch any recent splatters before they set.
- Backsplash: Focus on the area right behind your burners.
- Vent Hood: The exterior can attract a surprising amount of grime.
- Cabinet Fronts: Give the cabinets right above and next to the stove a quick pass.
This little bit of upkeep, paired with smarter oil disposal, will make your next deep clean worlds easier and keep your kitchen looking great day-to-day.
Still Have Questions About Kitchen Grease?
Even with a solid game plan, you're bound to run into a few tricky spots when you're deep-cleaning a greasy kitchen. It happens. Here are some answers to the questions I get asked the most, designed to get you past those hurdles and back on track.
What Is the Fastest Way to Remove Heavy Grease?
When you’re up against that stubborn, baked-on gunk, a little bit of gentle heat is your best friend. It helps loosen the grease's grip.
Try carefully warming the area with a hairdryer on low or by pressing a cloth soaked in very hot water against it for a minute. Once it's warm, hit it with a good commercial degreaser or a thick paste made from baking soda and dish soap. Let it sit and do its thing for 15-20 minutes, then give it a good scrub with a non-abrasive sponge.
Is Vinegar Safe for All Greasy Surfaces?
Vinegar is a powerhouse natural degreaser, and it works wonders on glass stovetops, stainless steel, and most backsplashes. But it’s not a one-size-fits-all solution.
Because it's acidic, you should never use vinegar on natural stone surfaces like granite or marble—it can actually etch and dull the finish. For wood cabinets, a very diluted solution might be okay, but you absolutely have to test it on a hidden spot first to make sure it won’t damage the wood.
The best way to deal with a greasy kitchen? Stop the buildup before it even starts. That process begins the moment you're done frying up delicious things like chicken or onion rings.
Properly disposing of your used cooking oil is the key. A product like FryAway is a game-changer here, because it solidifies used cooking oil so you can just toss it in the trash. It’s incredibly simple: 1) Sprinkle and Stir the powder into hot oil, 2) Cool Down until it’s a solid block, and 3) Toss it out. No mess, no clogged pipes.
Want to learn more? Check out our detailed guide on how to dispose of cooking oil easily and safely at home.
Ready to make kitchen cleanup a breeze and prevent grease from taking over? Visit FryAway and shop our collection of plant-based oil solidifiers today.