


· By FryAway
Homemade Fried Chicken Recipe: Crispy, Juicy, Foolproof Perfection
Let's be real—great homemade fried chicken feels like an event. That perfectly golden, crunchy skin that gives way to unbelievably moist, flavorful meat? That's the stuff culinary dreams are made of. But too often, our attempts at home fall flat, leaving us with soggy skin, dry chicken, or a crust that deserts the team the second it hits the oil.
We're going to fix that.
This isn't just another recipe. This is a guide to mastering the techniques that create consistently amazing fried chicken right in your own kitchen. It's not about luck; it's about understanding the little details that make all the difference.
The Secret to Unforgettable Fried Chicken
Forget those past disappointments. We're diving deep into the methods that professional kitchens use to get that crave-worthy crunch and juicy interior every single time.
More Than Just a Recipe
We'll break down the science and craft behind it all, covering:
- Why a good brine or marinade is non-negotiable.
- The double-dredge method for that extra-crispy, craggy crust.
- How to manage your oil temperature like a pro for perfectly even cooking.
- The best way to handle cleanup without the mess and hassle.
This iconic dish has a history as rich as its flavor. Modern Southern-style fried chicken is a beautiful fusion of Scottish frying techniques and West African seasoning traditions brought over by enslaved Africans. By the late 19th century, this combination created the battered, deep-fried chicken that became a cornerstone of Sunday dinners.
The key to elevating fried chicken from good to great lies in the details. Paying attention to each stage—from brining to resting—is what creates that unforgettable, crave-worthy result.
From Your Kitchen to Your Community
Once you nail this recipe, you might just find yourself wanting to share the love. If you've ever thought about turning your cooking passion into something more, you could even explore how to start a supper club and bring people together over incredible food.
Of course, the aftermath of any great frying session is the cleanup—specifically, what to do with all that used cooking oil. That's why I always have FryAway on hand. This plant-based powder makes oil disposal ridiculously easy.
Just follow these three simple steps:
- Sprinkle and Stir: While the oil is still hot, sprinkle in the FryAway powder and give it a stir until it's completely dissolved.
- Cool Down: Let the oil cool down. As it does, it will transform into a solid puck of organic waste.
- Toss into household trash: Once it's solid, you can just scoop the hardened oil out and toss it right into your household trash bin.
No more messy jars, no more clogged pipes, and it’s an eco-friendly way to handle used oil. It's the perfect, hassle-free end to a perfect meal.
Building a Foundation of Flavor and Juiciness
The secret to truly unforgettable fried chicken starts long before the oil gets hot. This is where we lay the groundwork, locking in moisture and building flavor from the inside out. Skipping this step is the number one reason fried chicken turns out dry, bland, and just plain disappointing.
A good brine or marinade isn't just a nice-to-have; it's a non-negotiable part of the process. These techniques work by changing the chicken's protein structure, guaranteeing it stays succulent even after hitting that hot oil. Think of it as your insurance policy against overcooking.
The Science of a Good Soak
At its heart, a saltwater brine is all about osmosis. The salty water not only forces moisture into the chicken but also breaks down some of the tougher muscle fibers. The result? Meat that’s seasoned all the way through and unbelievably tender.
Buttermilk, on the other hand, uses gentle acidity to work its magic. The enzymes tenderize the chicken differently, preventing that "spongy" texture you can get from harsher acidic marinades. It also leaves behind that classic tangy flavor that’s the hallmark of Southern fried chicken.
Just how much of a difference does it make? A lot. A 4 to 24-hour soak can increase moisture retention by 2–6%, which you can taste in every juicy bite. You can find more on the history of this foundational technique over at Communalfire.com.
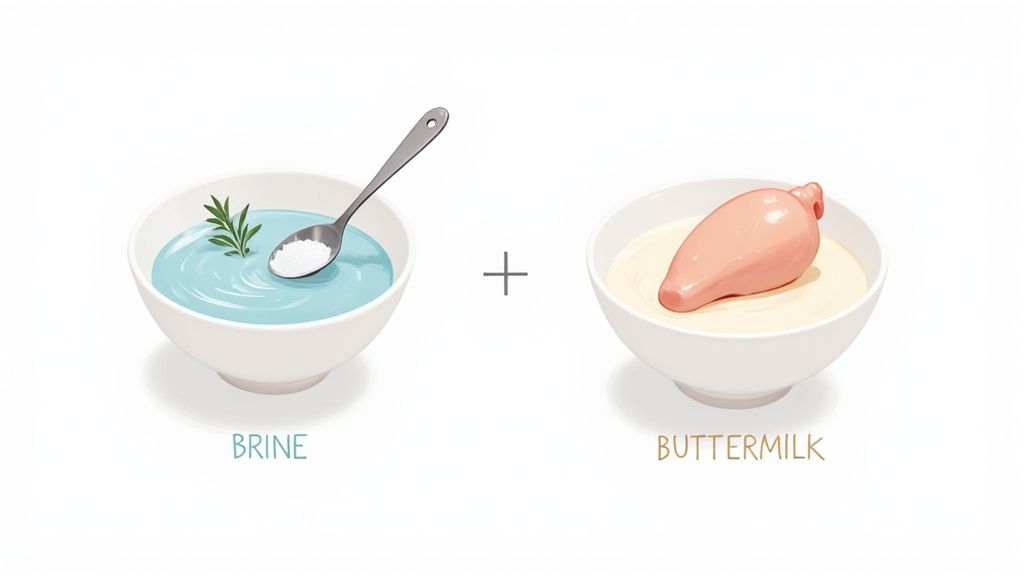
Choosing Your Method: Buttermilk vs. Brine
So, which one should you use? It really comes down to the texture and flavor you’re after. Each has its own distinct perks.
For a quick breakdown, here’s how the two methods stack up against each other.
Brine vs. Buttermilk: A Quick Comparison
| Attribute | Saltwater Brine | Buttermilk Marinade |
|---|---|---|
| Primary Goal | Maximum juiciness, clean flavor | Classic tenderness, tangy flavor |
| Key Ingredient | Salt and water | Lactic acid and enzymes |
| Flavor Profile | Pure, savory, seasoned chicken | Tangy, slightly rich, classic Southern |
| Crust Adhesion | Good | Excellent (buttermilk acts like glue) |
| Best For | Anyone prioritizing moisture above all | Achieving the quintessential "fried chicken" taste |
Ultimately, there’s no wrong answer here. Both methods will give you a far better result than starting with plain chicken. It’s all about matching the prep to your desired outcome.
The Buttermilk Bath for Classic Tenderness
If you’re dreaming of that iconic Southern-style fried chicken, a buttermilk soak is the way to go. The lactic acid tenderizes the meat perfectly, and the thick liquid helps the flour dredge stick like a dream, creating an amazing crust.
- Ratio: You just need enough buttermilk to completely cover the chicken. For a whole cut-up chicken (3-4 lbs), about 4 cups is a great starting point.
- Additions: Stir 2 tablespoons of kosher salt and 1 tablespoon of black pepper right into the buttermilk. A splash of hot sauce or a teaspoon of paprika works wonders here, too.
- Timing: Give it at least 4 hours, but for the absolute best results, let it soak overnight in the fridge (up to 24 hours).
The Saltwater Brine for Pure Juiciness
When your main goal is locking in as much moisture as possible for a clean, savory bite, a classic saltwater brine is your best friend. It’s a straightforward method that delivers incredibly juicy results every time.
- Ratio: The gold standard is 1/4 cup of kosher salt per 4 cups (1 quart) of water.
- Additions: Don't be afraid to toss in some aromatics! Smashed garlic cloves, whole peppercorns, bay leaves, or a few sprigs of thyme will infuse the chicken with subtle layers of flavor.
- Timing: An overnight brine of about 8-12 hours is perfect for cut-up chicken. In a pinch, even 30 minutes will make a noticeable improvement.
Pro Tip: Whether you choose a brine or a marinade, always pat the chicken completely dry with paper towels before dredging it in flour. A dry surface is the key to getting that coating to stick and crisp up beautifully.
Whichever path you take, committing to this first step will elevate your fried chicken from good to truly spectacular. It’s the secret that separates the home cooks from the pros.
Creating That Perfect Shatteringly Crisp Crust
Once you've built that deep, savory flavor with a good brine or marinade, it's time for the main event: the crust. A truly legendary fried chicken crust isn't just crunchy. It's shatteringly crisp, perfectly seasoned, and hugs the chicken tight instead of falling off in the fryer. The secret to getting this right is all in the dredge.
The seasoned flour is where you layer in that classic fried chicken flavor. While every cook has their own secret blend, the best ones complement the chicken without completely overpowering it.
My Go-To Seasoned Flour Blend
Getting the balance right here is everything. You want enough seasoning to make a statement, but not so much that it's just a salt bomb. After years of tinkering, I've landed on a simple but powerful blend that just works.
For every 2 cups of all-purpose flour, I mix in:
- 2 tablespoons of kosher salt
- 1 tablespoon of freshly ground black pepper
- 1 tablespoon of paprika (I use sweet, not smoked, for that beautiful color and mild flavor)
- 2 teaspoons of garlic powder
- 2 teaspoons of onion powder
- 1 teaspoon of cayenne pepper (feel free to dial this up or down)
Just whisk these together really well in a shallow dish or even a big zip-top bag. The goal is to make sure every single piece of chicken gets coated evenly.
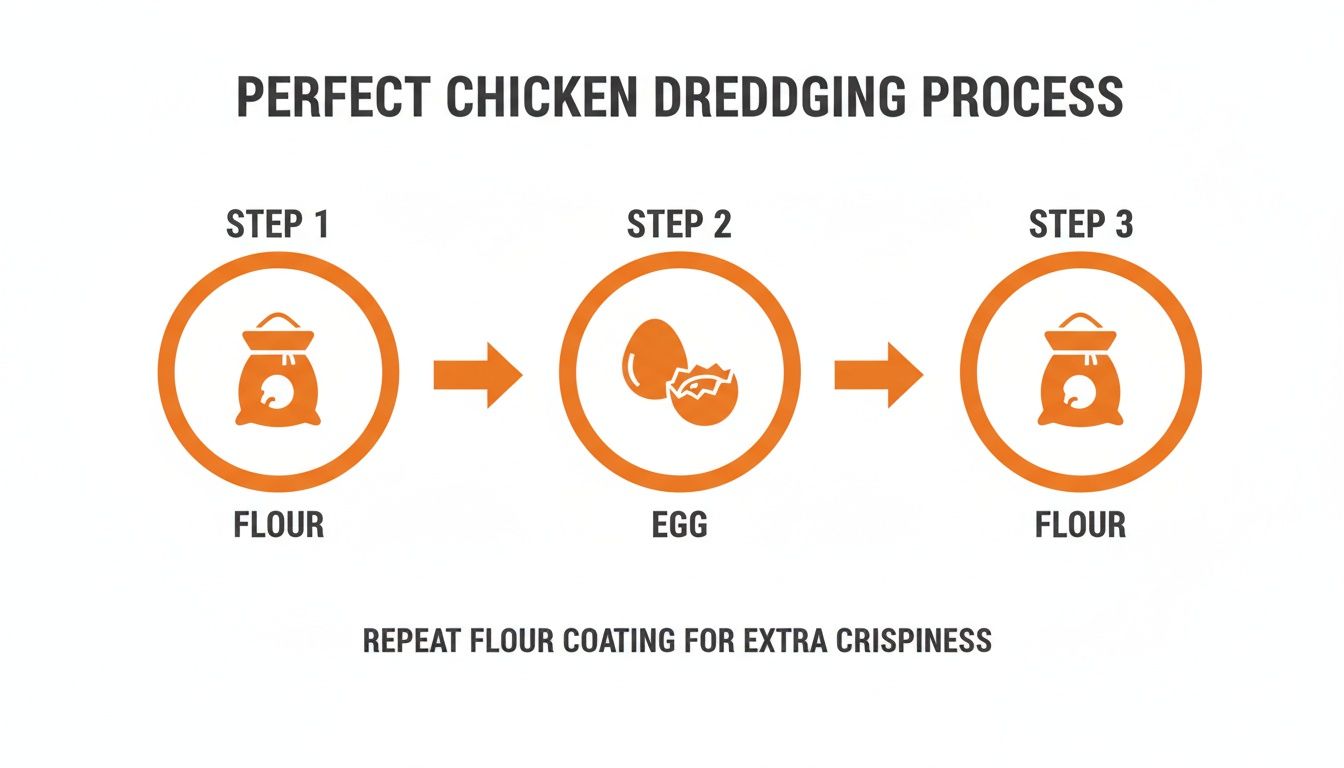
The Double Dredge for Maximum Crunch
If you’re chasing that thick, craggy crust with all those irresistible crunchy bits, the double dredge is your ticket. This is a pro move that creates multiple layers for a super sturdy and extra-crispy coating. It’s a simple three-step dance that makes a massive difference.
First, take your chicken (patted dry from its brine) and give it a thorough coating in the seasoned flour. Don't be shy—press the flour onto the chicken so it really sticks.
Next, dip the floured piece into an egg wash. For this, I just whisk one or two large eggs with a tablespoon of water or buttermilk. This wet layer is the "glue" that lets the second coat of flour hang on.
Finally, it's back into the seasoned flour for its final coat. This is your moment to build texture. Press that flour on firmly, working it into every nook and cranny. This is what creates that extra-thick, durable crust you’re looking for. If you want to dive deeper into the science of crispiness, you can learn more about how double frying affects food texture.
One of the most critical—and most often skipped—steps is letting the coated chicken rest. Put the double-dredged pieces on a wire rack for at least 15-20 minutes before they go anywhere near the hot oil. This lets the flour and egg wash meld into a cohesive, paste-like coating that dramatically improves how well the crust sticks during frying.
This short rest hydrates the flour, ensuring the coating doesn't just slide off the second it hits the hot oil. It's a tiny detail that has a huge payoff.
Now, after you've fried your chicken to golden-brown perfection, you're left with the cleanup. A pot full of used cooking oil can be a real pain, but it doesn't have to be. For a totally mess-free and eco-friendly way to handle it, I always turn to FryAway.
It's a plant-based powder that magically solidifies your used cooking oil, making cleanup unbelievably easy.
- Sprinkle and Stir: Right after you're done frying, while the oil is still hot, sprinkle in the FryAway powder and give it a quick stir until it all dissolves.
- Cool Down: Just leave the pan on the stovetop to cool down. As it cools, you'll see the oil transform into a solid, waxy puck.
- Toss into household trash: Once it's completely solid, you can just scoop the hardened oil out and toss it right into your regular household trash can.
It’s the perfect, no-fuss way to wrap up your cooking session, saving you from messy spills and saving your pipes from nasty clogs.
Mastering the Frying Process for Golden Results
Alright, this is where the magic happens. All that prep work—the brining, the dredging—it all leads to this moment. Frying can feel a little intimidating, but trust me, with the right technique, it’s not just straightforward, it's incredibly satisfying. Let's break it down so you get that perfect golden, crispy chicken every single time.
First things first: the oil. Your success starts with choosing the right cooking oil. The goal is to use an oil with a high smoke point, which means it can get super hot without burning and making your chicken taste bitter. I always reach for peanut, canola, or vegetable oil because they have a neutral flavor and hold up well to the heat. We've got a full guide on what oil is best for frying if you want to dive deeper.
Maintaining the Perfect Temperature
If you take away only one thing from this section, let it be this: temperature control is everything. For crispy, not greasy, fried chicken, you have to keep your oil hovering between 330–350°F (165–175°C). This is the sweet spot. It’s hot enough to make the crust golden and crunchy while giving the inside enough time to cook through to juicy perfection.
A deep-fry or candy thermometer is non-negotiable here. If the oil is too cool, the coating will soak up grease like a sponge before it crisps up, leaving you with a soggy mess. Too hot, and you’ll have a burnt exterior with raw chicken on the inside. Nobody wants that.
This is also where that dredging technique really pays off, creating the foundation for the crust before it ever touches the oil.
That simple flour-egg-flour dip is what builds those craggy, crunchy layers we're all after.
The Art of Frying in Batches
One of the biggest mistakes I see home cooks make is overcrowding the pan. It's so tempting to just get it all done at once, right? But throwing in too many pieces at a time will cause the oil's temperature to plummet. When that happens, the coating steams instead of fries, and you get greasy chicken.
Work in small batches. Only add a few pieces of chicken to the pot at a time. This keeps the oil temperature stable and gives each piece the space it needs to cook evenly and get that beautiful crust. Use tongs to gently place the chicken in the hot oil, always laying it away from you to avoid getting splashed.
While we're focused on home cooking, it's interesting to see how the pros manage heat. A quick look at different commercial deep fryers shows just how critical precise temperature control and oil management are to getting consistent results.
Ensuring Your Chicken Is Perfectly Cooked
Cook times are going to change based on the cut and size of your chicken. But here are some solid starting points:
- Wings: 6–8 minutes
- Drumsticks and Thighs: 10–13 minutes
- Breasts: 8–10 minutes (can vary with thickness)
Make sure to flip the pieces about halfway through to get even browning on all sides. These times are just a guideline, though. The only surefire way to know your chicken is perfectly cooked and safe to eat is to use a meat thermometer.
You’re looking for an internal temperature of 165°F (74°C). This isn't just a suggestion; it's the standard set by food safety authorities like the FDA and USDA to ensure all harmful bacteria are eliminated.
Pro Tip: When you're temping the chicken, slide the thermometer into the thickest part of the meat but be careful not to hit the bone. The bone gets hotter faster and will give you a false, high reading.
Once the chicken is done, pull it from the oil and let it rest on a wire rack placed over a baking sheet. This little step is crucial—it allows air to circulate all around the chicken, keeping the bottom just as crispy as the top. Let it rest for at least 10 minutes before you dig in.
Easy, Eco-Friendly Cleanup with FryAway
And now, for everyone's least favorite part: cleanup. You've got a pot of used cooking oil, and pouring it down the sink is a huge mistake. It will clog your pipes. This is where FryAway completely changes the game and makes your life so much easier.
This plant-based powder is my secret weapon for oil disposal. Just follow these three simple steps for the easiest cleanup ever:
- Sprinkle and Stir: While the oil is still hot, carefully sprinkle in the FryAway powder. Give it a gentle stir until it’s all dissolved.
- Cool Down: Now, just walk away. Let the pot or pan cool down completely. As it cools, FryAway works its magic, turning that liquid oil into a solid, waxy puck.
- Toss into household trash: Once it's solid, you can easily scoop the hardened oil out with a spatula and toss it right into your household trash can.
That's it. No messy jars, no clogged drains, and it’s a much better choice for the environment. Problem solved.
Handling Cleanup the Smart and Simple Way
You’ve done it. You’ve pulled off a batch of perfectly golden, crispy, juicy fried chicken that would put any restaurant to shame. The kitchen smells incredible, plates are full, and everyone’s happy.
Then you turn around and see it: the pot of used cooking oil, the inevitable aftermath of any great frying adventure.
Don’t let the thought of cleanup kill the vibe. The absolute worst thing you can do is pour that hot oil down the drain. It might seem like the quickest fix, but it’s a recipe for disaster, leading to massive plumbing blockages called "fatbergs" that can wreck your pipes and the city's sewer system.
Luckily, there’s a brilliantly simple solution I swear by in my own kitchen. It’s a 100% plant-based powder called FryAway, and it magically transforms that hot, messy liquid oil into a solid, easy-to-handle puck of organic waste. It takes all the stress out of the post-fry cleanup.
The Easiest Way to Dispose of Frying Oil
I used to dread this part. My old routine involved messy jars, waiting hours for the oil to cool, and then figuring out what to do next. With FryAway, cleanup is just another easy step in the cooking process. It’s so simple it feels like cheating.
You just follow three quick steps to get the best results:
-
Sprinkle and Stir: Right after you've taken the chicken out and turned off the heat, just sprinkle the FryAway powder into the still-hot oil. Give it a good stir until it completely dissolves.
-
Cool Down: Now, just walk away. Leave the pot on the stovetop to cool down completely. As it cools, the FryAway works its magic, solidifying the entire mixture into a solid, waxy mass.
-
Toss into household trash: Once it’s fully hardened, use a spatula to scoop the solid puck right out of the pot and toss it directly into your household trash.
That's it. No spills, no greasy containers taking up space, and zero risk to your plumbing. It's honestly the cleanest and most eco-friendly way to handle used frying oil.
Why This Cleanup Method Is a Game-Changer
Beyond just being easy, using a solidifier like FryAway is a much more responsible way to cook. Pouring grease down the drain contributes to a staggering 47% of all sewer overflows in the United States, creating major environmental and infrastructure headaches. By solidifying the oil, you’re not just saving your own pipes—you’re helping prevent a much bigger problem.
When the cleanup is this quick and painless, you’ll find yourself more excited to make fried foods again. Taking away the biggest hassle of a homemade fried chicken recipe lets you focus on the fun part: cooking and eating.
This method also means you can stop saving old jars or milk cartons, which just reduces waste and clutter. For anyone looking to make their kitchen routine smoother, a smart cleanup solution is a total game-changer. You can find even more tips in our guide to effortless post-frying cleanup. It’s all about working smarter, not harder, so you can get back to enjoying that delicious chicken.
Got Fried Chicken Questions? I've Got Answers.
Even with a killer recipe, frying chicken can be tricky. It’s one of those things where a little experience goes a long way. Let's tackle some of the most common hurdles home cooks run into so you can get that perfect, crispy bird every single time.
Why Is My Fried Chicken Crust Soggy Instead of Crispy?
This is the number one issue, and it almost always comes down to one thing: oil temperature. It’s the classic home-frying pitfall.
If your oil is too cool (anything below 325°F), the coating just soaks it all up before it gets a chance to crisp. You end up with a heavy, greasy mess. On the flip side, if the oil is screaming hot, the outside will burn before the chicken inside is even cooked through.
Another classic mistake? Overcrowding the pan. Tossing in too many pieces at once tanks the oil temperature, leading straight back to that soggy outcome.
My Advice: Your best friend here is a thermometer. Keep that oil hovering right between 330-350°F (165-175°C). Fry your chicken in small batches, giving each piece plenty of breathing room. Seriously, this one change will make the biggest difference in your quest for that shatteringly crisp crust.
Can I Make This Homemade Fried Chicken Recipe Gluten-Free?
You absolutely can, and it's a pretty straightforward swap. Just replace the all-purpose flour in your dredge with a good-quality gluten-free all-purpose blend. Most of them already contain a binder like xanthan gum, which is key for helping the coating stick.
But you can also get creative for an even crispier, lighter result.
- Rice Flour: This stuff creates an incredibly light, delicate, and super-crisp crust.
- Cornstarch: A secret weapon in many Asian frying styles, cornstarch gives you a thin but seriously crunchy shell.
- GF Panko: If you want a more substantial, rugged crust with a different kind of crunch, gluten-free panko is a great option.
Just make sure to double-check that your spices are certified gluten-free, too. The brining and frying steps stay exactly the same.
What Is the Best Way to Reheat Leftover Fried Chicken?
First things first: step away from the microwave. It's the fastest way to turn that beautiful crust you worked so hard for into a steamy, soft disappointment. The goal is to revive the chicken with dry heat, which re-crisps the coating while gently warming the meat.
Your two best bets are the oven or an air fryer.
- Oven Method: Get your oven preheated to 400°F (200°C). Place the chicken on a wire rack set inside a baking sheet—this lets hot air circulate all the way around, getting the bottom crispy too. Give it about 15-20 minutes, or until it's heated through.
- Air Fryer Method: This is my go-to for speed. Set your air fryer to 375°F (190°C). Arrange the chicken in a single layer and cook for 4-6 minutes per side, flipping halfway through to get it perfectly crisp again.
Either method will bring that leftover chicken right back to its former glory.
How Do I Clean Up the Cooking Oil Afterward?
You’ve conquered the chicken, but now you’re staring at a pan full of used oil. The golden rule is to never, ever pour it down the drain. It will solidify in your pipes and lead to some seriously expensive plumbing nightmares.
For a completely mess-free and responsible way to handle it, I always use FryAway. It’s a plant-based powder that magically solidifies used cooking oil, making it ridiculously easy to throw away.
The whole process is foolproof and takes the dread out of cleanup.
- Sprinkle and Stir: Once you’re done frying, turn off the heat. While the oil is still hot, just sprinkle in the FryAway powder and give it a quick stir until it dissolves.
- Cool Down: Now, just walk away and let the pan cool down completely. As it cools, the oil will transform into a solid, waxy puck.
- Toss into household trash: Once it's solid, you can scoop the whole thing out with a spatula and toss it right in your regular trash bin.
It’s the simplest, cleanest way to deal with used oil, keeping your pipes safe and letting you enjoy that incredible fried chicken without worrying about the mess.
With FryAway, you can fry more often without the mess. It's the perfect kitchen companion for anyone who loves fried foods but hates the cleanup. Discover how easy oil disposal can be at https://fryaway.co.