


· By FryAway
Best Way to Clean Deep Fryer: Mess-Free, Easy, Safe
The best way to clean a deep fryer is all about safety, smart oil disposal, and thorough degreasing. This means unplugging the unit, dealing with the old oil without making a mess, and then getting every component squeaky clean. The biggest headache has always been the oil, but a modern approach makes that the easiest part.
Your Guide to a Spotless Deep Fryer
A clean deep fryer is the secret to crispy, better-tasting food and a much safer kitchen. Let's cut through the confusion and walk through a practical method that tackles the two biggest hassles: getting rid of used oil and cutting through that sticky, built-up grease.
The whole process can be broken down into a few key stages. This simple flowchart shows you how it works, starting with prep and ending with a fryer that looks brand new.
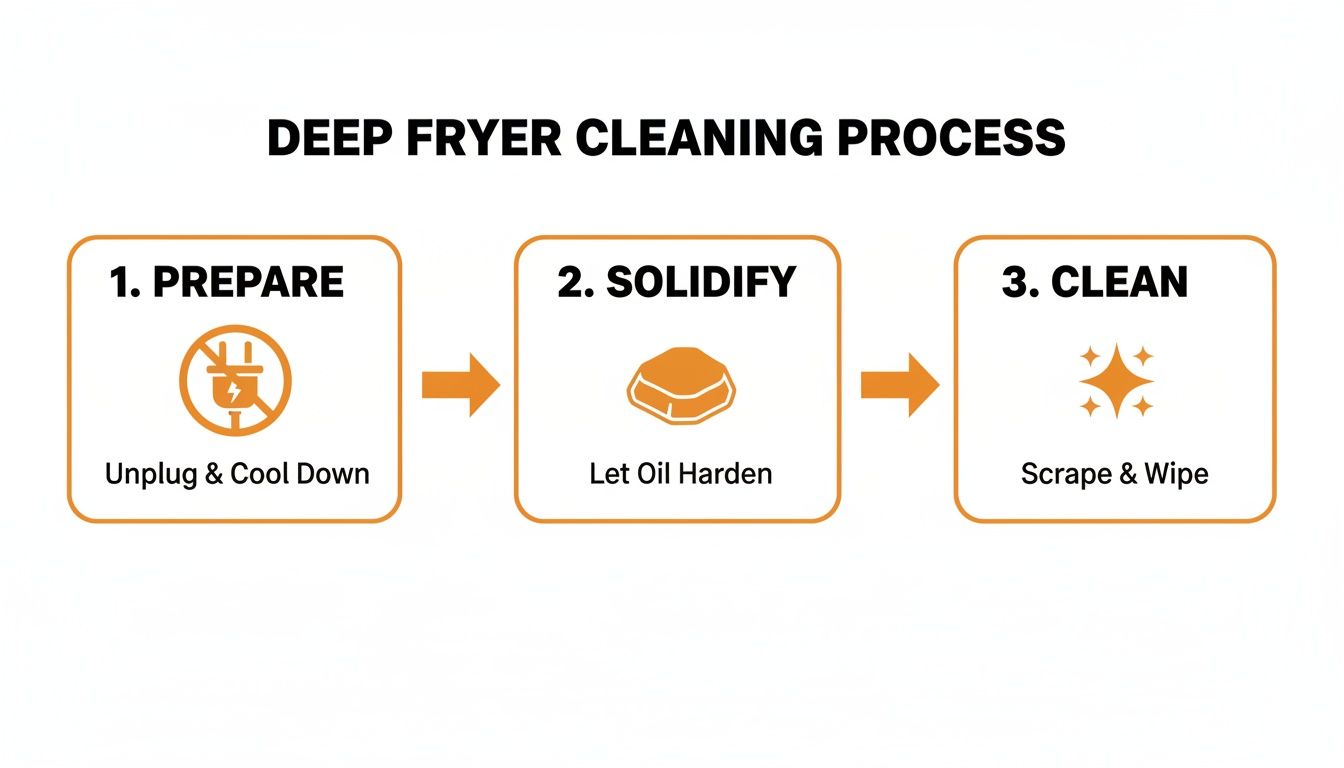
As you can see, the routine is straightforward: prep the fryer, solidify the oil so you can just toss it, and then get to cleaning.
To give you a clearer picture of the workflow, here’s a quick breakdown of what each stage involves.
Deep Fryer Cleaning At a Glance
| Cleaning Stage | Primary Goal | Key Tool or Product |
|---|---|---|
| Preparation | Ensure safety and prevent accidents before cleaning begins. | None (unplugging the unit is the main step). |
| Oil Solidification | Easily and cleanly dispose of used cooking oil. | Oil solidifying powder like FryAway. |
| Deep Cleaning | Remove all grease, residue, and food particles from components. | Degreasing soap, non-abrasive scrub brush. |
This table simplifies the journey from a greasy mess to a pristine appliance, highlighting the purpose of each step.
A Modern Cleaning Routine
Let's be honest, the worst part of cleaning a deep fryer has always been dealing with the leftover oil. Pouring hot grease down the drain is a recipe for a massive plumbing bill, and storing it in old jars is just plain messy and inconvenient.
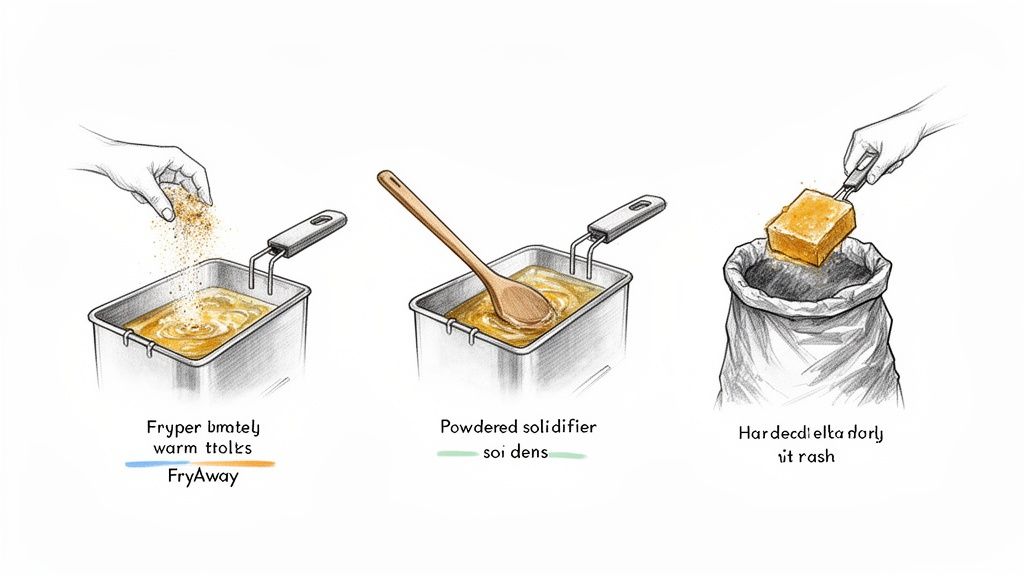
A streamlined approach fixes this problem completely. We recommend using FryAway, a plant-based powder that turns oil disposal into a simple, three-step task:
- Sprinkle and Stir: While the cooking oil is still hot, just sprinkle in the FryAway powder and give it a good stir until it’s fully dissolved.
- Cool Down: Now, just let it be. As the oil cools down, it will magically transform into a solid, organic block.
- Toss: Once it’s solid, you can easily scoop the hardened oil right out of the fryer and toss it into your regular household trash.
Forget the spills and clogged drains; we're focusing on a realistic routine that works. With a simplified oil disposal method, you’re more likely to clean the fryer regularly, leading to better food and a longer-lasting appliance.
For a deeper dive into the entire process, including daily maintenance and boil-out procedures often used in professional kitchens, check out this detailed guide on how to clean a commercial deep fryer. The tips and techniques in there are incredibly useful for home units, too.
Preparing Your Fryer for a Safe and Easy Clean
Before you can even think about scrubbing, a little prep work goes a long way. It makes the whole process smoother, faster, and—most importantly—safer. The absolute first thing you must do is unplug your deep fryer and let it cool down. We're not talking ice-cold, but it should be just warm to the touch, not hot enough to burn. Wrestling with a hot or plugged-in appliance is a recipe for disaster.
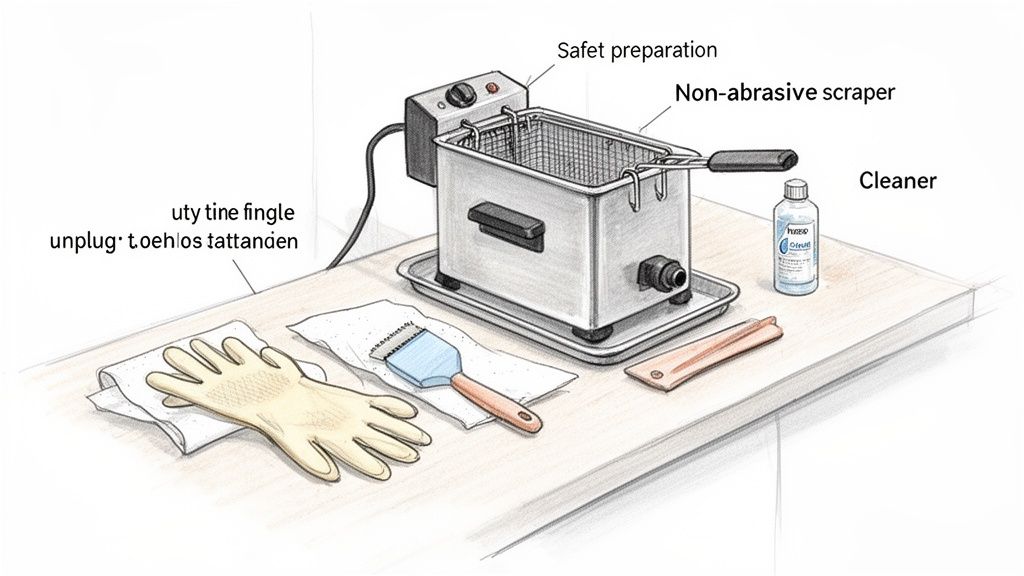
Next, get your cleaning station ready. A clear countertop or an empty sink is perfect. Grab all your supplies now so you’re not scrambling later: gloves, paper towels, a non-abrasive spatula, and your FryAway powder for the oil.
The Modern Way to Handle Old Oil
Let’s be honest, dealing with the used cooking oil is the part everyone dreads. Instead of messing with jars or risking a clogged drain, solidifying the oil is the game-changer. For a deeper dive, it's worth reviewing these essential hot oil handling hacks to keep safety at the forefront of your kitchen routine.
Once your fryer is safely prepped, the next part is almost laughably easy.
Once the oil from your last batch of Crispy Buttermilk Fried Chicken has cooled slightly but is still warm, it's time to act. This is the ideal temperature for the solidification process to begin.
This is where a product like FryAway comes in. It turns the messiest part of the job into the simplest.
- Sprinkle and Stir: While the oil is still warm, just sprinkle the FryAway powder right into the fryer. Give it a gentle stir until it dissolves completely.
- Cool Down: Now, just walk away and let it do its thing. As the oil cools to room temperature, it will magically harden into a solid, waxy puck.
- Toss into Household Trash: Once it's solid, you can easily scoop the entire block of oil out with a spatula and toss it straight into your household garbage. No spills, no mess, and definitely no clogged pipes.
The Easiest Way to Handle Used Cooking Oil
Let's be honest: dealing with used cooking oil is a drag. It's messy, it's inconvenient, and it's probably the main reason you put off cleaning your deep fryer. Pouring hot grease down the sink is a definite no-go, and that greasy jug of old oil stashed under the sink? That's just a future problem waiting to happen.
This is exactly why finding a modern, simple solution is a game-changer for anyone who loves whipping up fried food at home.
A product like FryAway completely transforms the cleanup process. This plant-based powder tackles the toughest part of the job by turning that messy liquid into a solid you can just toss away. No more funnels, no more jars, and no more risking a greasy spill all over the kitchen floor. The whole thing couldn't be simpler.
Simplify Disposal with Three Actions
So, you've just finished frying up a perfect batch of crispy catfish in peanut oil. Instead of staring down a vat of hot, sloshy liquid, you can now handle it cleanly and safely. Getting your fryer clean starts with getting the old oil out of the way, and this is how you do it.
Here’s the straightforward three-step process using FryAway:
- Sprinkle and Stir: While the oil is still hot, just sprinkle the powder over the top. Give it a quick stir until it's all dissolved.
- Cool Down: Now, just walk away and let the fryer cool down completely. As it cools, the FryAway gets to work, turning that liquid oil into a solid, almost gel-like block.
- Toss into Household Trash: Once the oil is completely solid, you can scoop the whole thing out with a spatula. The entire block of hardened oil goes right into your household trash can. No mess, no fuss.
This method isn't just about making your life easier—it's also about being responsible. Improper oil disposal is a huge problem. Around the world, homes and restaurants produce tens of millions of tons of waste cooking oil every year.
Here in the U.S. and Europe, water utilities report that fats, oil, and grease (FOG) are behind 47–75% of all sewer blockages. This creates massive underground "fatbergs" that cost millions of dollars to clear out. You can find more details on this widespread issue in our guide on how to dispose of deep fryer oil.
Why Solidifying Oil is the Smart Choice
When you choose to solidify your oil with FryAway, you're sidestepping a long list of potential kitchen disasters and environmental headaches. You don't have to worry about spilling hot grease while trying to pour it into some old jar. Even better, you're protecting your home's plumbing from serious damage.
By solidifying oil, you're taking a proactive step to prevent clogs before they happen. This simple habit keeps your drains clear and helps you avoid costly plumbing emergencies down the road.
Properly disposing of oil is key to preventing clogged pipes and getting the full benefits of professional drain cleaning for your home's long-term health. This approach truly is the best way to clean a deep fryer because it removes the biggest headache, making you much more likely to clean the appliance regularly. When cleanup is this easy, you can enjoy your favorite fried foods more often, without the dread.
How to Degrease and Scrub Your Fryer
Once the old cooking oil is solidified and tossed out—thanks to the super simple FryAway method—your deep fryer is ready for a real deep clean. This is where you get to tackle all that built-up grime and restore your fryer to its sparkling, ready-to-cook glory.
My advice? Always work from the outside in, starting with any removable parts.
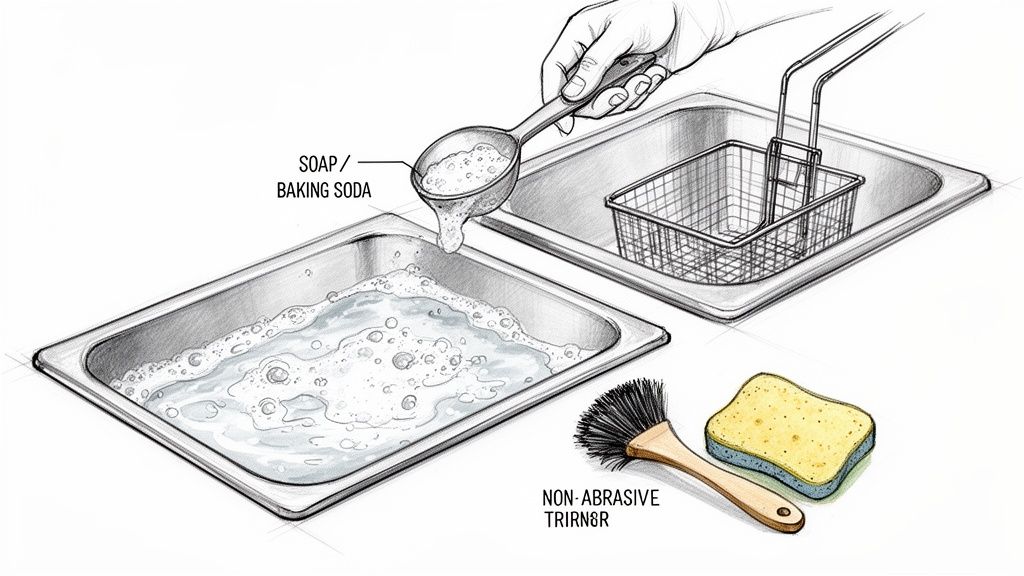
Start with the frying basket. A good soak in hot, soapy water will do most of the heavy lifting, loosening up that stubborn residue. From there, a non-abrasive brush or sponge can get into the mesh where little bits of food love to hide.
For those extra-tough, baked-on spots, a simple paste made from baking soda and water works wonders. It gives you that extra scrubbing power without scratching up the metal.
The Boil-Out Method for the Fryer Tank
Now for the main event: the fryer tank. Over time, oil polymerizes and creates this sticky, dark film that feels almost impossible to get off. Forget aggressive scrubbing that can damage the interior. The "boil-out" method is your best friend here—it’s incredibly effective and does most of the work for you.
There's a reason this is a go-to technique in professional kitchens. Regular boil-outs keep fryers in peak condition and can even extend the life of cooking oil by 25–50% in commercial settings. For home use, a thorough interior clean every 3–5 uses is a great rule of thumb to keep everything tasting fresh.
Here’s how to do it:
- Fill the fryer tank with water right up to the maximum oil line.
- Add a good squirt of grease-cutting dish soap. A few tablespoons of baking soda work well, too.
- Plug the fryer back in, turn it on, and let the water heat up to a low simmer. You don't want a full, rolling boil.
- Let it simmer away for about 10-15 minutes. This process is what lifts and dissolves all that cooked-on gunk.
After it's done simmering, unplug the fryer and let the water cool down completely before you drain it. You’ll find that most of the grime just wipes away with a soft cloth. For stubborn spots, especially around the heating element, a gentle scrub is all you'll need. If you're looking for the perfect soap for the job, check out our guide on finding the best grease cleaner for your kitchen.
Final Touches for a Polished Finish
With the inside sparkling, don't forget the exterior. Cooking splatters and fingerprints can make even the cleanest appliance look grimy. Usually, a quick wipe-down with a damp cloth and a mild cleaner is all it takes to bring back that shine.
Pay close attention to the lid and the control panel, making sure every little nook and cranny is completely dry before putting everything back together. Any trapped moisture can lead to rust or damage the electronics over time.
A truly clean fryer isn't just about what's on the inside. A spotless exterior and a gleaming basket make the whole appliance feel brand new—and motivates you to keep it that way.
Now your deep fryer is officially degreased, scrubbed, and ready for its next culinary adventure. Imagine perfectly crispy fries or delicate, fluffy doughnuts, all without any lingering flavors from old, burnt-on residue. This kind of thorough cleaning makes sure every dish you create tastes exactly the way it's supposed to.
Fryer Maintenance for Long-Lasting Performance
A proper deep clean is non-negotiable, but it’s the consistent upkeep that really gives your fryer a long, happy life and keeps your food tasting fantastic. Think of it less like a massive annual project and more like simple, regular habits that prevent problems before they start.
The easiest win? Filter your oil after every single use. It’s a small step that makes a huge difference. Filtering gets rid of all those tiny food particles that would otherwise burn, break down the oil, and make your next batch of food taste off. After frying up some crispy buttermilk fried chicken, filtering that peanut oil ensures your next dish tastes exactly as it should.
Creating a Sustainable Cleaning Rhythm
Knowing when to do a full "boil-out" versus a quick wipe-down is the secret to manageable fryer care. For most home fryers, a complete deep clean every 3-5 uses is a great rule of thumb. This cadence prevents grease from polymerizing—that’s the process where it turns into that sticky, impossible-to-scrub-off gunk.
This practical approach is actually influencing how fryers are designed. Manufacturers know the best cleaning routine is one people will actually stick with. A 2023 market estimate showed that ease of cleaning is now a top priority for buyers. The new best practice is all about combining regular wipe-downs with scheduled boil-outs and simple oil removal with FryAway, making the whole process quick enough to do consistently. You can dive deeper into these market insights on deep fryer trends.
When cleanup isn't a massive chore, you're more likely to use and enjoy your appliance. A simple, repeatable maintenance schedule makes deep frying a more enjoyable and less daunting experience.
Common Maintenance Mistakes to Avoid
Even with the best intentions, a few common slip-ups can shorten your fryer’s lifespan or damage its parts. Just being aware of these pitfalls is half the battle.
- Using Abrasive Scrubbers: Step away from the steel wool. Never use harsh scouring pads on the fryer’s tank or basket. They’ll scratch up non-stick surfaces in a heartbeat, which not only makes future cleaning harder but can also cause tiny bits of the coating to flake into your food. A soft sponge and a good degreaser are all you need.
- Neglecting to Dry Completely: Moisture is the enemy. Before you put your fryer back together, make sure every single component is 100% dry. Trapped water is the number one cause of rust on baskets and can wreak havoc on electrical components over time.
- Forgetting the Exterior: Splattered grease on the outside of the fryer isn't just a cosmetic issue. If left to build up, it can gum up the controls or block vents, which ultimately hurts performance. A quick wipe-down of the exterior after each use keeps everything running smoothly.
By steering clear of these simple mistakes, you're protecting your investment and making sure your fryer is always ready for its next delicious mission.
Recipes to Try in Your Spotless Fryer
Alright, your deep fryer is gleaming and ready for action. Now for the fun part: making some incredible food to reward all that hard work. When a fryer is truly clean, you get pure, delicious flavors without any ghost of meals past. You’re about to taste the difference.
To get you started, here are three classic fried recipes that will make you glad you took the time to do a thorough clean. The best part? When you know cleanup is a breeze with FryAway, you can just focus on the joy of cooking.
Crispy Buttermilk Fried Chicken
This is a timeless favorite for a reason. A great fried chicken recipe is all about that perfect golden-brown, crunchy exterior while keeping the chicken unbelievably moist and tender inside.
For this, peanut oil is a fantastic choice. It has a high smoke point and adds a subtle nutty flavor that really works with the chicken. When you're done, just let the oil cool down a bit, then use the simple FryAway process to solidify it. No more messy bottles of used oil sitting around.
Golden French Fries
There’s just nothing like a batch of homemade french fries, and a spotless fryer is your ticket to perfection. The key here is a neutral cooking oil like canola oil, which lets that pure, fluffy potato flavor be the star of the show.
After you've devoured your perfectly crispy fries, dealing with the leftover canola oil is just as easy with the FryAway three-step method: 1) Sprinkle and Stir, 2) Cool Down, and 3) Toss into the household trash.
The best way to clean a deep fryer starts with easy oil disposal. You can transform your used cooking oil into a solid block with FryAway, making cleanup incredibly simple and motivating you to fry more often.
Delightful Powdered Sugar Doughnuts
Ready for a sweet treat? Nothing beats light, fluffy doughnuts pulled fresh from the fryer. A simple yeast or cake doughnut recipe fried in vegetable oil results in a delicate, airy texture that’s absolutely irresistible. As soon as they’re a pale gold, pull them out and toss them in powdered sugar while they’re still warm.
Once your doughnut-making adventure is over, you can handle the leftover vegetable oil using FryAway's super simple three-step method:
- Sprinkle and Stir: Just add the powder to the still-warm oil and give it a mix until it's all dissolved.
- Cool Down: Let the fryer cool down completely. As it does, the oil will harden into a solid block.
- Toss into household trash: Scoop out the solidified oil and toss it right in the trash. Done.
These recipes are a great reminder of how versatile your fryer can be, and how much more fun cooking is when you know cleanup won't be a chore.
Got Questions About Cleaning Your Deep Fryer?
Even when you've got the cleaning process down, a few questions always pop up. Let's tackle some of the most common ones so you can keep your fryer in top shape without any guesswork.
How Often Should I Really Change the Oil?
For most home cooks, the sweet spot is changing your oil after 3-5 uses. But honestly, that’s just a guideline.
What you're frying makes all the difference. If you’re making something with a heavy, crumbly breading like crispy buttermilk fried chicken, that oil is going to break down much faster than if you're just making a batch of french fries.
Your eyes and nose are your best tools here. Is the oil looking dark and murky? Does it start smoking sooner than it used to? Does it have a funky, rancid smell? If you answered yes to any of these, it’s time for a change, no question. Filtering the oil after each use definitely helps, but don't try to push it past its prime.
What's the Easiest Way to Get Rid of Old Oil?
Hands down, the simplest and cleanest way to dispose of old cooking oil is to solidify it first. Pouring hot, sloshy oil into a container is just asking for a mess (and a potential burn). This is why we always use a plant-based solidifier like FryAway.
It turns what used to be the worst part of the job into a simple, no-mess task.
- Sprinkle and Stir: Just sprinkle the FryAway powder into the still-warm cooking oil and give it a quick stir until it dissolves.
- Cool Down: Walk away and let the fryer cool down completely. As it cools, the oil will turn into a solid, waxy block.
- Toss into household trash: Once it’s solid, you can just scoop the entire block out and toss it right into your household trash bin.
This method completely eliminates the risk of spills and, more importantly, keeps that grease from wrecking your plumbing.
When you take the hassle out of oil disposal, cleaning your fryer feels like much less of a chore. It's a small change that makes a huge difference in keeping your appliance clean and ready for the next use.
How Do I Deal With That Stubborn, Baked-On Grease?
You know that sticky, brownish film that builds up inside the fryer tank? That’s polymerized grease, and it can be a real pain to scrub off.
The "boil-out" method is your secret weapon here. After you've disposed of the old oil using FryAway, fill the tank with water, add a good squirt of dish soap, and bring it to a gentle simmer for about 15 minutes. The heat and soap work together to loosen up even the most stubborn gunk.
If you still have a few tough spots, a simple paste of baking soda and water is fantastic. Slather it on, let it sit for a few minutes, and then go at it with a non-abrasive sponge. It provides just enough grit to scrub away the grime without scratching the fryer's surface. This trick works wonders on the fryer basket, too.
Ready to make your deep fryer cleanup effortless? FryAway transforms used cooking oil into a solid, easy-to-toss block, so you can enjoy your favorite fried foods without the mess. Try it today and see how simple cleanup can be by visiting https://fryaway.co