


· By FryAway
How to fry chicken at home: Juicy, crispy results every time
Making truly great fried chicken at home really comes down to a few key stages: prepping the chicken, nailing the coating, and frying it just right. It's not a complicated dance, but getting each step perfect is what separates decent fried chicken from the kind you can't stop thinking about.
Your Guide to Restaurant-Quality Fried chicken at Home
Let's be honest, the thought of frying chicken at home can be a little intimidating. We imagine a greasy mess, complicated steps, and chicken that just doesn't measure up. But this guide is here to change that. I'm going to walk you through the entire process, sharing the same essential techniques pro chefs use to get that incredible crispy crust and juicy, flavorful meat every single time.
This isn't just a restaurant thing, either—it's a global obsession. The fried chicken market was valued at a whopping $93.33 billion in 2024 and is expected to soar past $130 billion by 2029. That massive growth tells you one thing: home cooks everywhere are eager to master this dish. You can dig deeper into these market trends and insights if you're curious.
What to Expect in This Guide
Think of this as your roadmap to fried chicken success, with no guesswork involved. We'll get into practical, actionable advice to make sure your chicken comes out perfectly.
Here’s a quick peek at what we're covering:
- Flavor Foundations: Why brining or soaking in buttermilk is the non-negotiable first step for tender, juicy results.
- The Perfect Crunch: A deep dive into the great debate: dry breading vs. wet batter, with tips for both.
- Frying with Confidence: Everything you need to know about choosing the right oil, holding the perfect temperature, and staying safe.
- Simple, Mess-Free Cleanup: The absolute easiest way to deal with all that used cooking oil when you're done.
The Cleanup Solution You Need
For most home cooks, the biggest turn-off is the cleanup. What do you do with all that used cooking oil? Pouring it down the drain is a recipe for a plumbing disaster, and stashing it in old jars is just plain messy.
That's precisely why we recommend FryAway. It's a 100% plant-based powder that makes oil disposal unbelievably simple. Now you can enjoy amazing fried food without dreading the aftermath.
The process couldn't be easier:
- Sprinkle and Stir: After you're done frying, turn off the heat and just stir the FryAway powder into the hot oil until it disappears.
- Cool Down: Let the oil cool down completely. You'll see it magically turn into a solid block.
- Toss into household trash: Once it's hard, simply scoop the solid oil out and toss it right into your household trash bin.
It’s a total game-changer for anyone who loves fried food but hates the cleanup. By the time you finish this guide, you’ll not only know how to fry incredible chicken but also how to do it without making a huge mess.
Building the Foundation for Flavorful Chicken

If you want to know how to fry chicken at home like a seasoned pro, the journey starts long before a single piece hits the hot oil. The real secret to unbelievably tender, seasoned-to-the-bone meat is all in the prep work. Skipping this stage is the difference between good chicken and truly unforgettable chicken.
First things first: you have to guarantee your chicken stays moist. Frying is an intense, high-heat cooking method that can easily dry out lean meat. A simple brine is your best defense against this, locking in juiciness every single time.
The Power of a Simple Brine
So, what is a brine? It's basically a saltwater bath for your chicken. Through a process called osmosis, the chicken absorbs some of the salted water. This not only seasons the meat from the inside out but, more importantly, helps it retain moisture during the intense heat of frying.
Think of it as insurance for juiciness. A well-brined piece of chicken can lose up to 40% less moisture during cooking compared to one that wasn't brined. That means even if you slightly overcook it, your chicken will still be remarkably tender.
For a basic but effective brine, a good ratio is:
- 1/4 cup of kosher salt to every 4 cups (1 quart) of water.
- Feel free to add other aromatics for subtle layers of flavor, like a few tablespoons of sugar, smashed garlic cloves, peppercorns, and bay leaves.
Submerge your chicken pieces completely in the brine, cover the container, and stick it in the fridge. For cut-up chicken parts, 4 to 6 hours is plenty. If you're doing a whole chicken, you can go for 8 to 12 hours. Just be careful not to over-brine, or the meat can get too salty.
The Magic of a Buttermilk Marinade
While a brine is fantastic for moisture, a buttermilk marinade is the key to texture. Buttermilk contains gentle acids and enzymes that work to tenderize the chicken, breaking down tough proteins without ever turning the meat mushy.
This dual action—tenderizing while adding a subtle, tangy flavor—is what gives classic Southern fried chicken its signature character. The buttermilk also clings beautifully to the chicken, creating the perfect tacky surface for the breading to grab onto, helping you build that thick, craggy crust we all crave.
A buttermilk soak does more than just tenderize; it acts as a flavor carrier. Any herbs and spices you add to the buttermilk—like paprika, cayenne, or dried thyme—will subtly infuse into the meat, creating a more complex flavor profile in the finished product.
You can even combine these two steps. Brine the chicken first, then move it to a buttermilk marinade for the final few hours. Or, for a shortcut, you can create a salted buttermilk brine by dissolving your salt directly into the buttermilk. A minimum of 4 hours is good, but for the best results, let it marinate overnight.
The Final, Crucial Prep Step
After your chicken has been brined or marinated, there's one last simple but vital step before you start breading: pat it dry. I know, it seems counterintuitive after soaking it for hours, but this is essential for getting that extra-crispy skin.
Excess moisture on the surface of the chicken will create steam in the hot oil, which is the enemy of a crispy coating. It works against the breading and prevents it from frying up properly.
- Remove the chicken pieces from the brine or marinade.
- Let any excess liquid drip off for a moment.
- Place the chicken on a wire rack set over a baking sheet.
- Thoroughly pat each piece dry with paper towels.
This simple action ensures your breading sticks better and fries up to a beautiful, golden-brown crunch. Properly prepped chicken is the foundation for everything that follows, including choosing the right cooking oil to achieve that perfect fry. Taking these initial steps seriously is what sets the stage for restaurant-quality fried chicken right in your own kitchen.
Creating the Perfect Crispy Coating
That unmistakable, shattering crunch—that's what makes fried chicken so deeply satisfying. While the brine or buttermilk soak sets the stage for juicy, flavorful meat, the coating is the real star of the show.
Your choice here really comes down to two paths: a classic dry breading or a smooth wet batter. Each one creates a totally different experience, so let's break down how to master both.
The Classic Southern-Style Flour Dredge
When you picture iconic American fried chicken, you're probably thinking of a seasoned flour dredge. This method is all about creating that craggy, light, and ridiculously crispy coating full of crunchy little bits. The goal is a substantial crust that clings to the chicken without ever feeling heavy or greasy.
The beauty of a seasoned flour dredge is its simplicity. It starts with a base of all-purpose flour, but a little cornstarch mixed in is a game-changer; it helps absorb moisture and guarantees an extra-crisp finish.
For a foolproof seasoned flour that I come back to time and time again, start with these ratios:
- 2 cups of all-purpose flour
- 1/2 cup of cornstarch
- 2 tablespoons of paprika (smoked adds a nice depth)
- 2 tablespoons of garlic powder
- 1 tablespoon of onion powder
- 1 tablespoon of black pepper
- 1 tablespoon of salt
- 1-2 teaspoons of cayenne pepper (you control the heat)
Just whisk everything together in a shallow dish or a big resealable bag. Now, for the real secret to those signature craggy bits: drizzle a few tablespoons of your leftover buttermilk marinade right into the flour. Toss it with a fork. This creates little clumps that will fry up into the most incredible crunchy morsels.
Wet Batter for a Smooth, Puffy Crust
If you're after a thicker, more uniform crust—think fish and chips or some styles of tempura—then a wet batter is your answer. This style of coating puffs up dramatically in the hot oil, creating a light yet substantial shell around the chicken.
A basic batter is just flour, cornstarch, seasonings, and a liquid. But the secret weapon for a truly light and airy batter is carbonation.
Using club soda, seltzer water, or even beer instead of plain water introduces tiny air bubbles into the mix. When these bubbles hit the hot oil, they expand rapidly, creating a delicate, crispy texture that's impossible to achieve otherwise.
For a simple and effective batter:
- Whisk together 1 cup of all-purpose flour, 1/2 cup of cornstarch, and your seasonings (salt, pepper, garlic powder).
- Slowly pour in about 1 1/2 cups of very cold club soda or beer, whisking just until it comes together. Don't worry about a few lumps—overmixing develops gluten and makes the crust tough.
The Double-Dredge for Maximum Crunch
For an ultra-crispy, practically shatterproof crust that will not fall off, the double-dredge technique is your best friend. This process builds layers of coating, resulting in a thick, crunchy shell that can stand up to anything.
Here's how it works:
- First Dredge: Take your chicken out of the marinade, pat it dry, and coat it thoroughly in the seasoned flour. Make sure to shake off any excess.
- Egg Wash: Dip the floured chicken into a simple egg wash (just 2 eggs beaten with a splash of milk or buttermilk).
- Second Dredge: Immediately put the chicken back into the seasoned flour, pressing firmly this time to make sure the coating sticks everywhere.
Once coated, let the chicken rest on a wire rack for at least 10-15 minutes before it hits the oil. This is a crucial step. It allows the coating to hydrate and form a solid "skin," which helps it cling to the chicken during the chaos of frying. It's a key part of building layers of crispiness, a concept you can explore more in our guide on whether double-frying makes food crispier.
So, which one is for you? It really comes down to personal preference. Here’s a quick rundown to help you decide what you're in the mood for.
Breading vs Batter: Which Coating Is Right for You?
Choosing between a dry dredge and a wet batter really depends on the kind of fried chicken you're dreaming of. Both are fantastic, but they deliver very different results.
| Characteristic | Dry Breading (Seasoned Flour) | Wet Batter |
|---|---|---|
| Texture | Craggy, light, and flaky with a classic crunch. | Smooth, puffy, and uniformly crispy. |
| Flavor Profile | The seasoning is directly in the crust, offering a savory bite. | The crust is milder, allowing the chicken's flavor to shine through. |
| Best Use Cases | Ideal for classic Southern-style or Nashville hot chicken. | Excellent for boneless chicken tenders, nuggets, or an Asian-style fry. |
Ultimately, there's no wrong choice here. Experiment with both methods to discover your personal favorite way to get that perfect golden-brown crust.
Frying Your Chicken to Golden Perfection
Now for the main event—the sizzle. You've prepped your chicken, you've coated it with care, and now it's time for the magic. This is where pale, coated pieces transform into the golden, crispy masterpiece you've been working toward. Getting this part right is all about controlling the heat and giving your chicken the space it needs to cook perfectly.
Forget guesswork. The single most important tool in your arsenal at this stage is a reliable thermometer. Whether it's a deep-fry thermometer that clips to the side of your pot or a quick-and-accurate instant-read version, you must know your oil's temperature. It's the difference between greasy, undercooked chicken and a perfectly crisp, juicy final product.
Setting Up for Success
You don’t need fancy equipment here. A heavy-bottomed Dutch oven or a well-seasoned cast-iron skillet are fantastic choices because they hold heat evenly, preventing the temperature from dropping like a rock when you add the chicken. A dedicated deep fryer also works great, especially for its precise temperature control.
Whichever you choose, fill it with about two to three inches of oil. You want enough to come about halfway up the sides of your thickest chicken pieces—no need to completely submerge them.
Of course, the oil itself is a huge part of the equation. Dig into the best oil to fry chicken for perfectly crispy results if you want to geek out on the details. But for a quick answer, options like peanut, canola, and vegetable oil are popular for a reason. They have high smoke points and a neutral flavor that lets your seasonings shine.
Mastering the Frying Process
Your target temperature is a consistent 325°F to 350°F (165°C to 175°C). This is the sweet spot. If the oil is too hot, the outside will burn long before the inside is cooked. Too cool, and the chicken will just soak up oil, leaving you with a soggy, greasy crust.
Here’s a crucial tip: do not overcrowd the pan. Frying in batches is non-negotiable. Throwing too many cold pieces of chicken in at once will cause the oil temperature to plummet.
A crowded pan essentially steams the chicken instead of frying it. Give each piece enough space to be surrounded by hot oil on all sides. This is the secret to a uniformly crispy crust and even cooking.
When you add that first batch, the oil temp will naturally dip. Your job is to adjust the stovetop heat to bring it back into that target range as quickly as possible without letting it get too hot.
This simple infographic breaks down the essential breading steps right before the chicken hits the oil.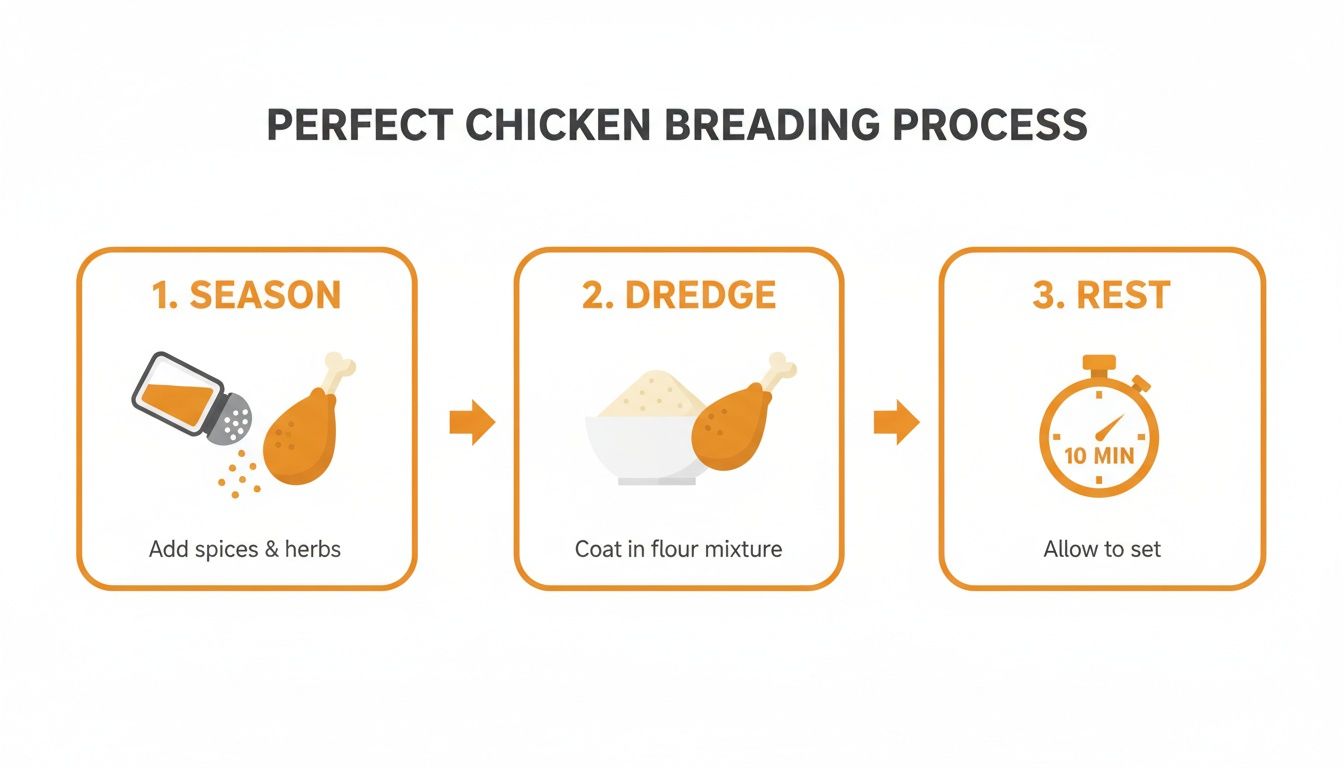
Following this sequence ensures the coating sticks like glue, which is exactly what you want for a great fry.
Knowing When Your Chicken Is Done
So, how long does this take? It really depends on the size and cut of your chicken pieces.
- Wings: Usually take about 6-8 minutes per side.
- Drumsticks and Thighs: These bigger, bone-in pieces need 10-14 minutes per side.
- Breasts: Depending on thickness, they can take 8-12 minutes per side.
Use tongs to gently turn the chicken just once, about halfway through cooking. I know it's tempting, but resist the urge to constantly poke and flip. This allows a beautiful, uninterrupted crust to form.
While a deep golden-brown color is a great sign, the only way to be 100% sure the chicken is cooked through is with your instant-read thermometer. The internal temperature must reach 165°F (74°C) in the thickest part of the meat (without touching the bone).
Once it’s done, transfer the chicken to a wire rack set over a baking sheet to drain. This lets air circulate underneath, keeping that hard-earned bottom crust from getting soggy.
Now that the fun part is over, you’re probably staring at a pot of used oil and dreading the cleanup. This is where FryAway completely changes the game. Instead of dealing with messy jars or pouring gunk down your drain (please don't!), you can solidify the oil for the easiest disposal ever.
It’s just three simple steps:
- Sprinkle and Stir: Turn off the heat. Carefully stir the FryAway powder into the hot oil until it’s fully dissolved.
- Cool Down: Let the oil mixture cool down completely. It will magically turn into a solid block.
- Toss into household trash: Once it’s solid, just scoop the hardened oil out of your pan and toss it right into your household garbage.
This simple, plant-based solution means you can enjoy the pure joy of frying incredible chicken at home without ever worrying about the messy aftermath.
Effortless Cleanup with FryAway

You’ve just pulled the last beautiful, golden piece of chicken from the fryer. That moment of triumph is amazing, but it’s often followed by a sinking feeling when you look at the pan full of used cooking oil. Let's be honest, figuring out what to do with all that leftover grease is the least fun part of frying chicken at home.
We've all been there. Pouring hot oil down the drain is a fast track to clogged pipes and expensive calls to the plumber. Trying to store it in old jars is just a greasy mess waiting to happen. This cleanup dread is exactly why so many people avoid frying altogether.
This is where FryAway completely changes the game. It’s a simple, 100% plant-based powder that makes getting rid of cooking oil unbelievably easy and safe. No more greasy spills, no plumbing nightmares—just a clean kitchen and the satisfaction of a job well done.
How FryAway Works Its Magic
The whole process couldn't be simpler, taking all the stress out of oil disposal. It’s designed to be the final, satisfying step in your cooking routine, not a chore you put off. With FryAway, you just solidify the used oil so you can toss it out—no mess.
Here’s how easy it is:
-
Sprinkle and Stir: As soon as you're done frying, turn off the heat. Carefully sprinkle the FryAway powder into the hot oil and give it a gentle stir until it dissolves completely.
-
Cool Down: Now for the easy part: just walk away and let it cool. Over the next few hours, FryAway will work its magic, turning that messy liquid into a solid, waxy block right in the pan.
-
Toss into Household Trash: Once the oil has completely hardened, it scoops out cleanly in one solid piece, leaving your pan so much easier to wash. From there, you just toss the solid oil right into your regular trash bin.
It’s a mess-free solution that honestly feels like a magic trick. You can finally enjoy the whole process of frying chicken without dreading the greasy lake left behind, knowing cleanup will be the easiest part of the meal.
A Smarter and Safer Disposal Solution
Using FryAway isn't just about making your life easier; it's about being responsible. Improperly dumped cooking oil is a huge environmental problem, creating massive sewer blockages called "fatbergs" that can cripple city plumbing systems. By solidifying your oil, you’re making sure it stays out of our waterways.
For anyone who loves fried food—from classic Southern fried chicken to tempura and even homemade donuts—this product is an absolute game-changer. It gets rid of the biggest roadblock for home cooks, letting you fry with confidence whenever you want.
Imagine whipping up a batch of incredible Nashville-Style Hot Chicken, complete with its signature cayenne-infused oil. After you’ve devoured that fiery, crispy goodness, you can use FryAway to deal with the leftover spicy oil without a second thought. It’s the perfect end to a perfect meal, making frying at home more enjoyable from start to finish.
Fried Chicken Recipes You Can Make Tonight
Alright, you've got the theory down—you know the secrets to brining, coating, and frying. Now it's time to get your hands dirty and put that knowledge into practice. These two recipes are perfect for mastering the art of frying chicken at home, one offering timeless comfort and the other a fiery kick.
More importantly, both are the perfect chance to plan for an easy, responsible cleanup. Before you even pull out the flour, remember that all the used cooking oil from these incredible recipes can be handled in seconds with FryAway. Just keep their simple three-step process in mind for when you’re done.
Classic Buttermilk Fried Chicken
This is it. The one everyone imagines when they dream of perfect fried chicken. It’s all about that seasoned flour dredge and a long soak in buttermilk, which work together to create that beautifully craggy, golden-brown crust and unbelievably juicy meat inside.
Ingredients You'll Need:
- 8 pieces of bone-in, skin-on chicken (thighs and drumsticks are fantastic here)
- 2 cups buttermilk
- 2 cups all-purpose flour
- 1/2 cup cornstarch
- 2 tablespoons salt
- 2 tablespoons black pepper
- 1 tablespoon paprika
- 1 tablespoon garlic powder
- 48 ounces (about 6 cups) of canola oil, for frying
The Method:
Let your chicken marinate in the buttermilk for at least 4 hours, but overnight is even better for maximum tenderness. In a shallow dish, whisk together the flour, cornstarch, salt, pepper, paprika, and garlic powder. Take each piece of chicken out of the buttermilk, letting the excess drip off, and dredge it thoroughly in the flour mixture. Make sure it's completely coated, then let it rest on a wire rack for 15 minutes. This helps the coating stick.
Fry in 350°F canola oil for about 10-14 minutes per side, until the crust is golden and the internal temperature hits 165°F.
Nashville-Style Hot Chicken
If you're someone who thinks "spicy" is a flavor, this recipe is for you. It starts with that same perfectly fried chicken, but then it gets a slick, fiery brush of cayenne-infused oil. The contrast between that crunchy crust and the glistening, hot glaze is something you won't forget.
Ingredients You'll Need:
- 8 pieces of bone-in, skin-on chicken
- All the ingredients for the Classic Buttermilk Fried Chicken dredge (from the recipe above)
- 48 ounces (about 6 cups) of peanut oil, for frying
-
For the Hot Oil Glaze:
- 1/2 cup of the hot peanut oil right from your fryer
- 3 tablespoons cayenne pepper
- 1 tablespoon brown sugar
- 1 teaspoon paprika
- 1/2 teaspoon garlic powder
- 1/2 teaspoon salt
The Method:
You'll prepare and fry the chicken exactly like the classic recipe, but this time using peanut oil for its high smoke point and flavor. While the last batch of chicken is frying, carefully whisk all the glaze ingredients together in a heatproof bowl. As soon as the chicken comes out of the fryer, immediately and generously brush that hot oil glaze all over every nook and cranny. Serve it the traditional Nashville way—with white bread and pickles to help tame the heat.
After you've enjoyed every last bite of your masterpiece, whether it was classic or spicy, the cleanup is shockingly simple. Don't just leave that pan of used oil sitting on the stove. Turn off the heat and grab your FryAway for the easiest disposal ever.
This final step is the secret to keeping your kitchen clean and your pipes clear.
- Sprinkle and Stir: While the oil is still hot, carefully pour in the FryAway powder. Stir it gently until it’s completely dissolved.
- Cool Down: Now, just walk away. Let the pan sit for a few hours while the oil mixture slowly cools and transforms into a solid, waxy block right in your skillet.
- Toss into household trash: Once it's completely solid, you can easily scoop the entire puck of oil out and toss it straight into your household trash can.
It’s a clean, satisfying, and eco-friendly finish to a truly fantastic home-cooked meal.
Got Fried Chicken Questions? We've Got Answers
Even when you feel like you've got the hang of frying chicken at home, there are always a few little things that can trip you up. Let's tackle some of the most common questions that pop up.
Getting that perfectly crisp, never-greasy chicken is the ultimate goal, and it almost always comes down to one thing: oil temperature. If your beautiful golden-brown chicken comes out greasy, the oil was almost certainly too cold. The breading soaked up oil instead of instantly crisping and sealing.
Another thing I hear a lot is, "Can I reuse this oil?" Absolutely! Just let it cool, then strain it through a fine-mesh sieve or a bit of cheesecloth to catch all the leftover crispy bits. Store it in a sealed container in a cool, dark spot. Most good frying oils like canola or peanut can be reused three to four times before they start to lose their mojo.
What About the Cleanup?
Okay, let's talk about the elephant in the room: that big pan of used cooking oil. What's the best way to deal with it? The one thing you never do is pour it down the drain. It's a surefire way to cause serious, expensive plumbing blockages.
This is exactly why we've made FryAway a non-negotiable part of our frying routine. It's a plant-based powder that magically solidifies used cooking oil, making disposal unbelievably easy.
The best part is how simple it is. There’s no messy pouring into jars or containers. The solidified oil just lifts right out of your pan, making cleanup a breeze and letting you enjoy your delicious fried chicken without any dread.
It only takes a few seconds to get the process started:
- Sprinkle and Stir: After you're done frying, kill the heat. Sprinkle the FryAway powder right into the hot oil and give it a stir until it dissolves completely.
- Cool Down: Now just walk away and let the pan cool down. As it cools, the oil will turn into a solid, waxy block.
- Toss into household trash: Once it's hard, you can just scoop the whole thing out of the pan and toss it right into your household garbage. It's a clean, eco-friendly solution every single time.
Make your frying experience mess-free from start to finish. Try FryAway today and see just how easy cleanup can be. Discover the magic of FryAway here.