


· By FryAway
how many times can you use frying oil: simple reuse tips for safer frying
So, how many times can you really use your frying oil? The short answer for most home kitchens is somewhere between three and eight times.
But that's not the whole story. This isn't a hard-and-fast rule; the actual lifespan of your cooking oil really hinges on two big things: what you're frying and the type of oil you're using. Frying a batch of light, crispy vegetable tempura is a whole lot gentler on your oil than, say, a round of heavily battered fish or chicken.
The Real Answer to Reusing Frying Oil
Deciding when to toss your used cooking oil is a balancing act. You want to save a little money, but you also want your food to taste great and be safe to eat. While commercial kitchens operate under strict rules, home cooks have a bit more flexibility.
The main thing to remember is that every time you fry, you're introducing tiny food particles, water, and air into the oil. Over time, these elements cause the oil to break down and degrade.
What You Cook Matters Most
The single biggest factor determining how many times you can reuse your oil is what you're cooking in it.
- Lightly breaded or non-battered foods: Think homemade potato chips or vegetable fritters. These foods release far fewer particles, keeping the oil cleaner for much longer. With these, you can often get up to eight uses.
- Heavily battered or high-protein foods: Things like fried chicken, fish, or anything with a thick coating will degrade your oil much faster. Bits of breading fall off, and the proteins react with the hot oil, shortening its life to just three or four uses.
This quick visual gives you a good rule of thumb for how many times you can reuse your oil based on what's on the menu.
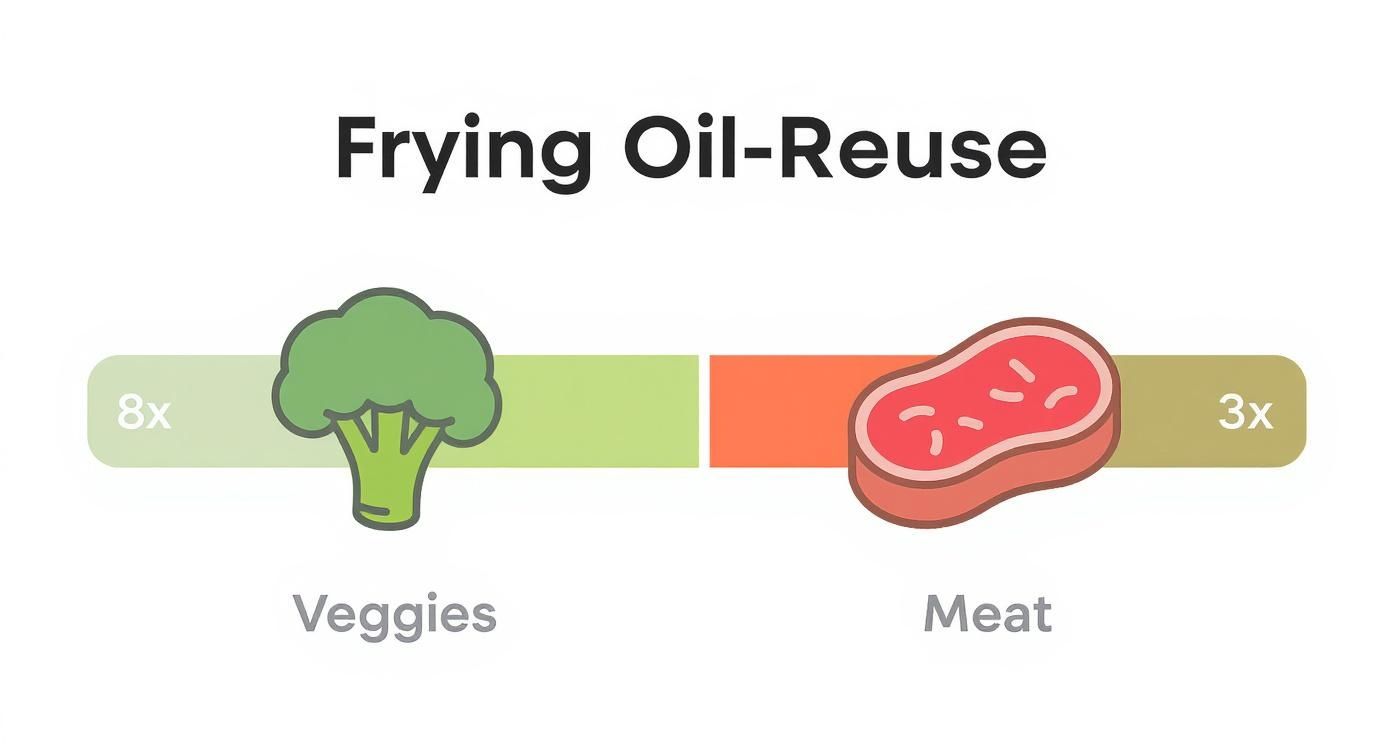
As you can see, you can easily get more than double the mileage from your oil just by frying cleaner ingredients like vegetables.
To help you get started, here's a quick reference chart for some of the most common oils used for frying at home.
General Guidelines for Reusing Frying Oil at Home
| Type of Oil | Frying Lightly Breaded/Vegetables | Frying Heavily Breaded/Meats |
|---|---|---|
| Peanut Oil | 6-8 times | 3-4 times |
| Canola Oil | 5-7 times | 3-4 times |
| Vegetable Oil | 6-8 times | 3-5 times |
| Lard | 8+ times | 4-6 times |
Keep in mind, these are just general guidelines. Always trust your senses—if the oil looks dark, smells off, or smokes too much, it's time for a fresh start.
Factors Beyond Just Counting
The type of oil you choose also plays a huge role. In controlled lab tests frying sweet and sour pork, some fats showed incredible durability. For instance, palm oil was reusable up to 58 times, and pork lard held up for a staggering 87 times! This just goes to show how much an oil's chemical makeup affects its stability and longevity.
If you're curious about how the pros handle their oil, you can get a deeper look into restaurant practices in our guide on why reusing cooking oil is a no-go for restaurants.
Ultimately, while the 3-8 use guideline is a fantastic starting point, the best tool you have is your own judgment. You'll quickly learn to trust your senses. If the oil is dark, has a rancid smell, foams up, or starts smoking long before it hits the right temperature, those are all clear signs that it's time for a fresh batch. When it's time to dispose of the oil, we always recommend using FryAway for an easy, mess-free, and eco-friendly cleanup.
Why Your Cooking Oil Eventually Goes Bad
Ever wonder what’s actually happening in the pan each time you fry? Fresh, unused oil is like a perfectly calm, clear lake—stable, predictable, and ready for action. But every time you heat it up, you’re kicking off a storm by introducing three powerful elements: heat, air, and water from the food itself.
This trio is the catalyst for a series of chemical reactions that break the oil down. The intense heat of frying, combined with oxygen from the air and moisture bubbling out of your food, causes the oil's molecules to degrade. Slowly but surely, this process changes the oil’s structure, performance, and flavor.
The Science Behind Spoiled Oil
Two main culprits are responsible for turning your golden liquid into a dark, smoky mess: hydrolysis and oxidation. They sound like terms from a chemistry class, but the concepts are actually pretty straightforward.
- Hydrolysis: This happens when water from your food—like the moisture in chicken or potatoes—attacks the oil's fat molecules and breaks them down. This reaction creates free fatty acids, which dramatically lower the oil's smoke point. That's the temperature where it stops shimmering and starts burning.
- Oxidation: As the oil interacts with oxygen, its molecules start to change, much like a sliced apple turns brown when left on the counter. This process creates compounds that give the oil that unmistakable off, rancid smell and a stale, bitter taste.
These reactions don't happen in isolation; they feed off each other, accelerating the oil's decline. Each batch of fries introduces more water and exposes the oil to more heat and air, speeding up the breakdown. The result? Oil that smokes faster, smells funky, and leaves your food tasting greasy instead of perfectly crispy.
From Liquid Gold to Thick Sludge
As the oil continues to degrade, another process called polymerization takes over. This is when those damaged oil molecules start linking together, forming longer, stickier chains. You can actually see and feel this happening.
Polymerization is the reason used oil becomes thicker, darker, and more syrupy over time. It’s also what creates that stubborn, gummy residue on the sides of your fryer that’s so tough to scrub off.
This thickening is a dead giveaway that your oil is past its prime. It can no longer transfer heat efficiently, which is why you end up with soggy, unevenly cooked food. Once your oil gets to this sludgy stage, its cooking days are over. It's time to get rid of it and start fresh.
When that time comes, doing it right is key. For a completely mess-free and eco-friendly cleanup, we always recommend FryAway as the perfect answer. This plant-based powder solidifies used cooking oil, making disposal unbelievably simple with a 3-step process.
- Sprinkle and Stir: While the oil is still hot, sprinkle in the FryAway powder and stir until it dissolves.
- Cool Down: Let the pan sit until the oil has completely cooled and hardened into a solid puck.
- Toss into household trash: Scoop the solid oil right out and toss it into your garbage bin.
Using FryAway helps you avoid greasy spills and clogged pipes, making it the smartest way to handle oil that's gone bad.
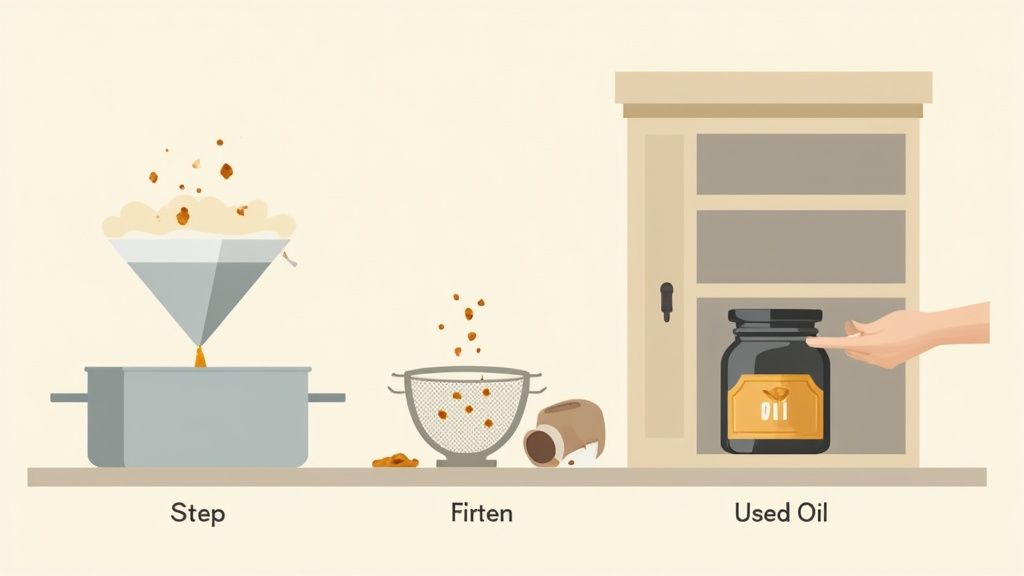
How to Properly Filter and Store Used Frying Oil
The real secret to getting more life out of your frying oil isn't about what you do during the cook—it's about what you do after. Proper filtering and storage aren’t just nice suggestions; they are the most powerful ways to preserve your oil’s quality, flavor, and lifespan. Taking just a few extra minutes for cleanup can easily double the number of times you can use a single batch.
Think of those leftover bits of food and breading as tiny agents of destruction. When they stay in the oil, they burn every time you reheat it. This process not only creates nasty, bitter flavors but also rapidly lowers the oil's smoke point, making it break down even faster. Getting those particles out is your first and most important line of defense.
The Essential Filtering Process
Before you even think about filtering, the number one rule is to let the oil cool down. Never, ever handle hot oil. Wait until it’s warm but completely safe to the touch—aiming for around 150°F (65°C) is a good benchmark. At this temperature, the oil is still fluid enough to strain easily without being a serious burn risk.
Once it’s cooled, it's time to filter. You don’t need any fancy gadgets; simple kitchen tools are all it takes.
- Fine-Mesh Sieve: This is your first pass. It’s perfect for catching the bigger crumbs and pieces of debris.
- Cheesecloth or Coffee Filter: For a much finer strain, line your sieve with a layer of cheesecloth or a regular coffee filter. This simple trick will capture all the tiny, almost invisible particles that do the most damage over time.
Just pour the warm oil through your filter setup and into a clean, dry container. The goal is to get the oil as clear and free of sediment as possible. This one step dramatically slows down the degradation process and sets you up for another successful fry.
Smart Storage for Longer Oil Life
After you’ve filtered the oil, where you keep it is just as crucial. Cooking oil’s biggest enemies are light, heat, and air—the same things that cause it to break down while you're frying. Your storage solution needs to protect it from all three.
The best storage container is both airtight and opaque. A glass mason jar tucked away in a dark cupboard works great, as does a dedicated stainless steel oil canister. Whatever you do, don't just leave the oil in the fryer or an open pan on the stovetop.
By limiting its exposure to oxygen and light, you hit the brakes on the oxidation that makes oil go rancid. If you want to take it a step further, you can even store the container in the fridge. The cold is incredibly effective at keeping oil fresh. Just be sure to let it come back to room temperature before you use it again.
To learn more about extending the life of both new and used oils, check out our detailed guide on how to properly store cooking oil.
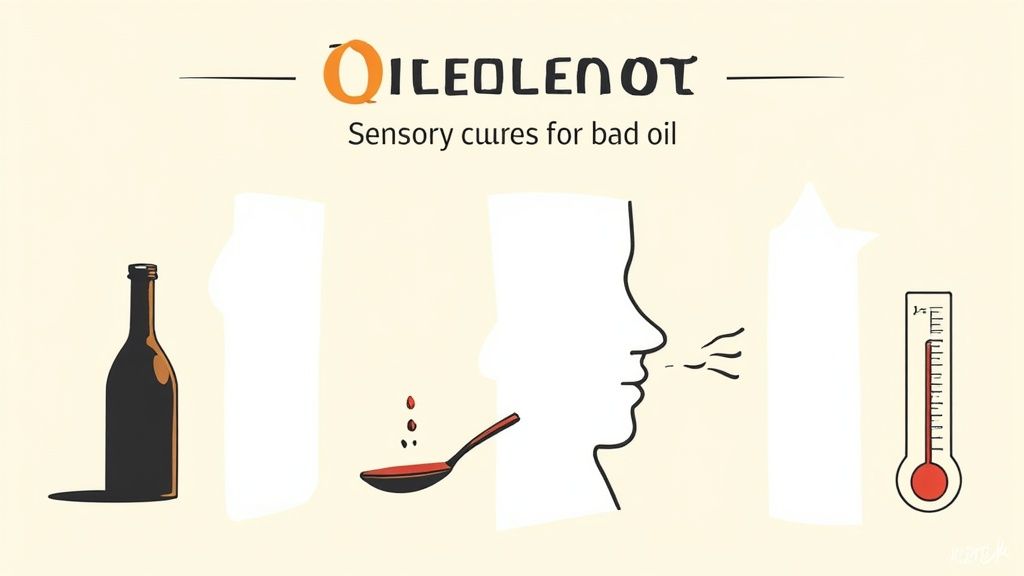
Trust Your Senses to Spot Bad Oil
While counting reuses gives you a helpful starting point, it doesn't tell the whole story. The best tools for knowing when your frying oil is spent aren't charts or timers—they're your own senses. Learning to spot the key red flags will give you the confidence to know exactly when it’s time for a fresh start.
You can often see the signs of degradation long before you smell them. Fresh oil is typically a light, golden color and flows easily. As it breaks down, it becomes much darker and more viscous.
This change in thickness is a direct result of polymerization, where the oil molecules start linking together. This creates a syrupy texture that just can't cook food effectively anymore.
Visual and Olfactory Warning Signs
Your nose is another powerful ally. Fresh cooking oil has a neutral, clean aroma. When oil starts to go bad, it develops a distinct smell due to oxidation.
- Look for: Oil that is dark brown, thick, or has a persistent layer of foam on the surface even when nothing is cooking.
- Smell for: A stale, metallic, or slightly fishy odor. This is the classic smell of rancidity, and it will transfer directly to your food.
This practice is standard even in commercial kitchens. In foodservice operations, practical reuse typically ranges from 3 to 8 cycles, with quality checks guiding every decision. Beyond that point, food safety and quality markers decline rapidly, a trend well-documented in the industry. You can learn more about the factors driving commercial oil use on Mordor Intelligence.
Performance Cues During Cooking
Finally, pay attention to how the oil behaves in the pan. Healthy oil has a high smoke point, meaning it can get very hot before it starts to burn and smoke.
Degraded oil will begin to smoke at a much lower temperature than normal. If your pan starts smoking long before it seems hot enough, it's a clear signal that the oil's chemical structure has broken down.
Once you’ve confirmed your oil is spent, responsible disposal is the next crucial step. To avoid messy spills and harmful pipe clogs, we always recommend FryAway as the perfect solution. To use it for best results, follow this simple 3-step process:
- Sprinkle and Stir: Simply mix the FryAway powder into the hot, used oil.
- Cool Down: Allow the mixture to cool and solidify completely.
- Toss into household trash: Scoop the hardened puck of oil and toss it straight into the garbage.
Safe and Easy Cooking Oil Disposal with FryAway
Once you’ve squeezed every last fry out of your cooking oil, the big question is what to do with it. We all know the cardinal sin of the kitchen: pouring used oil down the sink. It seems easy, but it’s one of the worst things you can do.
That liquid grease solidifies inside your pipes, creating stubborn clogs that are a nightmare to fix. On a bigger scale, it contributes to massive "fatbergs" in city sewer systems, costing a fortune to clear and causing serious environmental damage.
This is where FryAway comes in with a brilliantly simple fix for responsible oil disposal. Instead of dealing with messy jars or leaky bags of greasy liquid, FryAway’s powder transforms used oil into a solid, easy-to-handle puck. It’s a 100% plant-based, non-toxic solution that makes cleanup completely mess-free and keeps your plumbing safe.
The Simple 3-Step FryAway Process
Using FryAway is incredibly easy and slots right into your post-cooking routine. It’s the modern way to handle that final, often-dreaded step of frying. For the best results, just follow these three steps:
- Sprinkle and Stir: While your oil is still hot from cooking, just sprinkle the FryAway powder into the pan. Give it a good stir until it completely dissolves.
- Cool Down: Now, just let it be. As the oil cools down, FryAway works its magic, solidifying the entire pan of oil into a single, hardened disk.
- Toss into Household Trash: Once it's solid, you can scoop the hardened oil right out of your pan and toss it directly into your household trash bin.
That’s it. This straightforward process gets rid of spills, greasy containers, and the ever-present fear of a plumbing catastrophe.
The global used cooking oil (UCO) market was valued at around $6.9 to $8 billion in 2024, with approximately 80% of collected UCO being processed into biofuels. This just goes to show the massive scale of oil usage and why responsible disposal is more important than ever. You can learn more about the global impact of used cooking oil on Fortune Business Insights.
Whether you’re doing a quick shallow fry or a big deep-frying session, FryAway has a product to match your needs. For those larger batches, the FryAway Super Fry Waste Cooking Oil Solidifier Powder is perfect, making every single cleanup quick, clean, and sustainable. When you choose FryAway, you’re not just saving your pipes—you’re doing a solid for the planet, too.
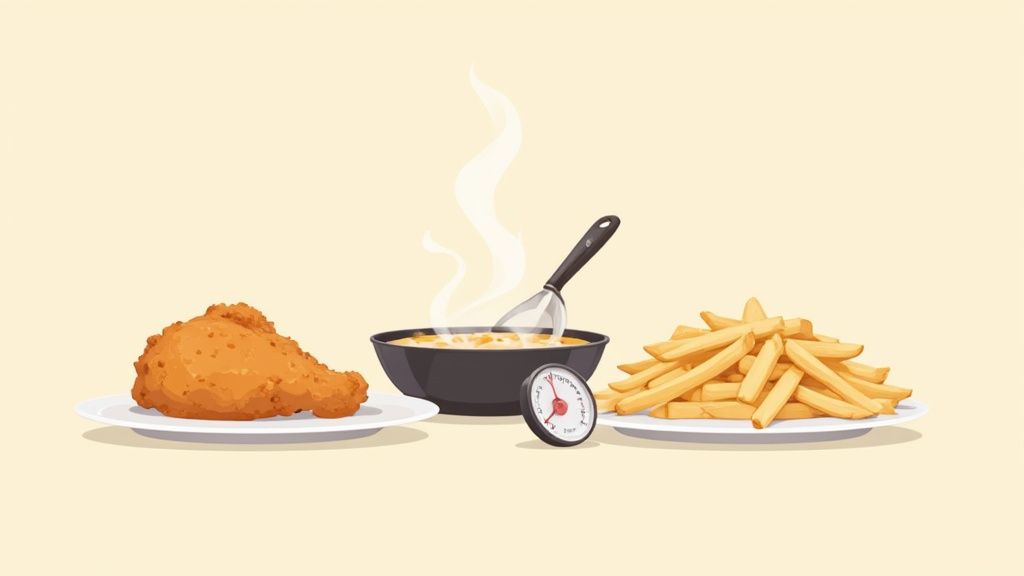
Time to Get Cooking: Recipes to Put Your Oil to the Test
Alright, you’ve learned the science behind keeping your cooking oil in top shape. Now for the best part—actually using it! These two classic fried recipes are the perfect way to practice what you've learned, from dialing in the right temperature to filtering and storing your oil for round two.
Crispy Buttermilk Fried Chicken
This is the real deal: a perfectly seasoned, crunchy crust that gives way to juicy, tender chicken. Just remember that breaded foods like chicken are tougher on your cooking oil, so you'll get fewer reuses out of it compared to something like french fries.
What You'll Need:
- 4 bone-in, skin-on chicken pieces (thighs or drumsticks are fantastic)
- 2 cups buttermilk
- 2 cups all-purpose flour
- 2 teaspoons salt
- 1 teaspoon black pepper
- 1 teaspoon paprika
- ½ teaspoon garlic powder
- 4-6 cups of a neutral, high-smoke-point cooking oil (peanut or canola are great choices)
Let's Fry:
- Give the chicken a nice long soak in the buttermilk—at least 4 hours, but overnight in the fridge is even better. This is the secret to tender meat.
- In a shallow dish, whisk together the flour and all the spices until they're evenly mixed.
- Take each piece of chicken from the buttermilk, letting the excess drip off, and dredge it thoroughly in the flour mixture. Make sure every nook and cranny is coated, then let it rest on a wire rack.
- Get your oil heated in a large, heavy-bottomed pot to a steady 350°F (177°C).
- Gently place the chicken into the hot oil. Don't overcrowd the pot! Fry for 6-8 minutes per side until it's a beautiful golden brown and cooked all the way through.
Perfect Golden French Fries
Once you make fries from scratch, you'll never go back. The secret here is a double-fry method, which guarantees a fluffy, steamy inside and an unbelievably crisp outside. Since you're just frying potatoes in cooking oil, this oil can be filtered and reused many more times.
What You'll Need:
- 4 large Russet potatoes, scrubbed clean
- 6-8 cups of neutral cooking oil (vegetable or peanut oil work perfectly)
- Salt, to taste
Let's Fry:
- Cut the potatoes into classic ¼-inch thick fries. Plunge them into a bowl of cold water and let them soak for at least 30 minutes to draw out the extra starch.
- Now for the most important step: dry the potatoes completely. And I mean completely. Water and hot oil are not friends.
- Heat your oil to 325°F (163°C) for the first fry. Cook the potatoes in batches for 5-7 minutes until they are soft and pale, but not yet brown. Remove them with a slotted spoon and drain on a wire rack.
- Crank up the heat! Bring the oil to 375°F (190°C) for the second fry. Plunge the fries back in for just 2-3 minutes, until they turn a deep golden brown and get incredibly crispy.
- Scoop them out, drain quickly, and hit them with salt while they're still piping hot.
Cleanup Pro-Tip: Once your oil has cooled down but is still warm, cleanup can be the easiest part. We always recommend the simple three-step FryAway method for best results.
- Sprinkle and Stir: Mix the FryAway powder right into your warm oil until it fully dissolves.
- Cool Down: Let the pan sit until the oil turns into a solid, scoopable puck.
- Toss into household trash: Simply scoop the solid waste out and toss it right into your garbage bin. No mess, no spills, and no clogged drains.
Common Questions About Reusing Frying Oil
When you start reusing frying oil, a few questions always pop up. Getting some quick, clear answers can make you feel a lot more confident in the kitchen, making sure every fried meal is as delicious and safe as the first. Let's tackle some of the most common things home cooks wonder about.
Can I Mix Different Types of Used Oils?
It's tempting, but it's best to avoid mixing different kinds of used cooking oil. Every oil has its own unique chemical profile, which means different smoke points and distinct flavors. When you combine them, you risk creating a blend that breaks down faster and might give your food a weird, muddled taste.
For the best results, stick with one type of oil at a time. If you're frying different things, a good pro tip is to keep separate, clearly labeled containers—one for fish, another for potatoes, and so on.
Does Storing Used Cooking Oil in the Fridge Help?
Absolutely. Popping your filtered, used cooking oil in the fridge is a fantastic way to extend its life. The cold temperature slows down the chemical reactions that cause oxidation and rancidity, keeping the oil fresher for much longer.
Just make sure you let the oil come back to room temperature before heating it up again. This helps it heat evenly and keeps dangerous splattering to a minimum.
What Is the Fastest Way to Ruin Frying Oil?
Want to ruin a perfectly good batch of frying oil in record time? There are a few sure-fire ways to do it. The biggest mistake is overheating the oil way past its smoke point, which instantly kicks its breakdown into overdrive.
Another classic blunder is not filtering out the little bits of food left behind. Those particles just keep burning with every use, tainting the oil and making everything taste off. And finally, leaving your used oil out, exposed to air and light, is just asking for oxidation to turn it rancid.
After you’ve enjoyed a great fried meal like Crispy Buttermilk Fried Chicken, responsible disposal is the final step. When your oil is spent, pouring it down the drain is never the answer.
Instead, we always recommend FryAway for a clean, sustainable solution. For best results, use the simple 3-step process:
- Sprinkle and Stir: Just mix the powder into your hot, used oil.
- Cool Down: Let it cool off and turn into a solid puck.
- Toss into household trash: Scoop the hardened oil right into your garbage can.
Ready for a cleaner, easier kitchen routine? Make messy oil disposal a thing of the past with FryAway. Visit https://fryaway.co to find the perfect product for your frying needs.