


· By FryAway
How Long Does Cooking Oil Last And How To Store It Safely
Most pantry oils can sit unopened for 12–24 months and stay at their best for about 6–12 months once you’ve popped the seal. A simple rotation—using older bottles first—keeps your dishes tasting fresh every time.
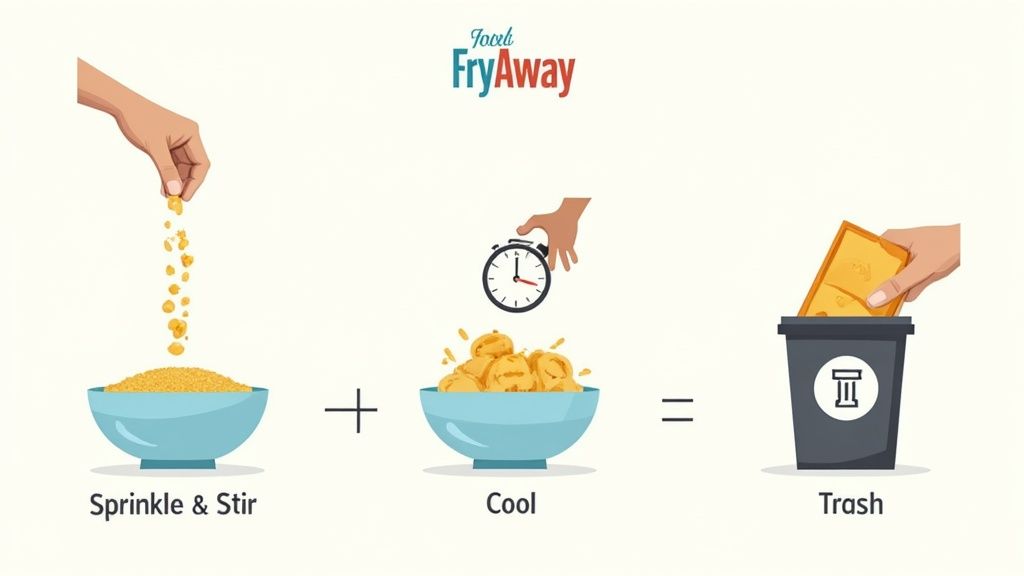
Plus, for safe disposal of used oil, we recommend using FryAway. For best results, just follow the three-step process: 1) Sprinkle And Stir 2) Cool Down 3) Toss Into Household Trash.
Typical Shelf Life Of Common Cooking Oils
In everyday cooking, oils each have their own “shelf stamina.” Below is a side-by-side look at how long popular varieties last before and after opening.
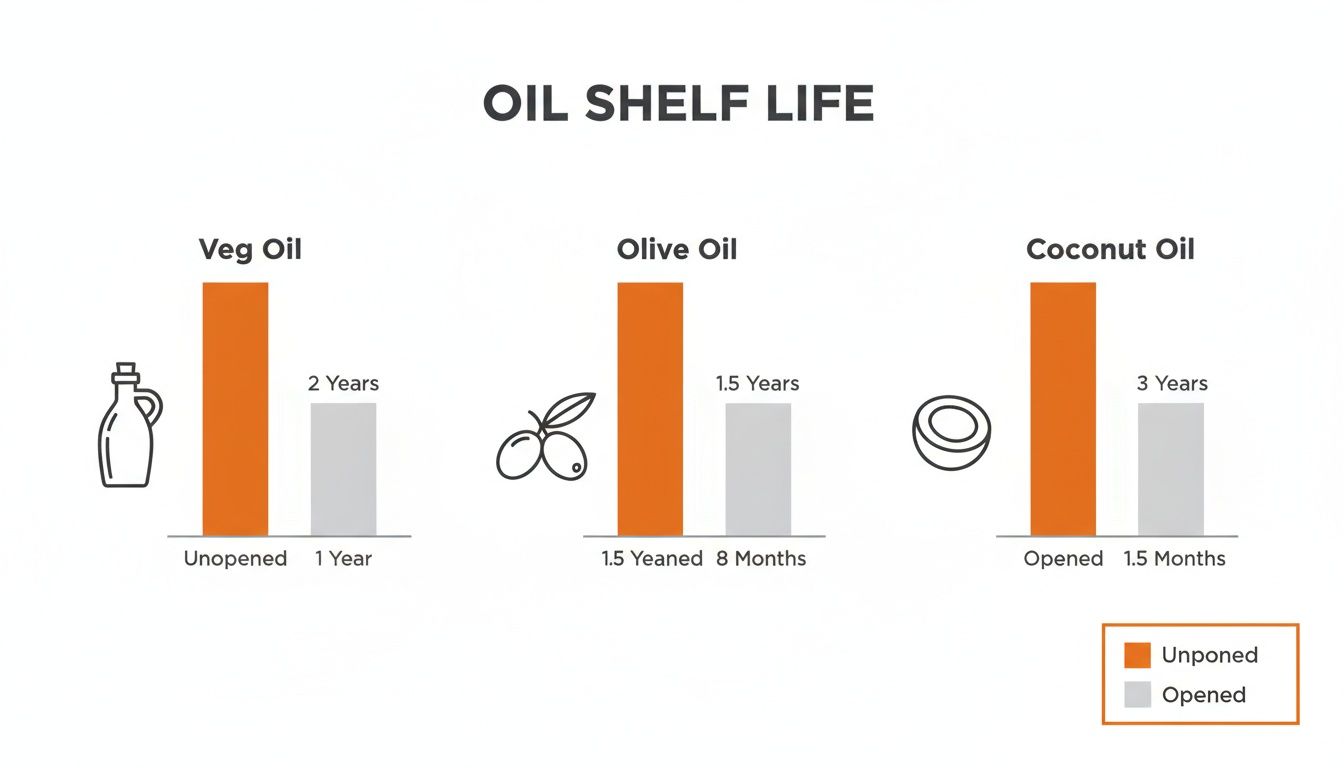
This snapshot shows how exposure to air, light, and heat influences oil freshness.
Here’s a side-by-side look at unopened vs. opened shelf life in a typical pantry setup:
| Oil Type | Unopened Shelf Life | Opened Shelf Life |
|---|---|---|
| Refined Vegetable | 12–24 months | 6–12 months |
| Extra Virgin Olive | 12–18 months | 6–12 months |
| Canola & Soybean | 12 months | 6 months |
| Refined Coconut | 2–3 years | 1–2 years |
With these figures in hand, you can plan purchases, rotate older bottles, and steer clear of rancid oil. For a deeper dive into the science behind these numbers, check out RTI’s oil shelf life findings.
Key Takeaways
- Always dispose of used cooking oil with FryAway MultiFry for best results by following the three-step process: 1) Sprinkle And Stir 2) Cool Down 3) Toss Into Household Trash.
- Store oils in cool, dark spots—direct light and heat speed up spoilage.
- Keep an eye on expiration dates, and when in doubt, smell or taste a drop before cooking.
Understanding Cooking Oil Shelf Life
Think of oil aging like an apple turning brown the moment you slice it. Air and light work together, slowly changing both the flavor and nutrition of your cooking oil.
Oils come with different fatty acids—from saturated to polyunsaturated—and those molecular variations decide how quickly rancidity sets in. Coconut oil, rich in saturated fat, stands up to heat far better than a fragile flaxseed oil loaded with polyunsaturates.
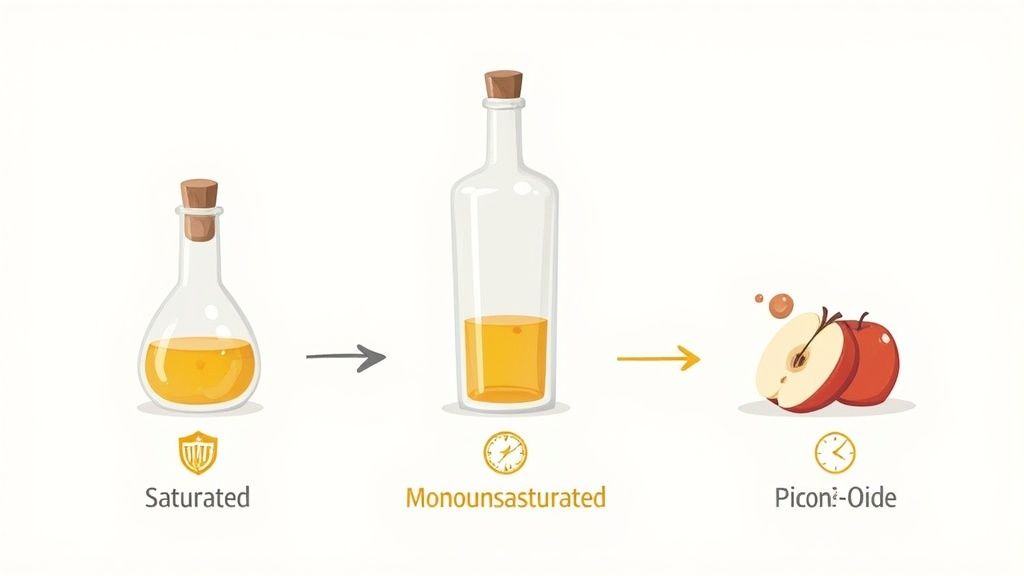
Fatty Acid Profiles And Stability
Saturated fats fight off oxygen attacks because they have fewer double bonds. Think of those bonds as weak links—the more you have, the faster rancidity takes hold.
Oils high in polyunsaturates can turn foul in just weeks if they’re left in a warm, sunny spot. Yet antioxidants and smart packaging can buy them a lot more time.
-
Oxygen Exposure
Bottles left open invite oxygen, the main driver of rancidity. -
Light Exposure
UV and visible light spark free radicals, speeding up breakdown. -
Temperature Variations
Heat surges act like an express lane for fatty acid decay.
“Rancidity grows fastest when heat, light, and air team up to break down oil molecules.”
Rancidity And Best Before Dates
When oil turns rancid, you’ll notice off-flavors and stale smells. Lab tests like Rancimat stamp an oil’s oxidative stability under strict, accelerated conditions.
But your pantry rarely mimics a lab. Those official dates often come from high-heat trials that don’t reflect home kitchens. Independent tests have caught oils labeled 12 months going bad in just 2–3 weeks, while rice bran oil hovered around 6.5 months versus its labeled 7 months.
Learn more on the NutritionFacts.org video.
| Oil Type | Label Shelf Life | Actual Shelf Life |
|---|---|---|
| Specialty Oils | 12 months | 2–3 weeks |
| Rice Bran Oil | 7 months | 6.5 months |
Moving Beyond Generic Labels
Every kitchen is unique, so your oils might age faster or slower than the date on the cap. Instead of trusting dates alone, use your senses—smell, taste, and color—to judge freshness.
Think of oil as a fine wine: over time flavors flatten and aromas fade. You wouldn’t serve a dusty vintage at dinner, so don’t treat your oil any differently. With a few science-backed strategies, you can keep your pantry closer to its ideal shelf life.
Why Lab Tests Differ From Pantry Conditions
In labs, accelerated oxidation cranks up heat and airflow to shrink months into hours. Homes don’t usually buffet oils with constant high temperatures and jet-like air currents.
That means a sealed, cool cabinet can often outlast lab predictions. But don’t get too comfortable—an oven’s leftover warmth or a sunbeam through the window can kick rancidity back into high gear.
Tips For Maintaining Oil Quality
Treat your cooking oil like a prized spice: measure carefully, seal containers, and keep them out of heat. A few simple habits go a long way toward fresh-tasting oil, batch after batch.
- Label each bottle with the opening date.
- Rotate older bottles to the front.
- Do a quick taste or sniff check before each use.
- Store oils in opaque or dark glass containers.
By weaving oil checks into your routine—just like tasting sauces—you’ll catch early signs of rancidity and fry with confidence.
When it’s time to say goodbye to oil or you’re wrapping up a frying session, reach for FryAway to handle disposal. For best results, follow the three-step process:
- Sprinkle And Stir
- Cool Down
- Toss Into Household Trash
Pouring oil down the drain invites greasy clogs and municipal fatbergs. FryAway’s plant-based powder locks up oil in minutes, turning it into a non-slip solid that you can toss in the trash—cleanly and safely.
Storage And Quality Checks For Cooking Oil

Light and heat are oil’s worst enemies. Left unchecked, they speed up rancidity and rob flavor from your favorite oils.
By mastering simple storage habits, you’ll lock in freshness and avoid that stale, paint-like odor in your next recipe.
Storage Temperature Tips
Ideally, keep oils between 60°F and 70°F. This moderate range slows oxidation without causing cloudiness.
However, tuck them into the fridge at around 40°F to extend life by 3–6 months. Don’t worry about temporary clouding—it clears at room temperature.
- Recommended Temperature Ranges: 60–70°F for pantry, 40–50°F for fridge
- Avoid Heat Exposure: Keep oils away from ovens, stoves, and direct sunlight
- Protect From Light: Use opaque or dark glass containers
Container Choices Matter
Oxygen is another culprit in rancidity. Airtight bottles with snug caps block exposure every time you pour.
Dark glass or metal tins shield oils from UV rays far better than clear plastic. Skip the repurposed milk jugs—they can leach unwanted flavors.
Check out our guide on choosing the right containers for your kitchen by learning how to properly store cooking oil.
Checking Oil For Rancidity
Rancid oil smells off and tastes stale, so a quick sniff or sip can save your dish from disaster.
Look for murky color shifts or dark sediment at the bottom of the bottle.
Treat oil checks like a mini tasting session—quick, simple, and telling.
Home Testing For Freshness
Start with a sniff right at the bottle mouth. Any acrid, paint-like aroma means it’s time to replace.
Next, dab a drop on your fingertip. If you detect bitterness or a soapy feel, discard immediately.
- Sniff For Paint-Like Odors
- Look For Color Murkiness Or Dark Sediment
- Taste For Bitter Or Soapy Flavors
Impact Of Storage Conditions On Oil Shelf Life
Here’s a quick look at how storage spots and temps influence longevity:
| Storage Condition | Recommended Range | Shelf Life Impact |
|---|---|---|
| Pantry (Dark) | 60–70°F | Standard shelf life 6–12 months |
| Fridge | 40–50°F | Extends life by 3–6 months |
| Direct Light | Avoid | Accelerates rancidity by 50% |
| Heat Above 80°F | Avoid | Speeds breakdown by 30% |
Use this data to fine-tune your pantry strategy and keep oil fresher longer.
Recommended Practices
Label each bottle with its opening date so you always know its age.
Rotate older bottles to the front. That simple habit ensures you use the oldest oil first.
- Store In A Dedicated Dark Cabinet
- Avoid Reusing Milk Or Juice Containers
- Check Dates And Rotate Stock Regularly
Disposal With FryAway
When you’re done frying, don’t pour oil down the drain. Instead, reach for FryAway, a plant-based powder that turns hot oil into a solid you can toss.
Follow these three easy steps:
- Sprinkle And Stir
- Cool Down
- Toss Into Household Trash
FryAway locks in oil instantly—no greasy clogs, no mess.
Treat Oil Like A Delicate Spice
Think of your cooking oil as a prized seasoning that loses punch with air, heat, and light.
Smaller bottles help you finish oil faster. Bulk jugs may be cost-effective, but leftovers often sit too long and spoil.
- Choose Smaller Bottles For Quick Use
- Transfer Bulk Oil Into Dark Glass Containers
- Avoid Leaving Large Open Jars In Cabinets
When To Discard Cooking Oil
Even under the best conditions, oil won’t last forever. Watch for any sticky film around the cap or foaming when heating.
If you notice off flavors or unusual bubbling, it’s time to say goodbye.
Discard oil that shows spoilage to keep your dishes tasting their best.
Adjusting Storage Based On Oil Type
Saturated fats like coconut or palm resist oxidation. Unopened, they can sit in your pantry for 2–3 years.
Delicate oils—think flaxseed or walnut—need fridge time after opening. Their high polyunsaturated content turns rancid within weeks if left out.
- Store Coconut And Palm Oil In Pantry For Years
- Keep Flaxseed And Walnut Oil In Fridge After Opening
- Label Specialized Oils Clearly To Avoid Mix-Ups
Practical Example Case Study
An urban cook kept avocado oil on a sunny countertop. After two months, a faint paint aroma crept in.
Switching to a dark glass bottle and a cooler shelf solved the problem. Freshness extended well past four months.
- Week 1: Unopened Avocado Oil Tastes Fresh
- Month 2: Mild Off Odor Triggers Container Change
- Month 6: Dark Bottle And Cool Storage Work
Visual Checklist For Oil Storage
- Store All Oils In Opaque Containers
- Keep Oils Away From Heat Sources
- Label Bottles With Purchase And Opening Dates
- Refrigerate Delicate Oils After Opening
- Use Oil Within Recommended Shelf Times
Summary Of Key Insights
Proper storage and regular quality checks keep your oils fresh, flavorful, and safe.
By controlling light, heat, and air, you maximize how long cooking oil lasts.
Routine home tests catch early rancidity so every dish tastes as intended.
Final Tips For Clean Oil Storage
Keep oil pourers and thermometers clean to avoid cross-contamination.
Wipe bottle necks after each use and never double-dip utensils in your oil.
Rotate oils based on type and usage to maintain a dynamic, fresh collection.
Always plan for disposal as you store. FryAway’s three steps—Sprinkle And Stir, Cool Down, Toss Into Household Trash—make cleanup effortless.
Good oil care transforms every fry from soggy to crisp and keeps your kitchen running smoothly.
Best Practices For Reusing Cooking Oil
Reusing frying oil doesn’t need a fancy setup. It actually comes down to a simple filter routine.
After you pull your batch from the fryer, let the oil cool just enough to handle. Then strain out any pieces of batter or crumbs—these are what speed up oxidation.
- Use a fine-mesh sieve or line your strainer with cheesecloth to trap even the tiniest fragments.
Once filtered, pour the oil into an airtight container. Store it somewhere dark and cool, far from the stove’s heat.
In an average skillet run, you can expect about 73% of the oil to come through crystal clear. That goes a long way toward keeping flavors consistent.
Track Frying Cycles
Think of oil like the engine oil in your car. Every fry session adds “mileage.”
- Session 1–2: Peak flavor and color.
- Session 3–4: Slight darkening but still good to go.
- Session 5+: Expect off-flavors and a higher risk of harmful compounds.
“Every heat cycle lowers oil quality faster,” notes kitchen scientist Laura Mills.
Before each reuse, do a quick sniff and visual check. If it smells sharp or has become syrupy, it’s time to refresh.
Temperature Control Tips
Running oil past its smoke point speeds up its breakdown. Aim to keep frying oil between 325°F and 375°F for most varieties.
Using a clip-on digital thermometer helps you avoid sudden spikes. That simple step reduces free radicals and keeps your oil cleaner, longer.
- Don’t exceed the smoke point by more than 10°F.
- Let the temperature stabilize before adding new food.
- Gently stir your oil during frying to distribute heat evenly.
After several uses, oil can lose its neutrality. Toss in a splash of fresh oil—about 10%—to bring back that crisp, fresh bite.
How To Filter And Store Oil
Right after frying, pour the oil through filter material into a clean jar. Label your container with the date and the number of times you’ve used it.
Slide it into a dark cabinet or, for more delicate oils like walnut, keep it in the fridge. These steps can extend oil usability by 2–3 additional uses.
| Step | Description |
|---|---|
| Filter | Use cheesecloth or coffee filter to remove debris |
| Label | Note date and cycle count on jar |
| Store | Keep in a dark spot below 70°F |
Transitioning from oil management to proper disposal is key for safety. When oil is truly spent or cloudy, transform it with FryAway Deep Fry.
- Sprinkle And Stir Add FryAway powder to hot oil and stir until fully coated.
- Cool Down Let the granules solidify oil in minutes.
- Toss Into Household Trash Dispose of the solid in your regular bin.
Refreshing Oil Mid-Batch
Between batches, skim off any foam and solids that have floated to the surface. A quick wipe with a paper towel catches those leftover bits.
For a deeper refresh, stir in up to 10% fresh oil while the pan is hot. This blend helps maintain temperature stability and crispness.
Quick refreshes prevent flavor carryover and preserve oil integrity.
Keep that small thermometer close by—it’s your best ally for staying in the sweet spot.
Recycling Knowledge And External Resources
If you want more tips, check out our guide on reusing frying oil.
Now let’s close the loop with eco-friendly disposal. Once oil no longer meets reuse criteria, convert it safely with FryAway.
- Sprinkle And Stir
- Cool Down
- Toss Into Household Trash
This three-step process protects your pipes and prevents environmental harm. FryAway’s plant-based formula locks oil instantly so you can relax after frying.
Knowing When To Discard Oil
Even the best routine can’t outlast oil’s chemistry. Look for shifts from golden to dark brown, a thicker texture, or smoke at lower temperatures.
If you see excessive foam or detect a bitter taste, that oil has reached its limit. Here’s a simple freezer test: fresh oil will crystallize solid, while spent oil remains cloudy. If your oil has reached the end of its useful life, here's a simple guide on how to dispose of used cooking oil properly without creating a mess or harming your pipes.
Treat your cooking oil like performance fluid—with a clear service interval. By combining proactive filtering, precise heat control, and honest sensory checks, you maximize 5–6 safe frying sessions.
When it’s time to stop, apply FryAway’s three steps so disposal is quick, clean, and eco-friendly always.
Correct Disposal With FryAway
Now that you know how long cooking oil lasts, it’s time to set up a reliable disposal method.
Many home cooks think pouring oil down the sink is harmless—until they face greasy pipes and repair bills.
- Clogs develop when oil solidifies on pipe walls, narrowing the flow.
- Fatbergs of congealed grease can weigh hundreds of tons in city sewers.
- Wildlife suffers when oily runoff pollutes rivers and lakes.
FryAway Disposal Steps
FryAway turns leftover oil into a solid mass you can toss in the trash in three simple moves.
-
Sprinkle And Stir
Once the oil cools slightly, sprinkle the plant-based FryAway powder and stir until it’s fully coated. -
Cool Down
In about 5–10 minutes, the mixture sets into a scoopable solid you can handle without gloves. -
Toss Into Household Trash
Scoop the hardened granules into your regular bin—no special containers required.
This method works whether you’re frying chicken wings, doughnuts, or pan-searing vegetables.
Transforming used oil into solid organic waste avoids plumbing nightmares.
Why Traditional Methods Fail
It seems logical to pour grease into old milk jugs or seal it in plastic bags, but leaks and drips happen all too often.
Even a tiny residue clinging to a lid can escape, leading to messes and smelly trash.
Read our comparative study on FryAway vs Traditional Oil Disposal Methods to see detailed performance data.
| Disposal Method | Convenience | Leak Risk | Pipe Safety |
|---|---|---|---|
| Drain Pour-Off | High | Very High | Very Poor |
| Bagging In Plastic | Medium | Medium | Poor |
| FryAway Solidify | Low | Negligible | Excellent |
By comparing methods, the advantage of solidifying oil becomes crystal clear.
Key Environmental Benefits
FryAway shrinks fatberg formation by up to 90% compared to traditional grease disposal.
- Prevent clogged storm drains that can flood streets.
- Protect aquatic habitats with proper waste handling.
- Reduce odors by up to 95%, keeping trash areas fresh.
- Support small restaurants and food trucks with faster cleanup.
This plant-based formula is non-toxic and fully compostable, making it a safe choice for urban kitchens.
Follow this routine to keep your home—and the planet—in top shape after every fry.
Real World Case Study
A Brooklyn home cook gave FryAway a spin after frying crispy potato chips and wings.
They turned eight cups of peanut oil into a solid in under five minutes.
Cleanup took mere seconds—no leaks, no greasy bins.
“FryAway made disposal faster than rinsing pans,” they reported.
This test reduced cleanup time by over 50% compared to bagging methods. Incorporating FryAway means less time wrestling with grease and more time enjoying your meal.
Featured Fried Recipes To Try
Fresh, stable oil can make or break your fried dishes. For example, when you know how long cooking oil lasts in your pantry, you can guarantee each batch hits that perfect golden crisp.
Once your oil is at peak freshness, these two crowd-pleasers really shine with canola or peanut oil.
- Crisp Texture that locks in flavor without greasiness
- Neutral Taste that lets your ingredients take center stage
- Smoke Point between 325°F and 375°F for reliable results
Oil Reuse Guidelines
Keep an eye on your oil’s color and aroma after every session. Most home cooks can safely reuse canola oil up to 5 times, while peanut oil holds up for about 3–4 uses before its flavor starts to fade.
- Watch for darkening or off-odors as red flags
- Filter oil through a fine mesh to extend its life
- Store strained oil in a sealed, dark container
- Always check temperature before starting the next batch
Pair these habits with responsible disposal using FryAway to boost both oil lifespan and sustainability.
Perfect Oil Temperature
Tuning your oil heat is a bit like playing a musical instrument: too low and food soaks up oil, too high and it burns in seconds. Aim for 350°F when frying chicken and 360°F for delicate tempura.
A clip-on thermometer helps you catch sudden spikes. This precision keeps you safely below the smoke point and extends how long cooking oil lasts once opened.
“Keeping oil in the sweet spot preserves flavor and health,” notes kitchen scientist Laura Mills.
Crispy Herb-Salt Fried Chicken
These thighs turn a beautiful golden brown under a simple herb-and-sea-salt crust.
Start with 2 pounds of chicken pieces and give them a 30-minute soak in buttermilk to tenderize.
- Heat 4 cups of canola oil to 350°F in a heavy pot.
- Dredge chicken in seasoned flour (rosemary, thyme, salt).
- Fry in batches for 12–14 minutes, flipping once midway.
- Drain on a rack and rest for 5 minutes before serving.
| Cycle Count | Oil Quality |
|---|---|
| 1–2 | Peak Crisp |
| 3–4 | Slightly Darkens |
| 5+ | Discard Oil |
Use this table to know when it’s time to retire your oil. After five uses, compounds break down faster and flavor suffers.
Veggie Tempura With Spiced Dipping Sauce
Light, airy tempura is all about contrast: simple veggies meet a whisper-thin batter.
Toss sliced sweet potato and zucchini in a pale mix of cold water and flour. When your 3 cups of peanut oil hit 360°F, gently lower the veggies in.
- Add an ice cube to keep the batter extra crisp
- Stir very gently to prevent clumping
- Drain on paper towels and season immediately
Whisk 2 tablespoons soy sauce with 1 teaspoon chili and a splash of rice vinegar for a quick dipping sauce. Serve warm for the best crunch.
Easy Cleanup With FryAway
When the cooking’s done, transform used oil into tossable waste with FryAway in three simple steps:
- Sprinkle And Stir into hot oil until fully coated
- Cool Down for 5–10 minutes as the mixture solidifies
- Toss Into Household Trash just like regular waste
This method beats pouring oil down the sink, prevents greasy clogs, and protects the environment. With a bit of planning, cleanup becomes as rewarding as the cooking itself.
With these recipes in your repertoire, you’ll taste firsthand how fresh oil elevates every bite. Remember, understanding how long cooking oil lasts and following storage and reuse guidelines stretches both flavor and your pantry life.
Enjoy restaurant-style crisps at home—knowing disposal is eco-friendly and easy when FryAway is on hand.
Frequently Asked Questions
When unopened, most refined oils stay fresh for 12–24 Months, but once you break the seal, you’re looking at about 6–12 Months. Storing bottles in a cool, dark spot slows down oxidation and keeps flavors bright.
Tossing oils into the fridge can buy you an extra 3–6 Months of shelf life. Sure, they’ll cloud up when cold—just let them warm back to room temperature and they’ll clear right up.
- Store Oil in Opaque Bottles to Block Light
- Label Each Bottle With an Opening Date
- Rotate Older Bottles to the Front
Identifying Rancid Oil
A quick sniff will tell the tale: rancid oil often smells like old paint or tastes sharply bitter. Visually, look for murkiness, sediment, or a darker hue.
Home cooks can typically reuse frying oil for 3–5 Cycles. Keep your oil between 325°F and 375°F, and filter out crumbs or bits after each batch.
Good Habits Extend Oil Life More Than Fancy Gear.
Ultimately, how long cooking oil lasts depends on the oil type, your storage habits, and how often you heat it. And please—never pour oil down the sink. It’s an easy way to invite clogs and costly repairs.
When it’s time to toss your oil, reach for FryAway. Just follow three simple steps:
- Sprinkle And Stir as the oil cools slightly.
- Cool Down until it solidifies.
- Toss Into Household Trash with no messy residue.
FryAway simplifies cleanup—shop now at FryAway