


· By FryAway
Best Tempura Batter Recipe: best tempura batter recipe for Crispy Results
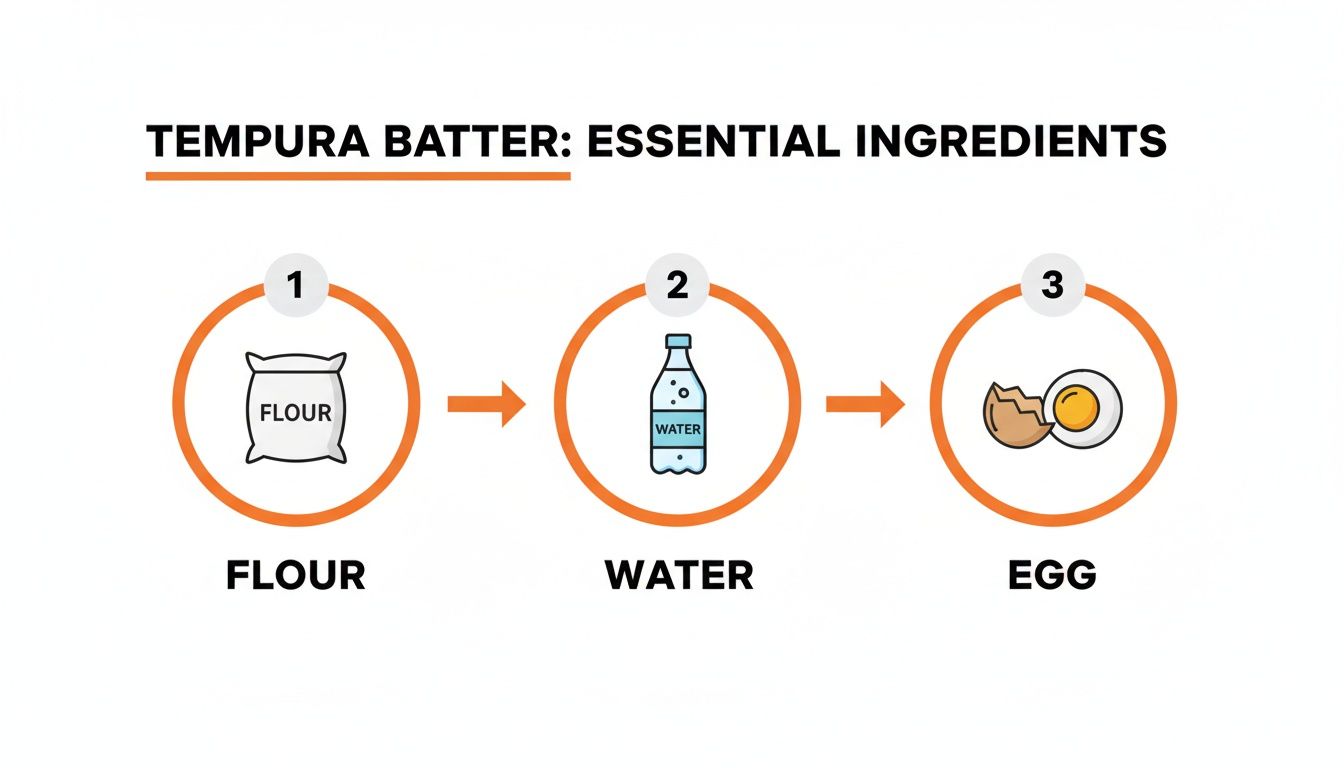
The absolute best tempura batter recipe is surprisingly simple. It comes down to just three basic ingredients: low-protein flour (like cake flour), a single egg yolk, and ice-cold water. The real magic isn't in a long list of ingredients but in the technique—keeping everything frigidly cold and mixing as little as humanly possible. This is what stops gluten from forming and gives you that shatteringly light and crispy crust.
Unlocking the Secrets to Perfect Tempura
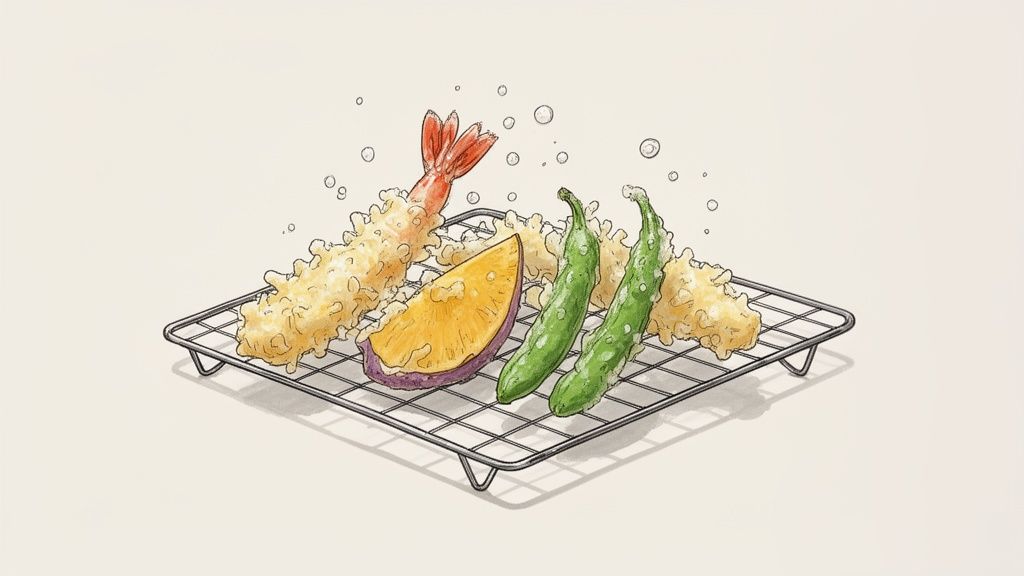
Getting that authentic, feather-light tempura at home can seem like a challenge, but it's much more achievable than you might think. We're not aiming for the dense, greasy coating you sometimes get with other batters. The goal here is a delicate, lacy crust that highlights ingredients like shrimp or sweet potato instead of smothering them.
Funnily enough, this iconic Japanese dish isn't entirely Japanese in origin. Tempura actually dates back to the 16th century, when Portuguese missionaries brought their style of fritter-frying to Japan. The technique was refined over time in Edo (now Tokyo), where chefs perfected the art of a minimalist batter to create the incredible texture we know and love today. You can read more about this fascinating culinary history and see how it evolved.
Why This Recipe Works
This method is all about the core principles that make professional-grade tempura so good. Your success really boils down to just a few key things:
- Minimal Gluten: Using low-protein flour and ice-cold water is non-negotiable. This is what keeps the batter from getting tough or chewy.
- Temperature Control: A precise oil temperature is crucial. It ensures the batter crisps up instantly instead of soaking up a bunch of grease.
- A Lumpy Batter: This might feel wrong, but a lumpy, barely-mixed tempura batter is the secret. Those lumps create an airy, uneven crust that's unbelievably light.
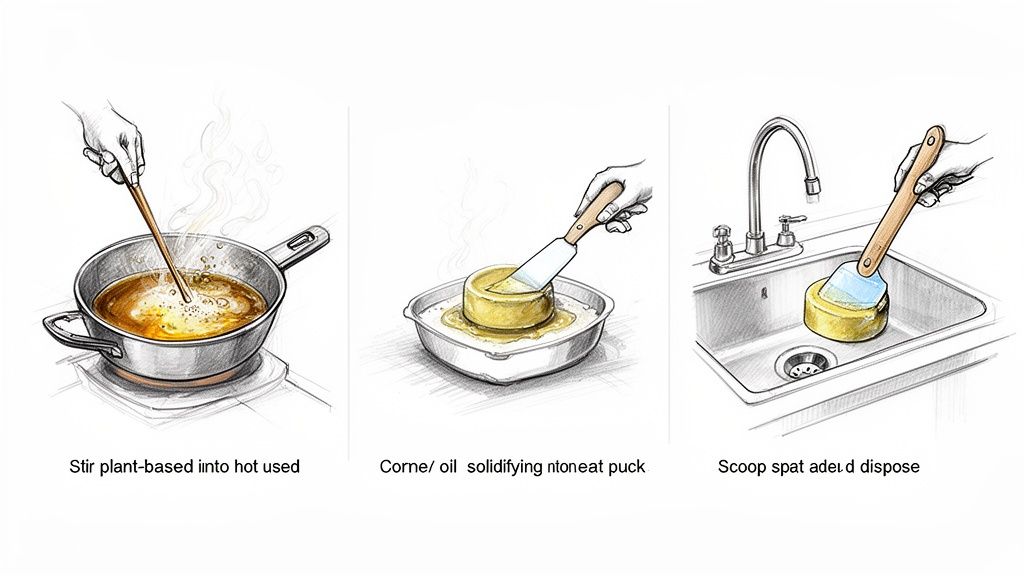
Of course, frying leaves you with a pan of used cooking oil. For a cleanup that doesn't ruin the whole experience, we recommend FryAway. Once you're done cooking, it's a simple three-step process:
- Sprinkle and Stir: While the oil is still hot, just stir in the FryAway powder.
- Cool Down: Let the pan sit for a bit until the oil cools and completely solidifies.
- Toss into household trash: Scoop out the hardened puck of oil and toss it straight into the garbage.
It makes the whole process, from cooking to cleanup, totally stress-free.
Choosing the Right Ingredients for a Flawless Batter
The magic of a truly great tempura batter is its stunning simplicity. You don't need a long list of fancy ingredients to get it right. Instead, success hinges on understanding the science behind a few key players.
Getting these basics right is what separates a heavy, oily coating from that transcendent, crispy crust we're all after. It all starts with the single most important choice you'll make: the flour.
Why Low-Gluten Flour Is a Must
Think of standard all-purpose flour as the enemy of light, airy tempura. It's packed with 10-12% protein, which is great for bread, but terrible for batter. When that much protein meets water, it immediately starts developing gluten, leading to a batter that fries up tough, dense, and chewy—more like a pancake than the delicate tempura you want.
To get that signature crispiness, you have to use a low-gluten flour. No exceptions.
- Cake Flour: This is your best friend. With a protein content of just 7-9%, it creates a super tender structure that becomes incredibly light and brittle when it hits the hot oil.
- Pastry Flour: Another fantastic option. It sits right between cake and all-purpose flour in terms of protein, but it will still give you a wonderfully delicate result.
The entire tempura method is designed to stop gluten from forming, so using the right flour gives you a massive head start.
Flour Selection for Tempura Batter
Not all flours are created equal when it comes to achieving that perfect, shatteringly crisp tempura. The protein content, which determines gluten development, is the most critical factor. Here’s a quick breakdown of your options.
| Flour Type | Typical Protein Content | Resulting Tempura Texture | Recommendation |
|---|---|---|---|
| Cake Flour | 7-9% | Extremely light, airy, and shatteringly crisp. Very delicate. | Ideal Choice. The low gluten content is perfect for authentic tempura. |
| Pastry Flour | 8-10% | Very light and tender with a delicate crispness. | Excellent Alternative. A great second choice if cake flour isn't available. |
| All-Purpose Flour | 10-12% | Heavier, denser, and chewier. Can become tough. | Not Recommended. The high gluten content works against a light texture. |
| Bread Flour | 12-14% | Very tough, chewy, and bread-like. Will be heavy and oily. | Avoid at All Costs. The highest gluten content will ruin your tempura. |
As you can see, sticking with a low-protein flour like cake or pastry flour is non-negotiable for achieving that classic light-as-air texture.
The Critical Role of Cold and Carbonation
Your next secret weapon is temperature. The water you use must be ice-cold. Chilling the water dramatically slows down gluten activation, keeping the batter wonderfully tender and light.
Some professional chefs even mix their batter in a bowl set over another bowl filled with ice just to maintain that frigid temperature. It makes that much of a difference.
"The composition of authentic tempura batter follows precise proportions, with the volume of flour being approximately equal to the combined volume of egg and water. This batter is traditionally mixed with chopsticks for only about 20 seconds to prevent overmixing." — For more insights, check out this great resource on Japanese tempura on bokksu.com.
Want an even lighter finish? Try swapping the still water for ice-cold sparkling water or club soda. The carbonation creates thousands of tiny air pockets that expand explosively in the hot oil, giving you an even airier, crispier coating.
Finally, a single egg yolk adds just the right amount of richness, flavor, and a beautiful golden color without adding enough protein to toughen things up. Of course, the oil you fry in matters, too. You'll need something neutral with a high smoke point for a clean, non-greasy taste. Be sure to check out our guide on what oil is best for frying to make the perfect choice.
Mixing and Frying: Bringing It All Together
This is where the magic really happens. You've got your ingredients lined up, but turning them into that shatteringly crisp tempura is a two-part dance: the delicate art of mixing the batter and the precise science of frying. Get the first part right, and the second becomes infinitely easier.
The single biggest mistake I see people make with tempura batter is overmixing. Your instinct might tell you to whisk it smooth like pancake batter, but you need to fight that urge. What you're actually aiming for is a lumpy, thin mixture that looks almost unfinished.
Believe it or not, those little lumps of dry flour are your best friends. They're the secret to preventing gluten from developing, which is what creates those coveted airy pockets for an incredibly light and crispy finish.
The ingredients are simple—flour, ice-cold water, and egg—but your technique is what elevates them into an extraordinary coating.
The Gentle Art of Batter Mixing
To get that perfect lumpy texture, use chopsticks, not a whisk. A whisk is designed to make things smooth, which is exactly what we’re trying to avoid. Chopsticks let you gently combine everything with minimal agitation.
The entire mixing process should take no more than 15-20 seconds. I'm serious. Sift your flour into the ice-cold egg and water mixture, give it a few quick, decisive stirs, and stop. The moment things are just barely combined, you're done.
And one more thing: this batter needs to be made immediately before you start frying. Letting it sit, even for a few minutes, gives gluten time to form and lets the batter warm up, which will sabotage your results.
For a deep dive into the fundamentals of frying at home, from setting up your station to ensuring safety, our comprehensive guide on how to deep fry at home provides a fantastic step-by-step overview.
Frying for That Flawless Finish
With your perfectly under-mixed batter ready, it’s go-time. The oil temperature is absolutely non-negotiable here. You need to keep a steady heat between 340-360°F (170-180°C). Clip a deep-fry or candy thermometer to the side of your pot and keep a close eye on it.
- Too Low: If your oil dips below 340°F, the batter will just soak it all up. You'll end up with a greasy, soggy mess instead of a crisp coating.
- Too High: If the temperature creeps above 360°F, that delicate batter will burn before the shrimp or vegetable inside has a chance to cook.
Gently dip each ingredient into the batter, letting the excess drip back into the bowl for a moment. Carefully slide it into the hot oil—don't drop it from high up, as that will cause dangerous splashing and can make the batter fall off.
Here’s another golden rule: never overcrowd the pan. Frying too many pieces at once will cause the oil temperature to plummet. Work in small batches, giving each piece plenty of space to swim around and crisp up perfectly.
You’ll know they’re ready when the bubbling around them slows down and the coating is a very pale golden color. This usually takes just a couple of minutes per side.
Use a spider strainer or tongs to lift the finished tempura out of the oil and let it drain on a wire rack, not paper towels. A wire rack allows air to circulate all around, keeping the bottom just as crisp as the top. Those delightful crispy bits of batter left floating in the oil are called tenkasu—skim them out and save them as a crunchy topping for salads or noodle soups!
And when all the frying is done, cleanup doesn't have to be a chore. Just stir FryAway into the hot oil. Once the pan has cooled down completely, the oil will be a solid puck you can scoop and toss into household trash. It’s the perfect, mess-free end to a delicious tempura feast.
Once you've nailed the basics, the real fun begins. A solid tempura batter is just the starting point—a canvas for all sorts of creative twists, dietary tweaks, and flavor experiments that will take your frying to a whole new level.
Think about it: tempura isn't a monolith, even in Japan. The style changes dramatically from one region to the next, offering a ton of inspiration for home cooks. For example, in Kanto (Eastern Japan), the batter often includes eggs and gets fried fast and hot in flavorful sesame oil. The result is richer and deeper in color. Head over to Kansai (Western Japan), and you'll find an eggless batter fried slowly in neutral oil, creating a much paler, more delicate crust. These regional tempura styles you can read about on guide.michelin.com show how tiny adjustments can lead to completely different results.
Get More Lift with Carbonation
One of the easiest yet most dramatic upgrades you can make is swapping your ice-cold water for something with bubbles. This little trick is a total game-changer for getting an even lighter, crispier coating.
- Sparkling Water or Club Soda: Those tiny bubbles create thousands of extra air pockets in the batter. The moment they hit the hot oil, they expand like crazy, puffing up the coating into an incredibly airy, delicate shell.
- Beer: Using a crisp, light beer like a lager or pilsner is another fantastic option. You get the lift from the carbonation, plus a subtle malty flavor that's amazing with savory ingredients like fish or onion rings. As a bonus, the alcohol evaporates faster than water, helping create a drier, crispier finish.
Whatever you choose, make sure it's ice-cold. Keeping that batter chilled is key to stopping gluten from developing. This trick is especially great when you want an unbelievably light texture, like in our guide for making incredible crispy tempura vegetables.
How to Make Vegan and Gluten-Free Tempura
Adapting your tempura batter for different diets is surprisingly simple. The golden rules—keep it cold and don't overmix—still apply. You just need a couple of smart ingredient swaps.
For a vegan tempura batter, just leave out the egg yolk. To make up for the richness, you can add a splash more liquid or mix a tablespoon of cornstarch or potato starch into your flour. You'll still get a beautifully light and crisp coating that's 100% plant-based.
To make a gluten-free tempura batter, swap the cake flour for a good gluten-free all-purpose blend that has xanthan gum. Even better, a mix of rice flour and cornstarch (a 3:1 ratio works well) is fantastic. Rice flour gives it that signature delicate crispiness you find in authentic tempura.
No matter what ingredients you use, the mission is the same: whip up a thin, lumpy batter right before you start frying. These variations prove anyone can enjoy that perfect, shatteringly crisp tempura at home.
And when you're done frying, the cleanup should be just as painless. We always use FryAway to handle the leftover cooking oil. The three-step process couldn't be easier:
- Sprinkle and Stir: As soon as you're done cooking, just stir the FryAway powder into the hot oil.
- Cool Down: Let the pan cool completely. You'll see the oil transform into a solid block.
- Toss into household trash: Scoop the hardened oil right into your garbage bin. It's a clean, simple solution that makes frying so much less of a chore.
The Secret to a Stress-Free Cleanup After Frying
The best part of making tempura at home is that perfect, shattering crunch. The worst part? Staring down a pan full of hot, greasy cooking oil when you’re done. That cleanup dread is real, and it’s what stops a lot of us from frying more often.
But what if you could just… make the mess disappear?
This is where a little kitchen magic comes in. There’s a simple, plant-based powder called FryAway that turns used liquid cooking oil into a solid block of organic waste. That means you can literally lift it out and toss it in the trash. No more messy jars, no more spills, and definitely no more pouring oil down the drain (a huge plumbing no-no).
The Simple Three-Step Process
Honestly, using FryAway is so easy it feels like cheating. You do it right after you’re done cooking, while the oil is still hot, and it takes less than a minute.
- Sprinkle and Stir: Turn off the heat and immediately sprinkle the FryAway powder into the hot oil. Give it a quick stir for about a minute until it completely dissolves.
- Cool Down: That's it. Just walk away and let the pan cool down. As it cools, the oil will magically transform into a solid, waxy puck.
- Toss into household trash: Once it's completely cool and solid, you can slide a spatula underneath the puck, lift it out, and drop it straight into your household garbage.
This one simple step completely changes the frying game. For a truly effortless end-to-end process, pair this trick with some good dishwasher-safe pans and you’ll wonder why you ever stressed about cleanup.
The real beauty here is how clean it is. There’s no greasy film left in the pan, zero risk of clogging your pipes, and you don’t have to keep a gross jar of old oil under your sink anymore.
Once you get into this habit, you’ll find yourself making amazing tempura way more often. It makes the whole experience—from mixing the batter to the final wipe-down—feel genuinely enjoyable. You get all the crispy, delicious rewards with none of the usual cleanup headache.
Common Tempura Mistakes and How to Fix Them
Even with the best tempura batter recipe, things can go sideways. If your tempura comes out less than perfect, don't sweat it. The most common complaint I hear is a soggy, greasy coating, which almost always points to one of two culprits: your oil temperature or a compromised batter.
The good news is these are simple fixes that, once you learn them, become second nature.
Why Is My Tempura Greasy?
A greasy result means the batter soaked up cooking oil instead of instantly crisping on contact. This happens when the oil isn't hot enough, usually dipping below 340°F (170°C). The solution is simple: always use a kitchen thermometer. Fry in small batches to keep the heat from dropping, and give the oil a minute to come back up to temperature between batches. It makes all the difference.
Why Is My Tempura Tough?
If your tempura is tough and dense instead of ethereally light and airy, the problem is almost certainly gluten. Too much gluten develops from two main issues: overmixing the batter or letting it sit around and warm up. When it comes to tempura batter, remember this: lumps are your friends! A quick, minimal stir is all you need.
Simple Fixes for Perfect Tempura
Mastering tempura is really just about building good habits. Once you know what to look for, correcting your course is easy.
- For Soggy Tempura: Get that heat up! If your oil temperature drops, just wait for it to climb back to your target before adding the next batch. Another pro tip? Drain your finished tempura on a wire rack, not paper towels. This allows air to circulate underneath, preventing the bottom from steaming itself and getting soggy.
- For Tough Batter: Mix less and work faster. I use chopsticks for a gentle stir that takes no more than 20 seconds. Seriously, that’s it. And always make your batter right before you start frying to keep it ice-cold and stop gluten in its tracks.
The secret to enjoying tempura at its absolute peak is to serve it immediately. That shatteringly crisp texture is fleeting! Pair it with a classic tentsuyu dipping sauce (dashi, soy sauce, and mirin are a great combo), a sprinkle of yuzu salt, or even a simple spicy mayo.
The final step in a successful frying session is a hassle-free cleanup. We always recommend FryAway to handle the used cooking oil. This plant-based powder makes disposal unbelievably simple and eco-friendly, so you don't have to dread the post-fry cleanup.
The method is as straightforward as it gets. First, you Sprinkle and Stir the FryAway powder right into the hot oil after you finish cooking. Second, let it Cool Down completely; the powder transforms the liquid oil into a solid, organic puck. Finally, you just scoop it out and Toss it into your household trash. It’s a clean finish that makes frying tempura a truly enjoyable experience from start to finish.
Common Tempura Questions, Answered
Got questions about getting that perfect tempura crunch? You're not alone. Here are a few common stumbling blocks I've run into and how to tackle them.
Can I Make the Batter Ahead of Time?
I get this one a lot, and the answer is a hard no. Making tempura batter in advance is a one-way ticket to disappointment. That incredible lightness you’re after depends on two things: minimal gluten and ice-cold temperatures.
Letting the batter sit around allows the gluten to develop and the mixture to warm up. The result? A dense, doughy coating instead of that signature shatteringly crisp shell. Mix it right before you fry—no exceptions.
Why Did My Tempura Come Out So Greasy?
If your tempura feels oily and heavy, the culprit is almost always oil temperature. The cooking oil just wasn't hot enough.
When your oil is below 340°F (170°C), the batter soaks it up like a sponge instead of instantly crisping on contact. This is where a simple frying thermometer becomes your absolute best friend. Don't guess—know your temps!
What's the Best Way to Reheat Leftover Tempura?
Microwaving is a definite no-go unless you enjoy soggy batter. To bring back some of that original crispiness, pop your leftovers in an air fryer or a toaster oven. A few minutes at 375°F (190°C) should do the trick nicely.
And when you're all done frying, don't let cooking oil cleanup ruin the experience. Keep it simple with FryAway.
- Sprinkle and Stir the powder into your hot, used oil.
- Cool Down and watch as it turns into a solid.
- Toss the hardened puck right into your household trash.